
For years I found myself making excuses as to why I wasn't creating the type of images that I so desperately wanted to make. I didn't have the gear, I didn't have a model, I didn't have access to a studio. At the end of the day, it came down to one simple thing, I never tried.
The Back Story
I live in a small town in the North of Ontario, Canada. It is easy to feel isolated up here, especially when it comes to trying to compete in any creative field. Sure the internet has made the world a much smaller place, but there is still this idea that you need to be in Toronto, Montreal, or Vancouver to even have a chance at making a real go at things. This was one of the many lies I would tell myself in order to not have to try and step out of my routine. If I could convince myself the deck was stacked against me, then accepting defeat before I even started was an easier thing to do. My friend Grant McIvor and I would always make big plans, talk big talk, but at the end of the day there was always a reason why we couldn't shoot something. If we had a dollar for every one of our shoot ideas that never happened, we would probably have at least $50. Impressive, I know.
This all changed one weekend due to the combination of opportunity and boredom. Grant's brother Adam wanted to get a nice shot of him and his Royal Enfield motorcycle. Grant suggested we shoot the photo in his grandmother's garage, as it was full of a bunch of old stuff he thought it would add to the feel of the image. I agreed, and the date was set.
The Prep
On the day of the shoot I packed up my entire kit. I had a couple of DSLRs, my recently acquired Fuji X100s, a handful of lenses, stands, flashes, reflectors, a budget smoke machine, and the kitchen sink. When I arrived at the location before noon, Grant was already there cleaning out some of the clutter. Shortly thereafter, Adam showed up with his motorcycle and we were off.
The Setup
We started by first deciding that the bike was going to be a main focus in the image. We placed the bike at an angle in the center of the garage, with the initial plan being to have a light outside the window beaming the motorcycle from behind. We managed to get a couple of test shots with that setup when the rain rolled in. The rain was a blessing in disguise, as it forced us to re-evaluate our situation. It was during this re-evaluation that I decided to put down the DSLR and pick up the Fuji.
Light #1:
The first light we put up was an Alien Bee 800 with beauty dish. It was on a light stand that brought the light up and into the rafters, in front and above the bike.

This was the first test shot with the Fuji X100s.
We liked what it was doing to the bike, but it felt a little flat and there was too much spill happening. Then we tried angling the light so it was shooting almost directly down onto the motorcycle. This gave us nice contrast on the bike but there was still too much spill happening on the ground, and the background was now too dark.

Interior Alien Bee 800 with beauty dish.
We fixed the spill happening on the ground by using a cheap eBay 5-in-1 disk reflector as a flag underneath the beauty dish. After that we still needed to get some light onto the background/model.
Light #2:
The second light came in the form of a Lumopro 160 speed light. I believe it was set to around 1/8 power and zoomed in about half way. The light was naked outside the window (it had stopped raining at this point). At first, I had Grant holding the light as we tried to get it in just the right spot that the edge of the light would hit the background as well as his face. It was at this time that Adam, the model, went to grab an old wooden toolbox from the basement to add to the feel of the shot.

Lumopro LP160 outside the window.

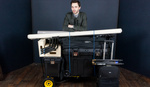
Lighting Diagram

All the lights were set.
When Adam got back with the toolbox, we did a couple of test shots and we knew the lights were where we needed them to be. Everything was a little underexposed, but I wanted to retain the detail in the window and I knew I could bring what I needed back up in Lightroom. We did a few more shots with this setup before making use of the smoke machine.
Smoke:
Coming from filmmaking, I love haze. It can be a bit cliche, but I believe if used correctly it adds something wonderful to an image. Adding smoke to an image is going to do a couple of things. First, it is going to act as a giant diffuser with any light that hits it being spread around the room. Secondly, if there is a hard light being used, it is going to create beams of light coming from the light source. We decided, after a suggestion from the model, to have him smoking a cigar. We figured this would extend the mood of the image, as well as give some explanation for the smokiness of the room.

The final image RAW straight out of camera.
After adding the smoke we knew we had it. We tried a few different poses, with this being the one we settled on.
Tech Specs
Camera: Fuji X100s
Lens: 23mm f/2
Shutter Speed: 1000/s
Aperture: f/4
ISO: 640
Focus: Manual
Lighting:
Alien Bee 800
Paul C Buff White Beauty dish with diffusion
Lumopro LP160
eBay 5-in-1 reflector
Post-Production
Due to my absolute inefficiency in Photoshop and love of cinematography, I always try and get everything in camera. Granted, there is always going to be some tweaking needed in some form or another. For the most part, however, I try my best to not rely on opening Photoshop. In this case, it was just to remove a logo on a battery, with the rest of the editing being done entirely in Lightroom.
In Lightroom, there were the usual contrast/exposure/color adjustments. In addition, I used local exposure, contrast, and clarity adjustments to accentuate certain elements such as the the bike, smoke, and model. I created the illuminated headlight by using the exposure brush and cranking up the exposure, then giving it an orange color cast. I did the same for the flame on the tip of the cigar. The dodge and burn look was created with the brush tool by adjusting the clarity and contrast sliders. To finish, there was slight noise reduction, sharpening, and grain added. In total, I spent under an hour in post. Once it was all said and done, I asked a friend of mine to add Royal Enfield's logo to the image as I figured it would be a great commercial style portfolio image.
Final Image

The final image.
Since creating this image with what is essentially a really great point-and-shoot camera, I have learned to stop worrying about the things that are out of my control and make use of what I have in my control. Sure there will always be better cameras, better lights, better subjects, more time, etc. At the end of the day, you just need to do it. Not every image is going to be a winner, but it might be. When I first posted this image online, I was surprised by the amount of positive responses I received. I was especially surprised when people would say things like, "I one day want to create an image like this." The thing is, I was saying the same thing for years. I was saying the same thing the day of the shoot, and I am saying the same thing now. The one thing that was holding me back is the same thing that is holding most people back, the fear to even try. So turn off the computer and go make some images, you are only a few clicks away from creating your best work yet.


Great story, great shot, great in-depth look at how you got there. Thanks for the good read!
I am going to take issue with you calling the X100S "essentially a really great point-and-shoot" though. By that regard you're basically saying any Leica Rangefinder is essentially a point-and-shoot. Doubt you'd have gotten 1/1000s flash sync on a point-and-shoot, or indeed been able to control any of the manual exposure or white balance.
Hey thanks for reading. I am using point-and-shoot as a means to describe a digital camera with a fixed lens in comparison to a DSLR. I completely agree, that the x100s is far superior in almost every way to almost every point and shoot. That being said, I have in fact shot with various cheap point and shoots that have full control over manual exposure, white balance and have high flash sync due to their complete electronic shutter, but none even come close to the X100s.
Jon took the words out of my mouth!
Great work Adam, thanks for sharing!
Great article and great image! I struggle with ideas. I usually have time and I'm bored like you but I don't have a strong circle of people needing images or having ideas.
Just need to get out there and make it happen. Thanks for the post
I was lucky and would not have been able to make this image without the other 2 people involved. The thing I am trying to get at though, is you never know when these things are going to come together. To quote Wayne Gretzky, "You miss 100% of the shots you don't take". On a more personal level, this one image changed a lot of things for me. I am fairly certain it is the only reason I was hired as a writer for Fstoppers, it ended up on the BBC website which spawned a lot of interest from a variety of people. If you would have asked me 2 months ago if this is where I thought I would be, all because we decided to shoot a friends motorcycle in a crappy garage one Sunday afternoon, I would have had to laugh at the idea. It is closer than you think.
Great read and awesome final image. Thanks for sharing!
Thanks for reading.
another good example that photoshop and over tech stuff doesn't make any sense relatively to desire of creating great shoot. hands down.
I think if you can do it in the camera without breaking the bank or yourself, why not. It just saves time and energy later. The "I'll fix it in post" attitude is nothing but trouble, albeit sometimes a necessary evil.
Interesting article, and inspiring as well. Your sentence " It was during this re-evaluation that I decided to put down the DSLR and pick up the Fuji" leaves me asking, why? Nothing against either alternative; I'd just like more explanation of what you couldn't do with the DSLR that you could with the Fuji.
There were few reasons. The first being I had just got the Fuji and like most people, all I had shot up until then was documentary type stuff. Next was that I was shooting at around 35mm on my 5Dmk2 and Canon 24-105mm. I personally hate the 24-105mm for photography purposes, so knowing the 23mm on the Fuji gives the equivalent of 35mm Full frame, I decided to try it out. The 3rd reason is that the X100 series uses a leaf shutter. This means you can sync the flash up to 1000th of a second wide open at F2 This was going to allow me to control the constantly changing ambient light I was getting through the window. Once I started to see how the colours were coming out on the back of the camera, I knew I had made the right choice.
Very timely. I have recently begun flat out asking friends on social media to volunteer for specific project ideas I have, or even just volunteer to let me shoot them and their own ideas. Whenever i get an interested model we set something up. Currently, I am planning a production that is much larger than I have attempted alone before on a shoot that involves costume designing, make up, and a cast (as opposed to just one model). Doing it all myself will be a challenge, but Im really thinking (and hoping) that it will end up well worth it.
That is the key. Keep me posted on how it turns out.
Great write-up and image. This is the kind of article I'd like to see more of on fstoppers. I would also like to know what made the Fuji a better choice than a DSLR for this shot. Or was it?
I have added a full explanation above. I should mention that I have since made the switch to Fuji and no longer own any Canon gear. I know only shoot on a Fuji X100s and X-T1, but that may be an article for another time.
I forgot to mention in the article, but the lights were both triggered with Paul C Buff Cybersync trigger/receiver combo. http://www.paulcbuff.com/cybersync.php
Great article! Very inspirational too! Thank you for the read.
Thanks a lot. I am really glad people are relating to it.
Absolute knock out image Sir, that's a stunner.
Thank you.
very good!:
Thanks.
Adam thank you so much for this article , sometimes in life we come across something that causes a shift in our thought process , its like a song that you believe was written just for you....your article was that song for me. Well done and thank you.
Hey Wayne,
Thanks for the kind words. I am glad my experience could help you in some way. Keep me posted with your progress.
Adam
great article! love to hear about the process for other photographers. curious if the lights on the motorcycle were 'lit' in post or how you achieved that look!
Thanks for the comment. Ya the headlight was lit in post. I simply took the brush tool in Lightroom, cranked up the exposure slider and added warmth. I did the same thing for the tip of the cigar.
very cool! looks great!!
Gorgeous image, but why ƒ/4.0 @ 1/1000s, ISO 640? DoF minimization doesn't seem like an issue, and image sharpness is likely maximized around ƒ/8.0. You could've shot at ƒ/8.0 @ 1/250s at ISO 640, ISO 160 while retaining your original aperture, or some combination of the above. Is there something I'm missing? I'm very curious to find out. Lovely photo, again.
Hey Aaron. Well I was shooting at 1/1000 to kill the ambient light coming from the door behind the camera as well as the window. The aperture and ISO combination was landed upon by laziness. Nobody wanted to climb into the rafters and change the power on the Alien Bee and I knew I had to be shooting at at least F4. So Iso was essentially flash power.
Lovely image and an interesting write up. The smoky atmosphere and the cigar are a really nice touch giving it that something extra.
If I could, I would add smoke to everything I shoot.
What a beautiful shot....perfect mood, lighting and gesture! Love the processing and great to see how much you can do in Lightroom, thanks so much for sharing the thought process and the smoke just nailed it! Brilliant :-)
Thanks.
Sometimes the easy road is to come up with the excuses as to why we cannot instead of finding the pathway to why we can. If only I was there instead of here. Thanks for showing one can overcome obstacles (your comment a crappy garage) and make something outstanding. Okay, now I have to get my butt out there and do it.
I know what you mean. Sometimes I don't mind having the crappiest environment or background to work with because it derails my "perfect scenario" fore-thought into overcoming an immediate challenge technically and/or aesthetically, and I think that's what separates pros from the give-up'ers.
I gotta say though, my little 3 year-old is much more of a bad-a$$ :-)
http://www.materialized.com/temp/harley_mark.jpg
I knew I recognized the photo, I remember seeing this guy on Reddit.
That is interesting, I myself am not a redditer. Do you happen to have a link?
Adam,
It's a great image, well executed and creative. I also strongly agree with the push to shoot with what you have and not let a lack of the latest and greatest get in the way. That being said I have a question regarding your final image and I'm mostly interested in peoples opinions of this because it's an issue I've gone both ways on with creative tests. In the final image you applied the Royal Enfield badge, indicating to perspective clients or peers that this is a commercial image and not a creative one. While the quality and creativity of it are on par, I'd be interested in how people feel about this practice. If you sold this to them after the fact than I repeal the questions.
On my website and in various other portfolios, the image exists without the badge. It was really a test to see if I could get away with it and have people think it was legitimate. I then tried to get in touch with Royal Enfield, but all I got was a retweet.
Thanks for sharing the story! You used a flag for the first light to kill light spil. (Very good tip!!!) What about the second light coming from window?? How did you manage to kill the light spill on background? The light on background looks so soft and smooth...
The light out the window was essentially pointed directly at the wall to the right of the camera, all that was lighting the subject and the wall was the spill. I believe it may have been edged naturally by the window frame as well.
Thanks!
Awesome post and seriously, what an image, great job! I find myself in this situation, I always find my self an excuse to don't do a photo, cause I don't have something, or I didn't find the right location... This post was important to show me that, I need to get up and shoot!
Thanks, looks great!
one of the best articles I've read on here to date.
Glad you liked it.
Great editing!
thank you for the very honest and detailed article, surely this must be an inspiration for many artists !
Now this is an article. And a photo. And a behind the scenes. Nice!