
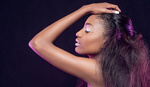
I will soon be releasing a start-to-finish retouching tutorial video here at Fstoppers on my most recent fashion editorial photoshoot. But before I do, I wanted to start warming our readers up with a complete gear list. In this article, I share with you everything I used on my shoot, the breakdown of costs, and where to find all the gear and extras: from the Profoto Strobe all the way down to the gaffer tape.
There are so many elements that go into a photoshoot, whether it's shooting on-location or in-studio, every detail must be paid attention to. Hopefully this list is helpful and shares some insight to the planning of your next editorial fashion shoot.
Let's take a look!
Lighting Gear
Strobes - 2 x Profoto D1 Monolights - $1,616 each = $3,232
Main Light Modifier - Photek Softlighter 60" - $114.95
Fill Light - Westcott Apollo Mega Softbox - $169.90
Fill Cards - $160 aprox
The Profoto strobes are the most expensive item here, by a mile. I used the 1000 w/s heads. Other similar strobes like the Elinchrom Pro HD 1000 are great as well, that particular model is approximately $400 less than the Profoto. Both the Photek and Apollo softboxes are indirect lighting sources, meaning the light bounces into the back of the box and back out the front for an even light source. The fill cards are very simple items. I used 4' by 8' foam core boards. I tape two together to create a V-Flat that can stand on its own.
Lighting Support
Lighting Stands - 2 x Impact Turtle C-Stand - $144.95 each = $289.90
Boom Arm - Avenger D600 Mini Boom - $121
I highly recommend spending the extra $100 per strobe and investing in c-stands over regular light stands. When you are spending $1,000 plus on each strobe I just think that the extra $100 to ensure your light doesn't take a tumble. The Mini boom is used on the main light to help angle and position it with more control.

Backdrop Gear
Backdrop Stand - Backdrop Alley Studio Kit - $158.53
Background Paper - Savage Super White - $189.95
Gaffer Tape - Rosco Gaffer Tape White - $18.95
There are a number of different ways to hang a backdrop, but the Backdrop Alley studio kit is a great mobile option. For the backdrop seamless paper, we went with a wider role, since we are shooting full length and movement for the editorial the wider 9 foot role was the way to go. You also have to remember to pack all the little things like gaffer tape. No tape, no shoot... or at least you will have to get very creative.
Camera Gear
Camera Body - Nikon D800 - $2,996.95
Camera Lens - Nikon 24-70 - $1,886.95
The D800 is my current camera of choice. The link here is actually to the newer D810 from Nikon. They are both amazing cameras, boasting a more than 36 megapixel sensor and a very impressive dynamic range. I usually try to shoot with longer focal lengths. The studio we shot in made it a little bit of a challenge. Shooting full length and capturing jumping and hair flipping meant needing to shoot a little bit wider. I was also very mindful of how wide I was shooting, staying between 50 and 70mm. But the 24-70mm and the 70-200mm lenses from Nikon are great. In studio they allow to shoot at a smaller Aperture, like f/11 or f/16 and still get great results.

Tethering Gear
Computer - Mac Book Pro 15" - $1,799
Adobe Lightroom - $20 per month
In Camera Storage - 32 GB SanDisk SD Card
Tethering is not a necessary thing, but I'm a big proponent of it, whenever it is possible. Being able to have a large screen that everyone can see (model, MUA, editor, etc) is a huge advantage. Being able to create presets for your images is also an added bonus. Also, the security of knowing your files are already on your computer's hard drive is pretty nice. I still recommend having a SD or CF card in your camera while tethering. The cord can easily come out or Lightroom can crash; having the card in the camera means you have a backup source for your files to go to. I have had the personal experience of taking an amazing run of shots from a model, only to turn back to my computer and see I didn't get any of them. The SD card can save you that headache.
Misc
2 Radio Triggers - Pocket Wizard Plus III - $149 each = $298
or Profoto Air Sync Trigger - $230
I am very confident that there are small odds and ends that I am leaving off of here. With so many little and necessary items to have on set, it's inevitable that I'll leave something off. Part of this shoot was having movement throughout, so having a fan that can create movement in the hair was a must. The Blow-It fan is a great option that won't kill your wallet. Also being able to fire your strobes remotely is an absolute requisite here. I like the Pocket Wizard Plus IIIs but I also really like the Phottix Stratos triggers. This shoot in particular I used the Profoto Airy Sync, it allows you to change your power output on each strobe, which is a huge plus.
In Conclusion
If you wanted more control over your background, you could easily add 4 more lights, 2 on either side to evenly light the background. I would recommend reading my how to easily light a white backdrop post. In that post I light the backdrop in a similar fashion, but also write on how you can use two lights on either side to create a nice evenly lit backdrop. I also would recommend making two additional v-flats - each one going around your backdrop lights so you don't get uncontrolled spill from those lights onto your model. When using lights to light-up your background, it is easy to wind up with the "glowing halo "look on your subject. All of the extra light is bouncing off of your background and onto your subject and it doesn't look good. You can stop this by getting the proper exposure and amount of light on your background but also by placing V-Flats around your background lights to block that light from bouncing back.
I want to finish up by saying that this is my list of gear that I used on this one shoot. Its not the "end all, be all," or the list of gear that you need to shoot an editorial. There is quite possibly an infinite number of ways to shoot an editorial. I hope you guys found this list helpful and insightful. My culling and editing video will be out next week, so be on the look out for that!
All feedback, questions, suggestions, etc. are always welcome below in the comments!


Great list, Lance! Thanks for sharing your insight!
Thanks Aaron!
Great list! Though I would probably switch out Lightroom for CaptureOne when it comes down to tethering. I find CaptureOne being more reliable and offering more options (live view, remote viewing on iPad/iPhone for clients, overlay, etc.). If you haven't, you should definitely give it a try, it's well worth it!
Hey Quentin, yes definitely. I use both! love them both. Usually when I am teaching or have students involved with shoots I use Lightroom. But for other projects I use Capture One. This shoot was actually a unique situation where I turned down getting $ in order to have the shoot at my colleges studio allowing students to be very involved to get that experience. It was really cool, so I used Lightroom because they are more familiar.
Thank you for this article, I am definitely looking forward to your video! I always enjoy when professionals showcase the details of their work!
One thing you mentioned that I'm a huge fan of, is tethering so the team can see. Whenever I shoot in-studio, I have my Mac Airplay the images to my Apple TV (now only $69!), which I have hooked up to a 55" television. It works flawlessly over Wi-Fi, so I highly recommend taking it for a spin!
Hey Kendra, thats a pretty neat idea. not bad!
Thanks! It's been very useful for me, particularly when there's a lot of people on the crew / creative team. It's nice to be able to designate an area for them to review the images without interfering with the set.
C-stands aren't for mounting lights. There are certainly more sturdy options out their for your $2,000 strobes, which are completely unnecessary for an aspiring fashion photographer.
C-Stands without sandbags are a bad idea but add enough sandbags and they will be sturdier than any lightstand i would think.
They'll work, but something like this has a larger footprint, a rocky mountain leg, and is built just as heavy as a C-stand: http://www.bhphotovideo.com/c/product/139497-REG/Matthews_387031_Hollywo...
For a big softbox a combo stand or a junior stand with an adapter is far sturdier than a C-stand:
http://www.bhphotovideo.com/c/product/600648-REG/Avenger_A1035CS_A1035CS...
Little known info; I've been doing it wrong all of these years WRT C-stands. The Avenger stands referenced are certainly nice, but your conclusions are head scratchers to say the least. And wrong. Avenger C-stands are no less sturdy, offer turtle style legs which are much easier to sandbag and much less likely to trip over than the tripod style legs of the stands mentioned. Plus, you can actually get 2 or ore in close proximity, which is what they were designed for.
You can obviously put a small light on a C-stand but that's not what they were designed for, and I took issue with the author's allusion that the only options are a C-stand or a flimsy aluminum light stand. I thought the whole article was a bit arrogant, and poor advice for a new photographer who could certainly set up their kit for a lot less money.
You walk into any high end fashion or commercial studio and 80% of your lights are going to be on C stands. Especially on product shoots. C stands were made to be solid sandbagged stands that can put your light in any position low/high or boomed into a set, while being next to 5 other C stands with lights and modifiers. When you need an extra large octo box or a light super high up then your get your combo stand out. Aluminum light stands are a compromise you make when you need to travel light or you use them to hold your seemless
Hey guys, I too have that boom arm but I never quite figured out how much weight was appropriate to put at the back? Same weight as the strobe with modifier? More? If anyone knows it would be super! :)
Use enough weight to balance the boom at the fulcrum.
Fulcrum?
http://en.wikipedia.org/wiki/Fulcrum
one thing missing is a Matthews single scrim flag to hold the white edge on the clothing. Personally I think that the listed equipment could have been used better the resulting photos seem very flat almost dirty. I think that black foamcore would have been much better for holding an edge on the model, its not glowy light or high contrast white background its just lost in the middle
Hey TD, great comment! So we gave that a crack too. The difference is with the black fill card camera right, we hold the edge like you are saying on the models left shoulder/side, but with the white fill we were getting a smoother backdrop. In a perfect situation, the model would be much further from the background allowing for the model and backdrop to be lit independently. Since this was shot at my college's studio (where I teach) so that the students could assist and participate in the shoot we were limited by the smaller size of the room.
But yes, great feedback!
Assuming you chose the Pocket Wizards over a Profoto Air Sync because the D1s are not Air models?
Matt, great catch. I most definitely did use the Air Sync, making that amendment now. Thanks!!
If you're going to make the Profoto D1 strobes your main light setup, cough up the extra $$ for the D1 Air kit. The Air has saved me so much time and effort by allowing me to control the light remotely. I use an overhead strobe a lot and not having to raise/lower it repeatedly to adjust (or climb up/down a ladder) makes it worth the money. If you're going to be using other brands or some combination of strobes and speedlights, then the Pocket Wizard is the way to go since it's universal.
Oh... and I think the 1000w/s kit is probably overkill here. I have the 500w/s version and can light a background area this size no problem. Not a criticism against the author/photographer... just another way to save some money if you're on a budget.
Or... you could take a Rebel and a 50mm lens into the street and shoot it for free ;) It's not about the equipment.
Hi Stefano, I don't disagree with you. Yes you can create amazing profession images with just a camera and a lens. I might personally go with my D800 and Nikon 85 1.4 but I get your point. The counter argument though, is if a client asks for a studio shoot with a white/grey/black backdrop, then you're going to need the equipment to pull it off. I agree that the power or strength of an image has much more to do with what you are shooting then the gear. But in certain situations you do need the proper gear.
If you are repeating a prior set-up or need to repeat the current set-up you might want a light meter on set. But if the shoot is just a test or not for a serious client, I could see why you wouldn't use a light meter--especially after burning through $4K in lights and modifiers.
Hey Tim. I know for some reason that light meters can be a highly debated topic. Sort of an old school / new school thing. I keep my light meter with my at all of my shoots. I shoot in this studio so often that I kind of have a feel for it and probably am 50/50 to take out the meter while testing light or not.
Anyone had experience using Pro8 vs D1? How does the D1 perform consistency and reliability wise? I have 2 B1s but will be adding 2 or more heads in near future. D1 are certainly much cheaper.
I think the D1's are amazing in color and output consistency
Why is everything photography related priced like surgical equipment..
great stuff!
Lance, great article and beautiful photography. I know this post is from years ago, but I have a question: Where did you get your v-flats for $160??? Thanks!! Tommy