
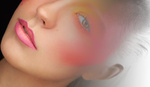
Dodging and burning for cleaning skin is very common amongst high-end retouchers and for a reason: when mastered, it gives you natural, yet almost perfect results. The downside of the technique is that it can eat up a lot of time. When I say a lot of time, I mean up to a couple of hours for a single image, depending on the problems that need corrections. While spending this much time on big projects or perhaps on personal projects is conceivable, for someone that shoots portraits every day and has to retouch quickly, this is simply not viable. A couple of tricks exist to help you go faster, while retaining a high quality and natural-looking image. I have listed four of them here with the hope that they will save you as much time as they do for me.
The Healing Brush Tool Should Be Your Best Friend
The healing brush tool, just like the clone stamp tool, seems to scare some people. They often think that by using it, they will ruin their images. This is true if you do not set it up according to the zone you want to correct. However, when you start understanding how it works, then you will see how much potential it has and most importantly, how much time it can save you!
Because the tool tries to blend in the zone you want to duplicate, it will not only copy the texture, but also try to even out the tones. With that in mind and by using the healing brush tool carefully, you can correct most texture problems and you can even out the tones of some areas.
I use the healing brush to correct texture problems as much as I possibly can. This is what I do first when starting work on a file. I try to keep my brush size as close to the size of the area I want to correct as possible. Working with a big brush size is generally what tends to give a mushy texture or plastic look to the skin.
If your model has perfect skin and your makeup artist did a fantastic job, the healing brush tool can even be enough. Dodging and burning might not be useful. The power of the healing brush tool is that Photoshop does almost all the work for you! I tend to compare the healing brush tool to correctors and concealers in makeup; they should do the heavy work and the rest should only be "details".
Let the Inverted High Pass Do the Work
I already know that some people are going to get mad at me for even daring to write "inverted high pass" in a retouching article. While this technique is not the best in the world, it can help diminish the time spent dodging and burning an image. It will help you even out the tones without losing too much texture. The problem with IHP is that it takes a little bit of practice to understand what Gaussian blur radius should be used to get the desired result.
Once you get the hang of it and start setting it up correctly, the IHP technique will save you a lot of time for quick (not high end!) retouching. You can even do a couple passes of IHP for one single image and use it more locally to keep as much texture and detail as possible. Conny Wallström did an excellent job at explaining how to use different instances of IHP in one image in a video. It is worth checking out:
https://www.youtube.com/watch?v=KRG_AuT9veo
Visual Help Layers for Near Perfect Results
If you watched the above video and read some of my previous articles, you already know about visual help layers. There are three you can use while dodging and burning to make your work easier.
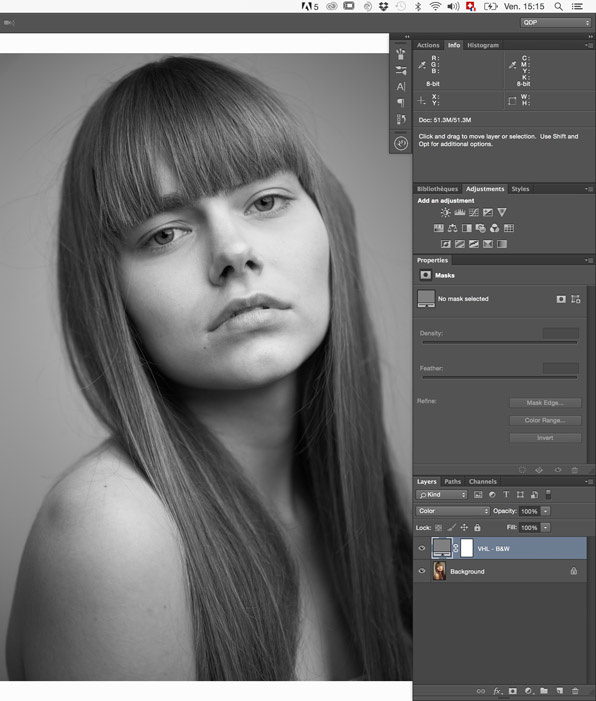
The most common visual helper is the black and white conversion layer. I am not going to go in depth about it because Julia already did an excellent job of explaining why you should use it when dodging and burning. A quick technique to remove colors from your image and keep the luminosity values correct is to create a solid color adjustment layer filled with mid gray (HSB: 0/0/50 or Hex: #808080) and then change its blending mode to "color." It will neutralize the colors of the image, but not alter the luminosity of the picture like most black and white conversions do.
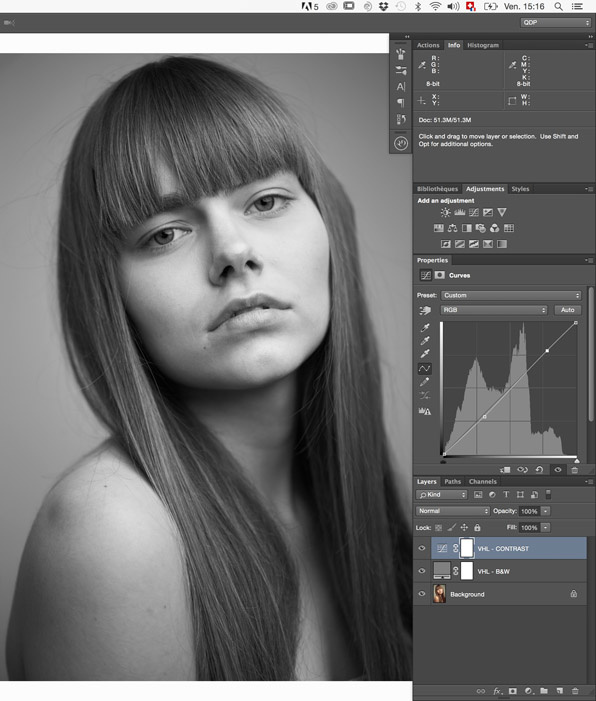
Turning your image into a neutral black and white version is great. However, sometimes it lacks contrast and it can be difficult to see what needs correction and what does not. To make it easier, add some very light contrast. The best and easiest way to do so is to create a new curve adjustment layer with an "s" curve. Make the "s" subtle though. By giving your image too much contrast, you might run the risk of overdoing or underdoing your dodging and burning.

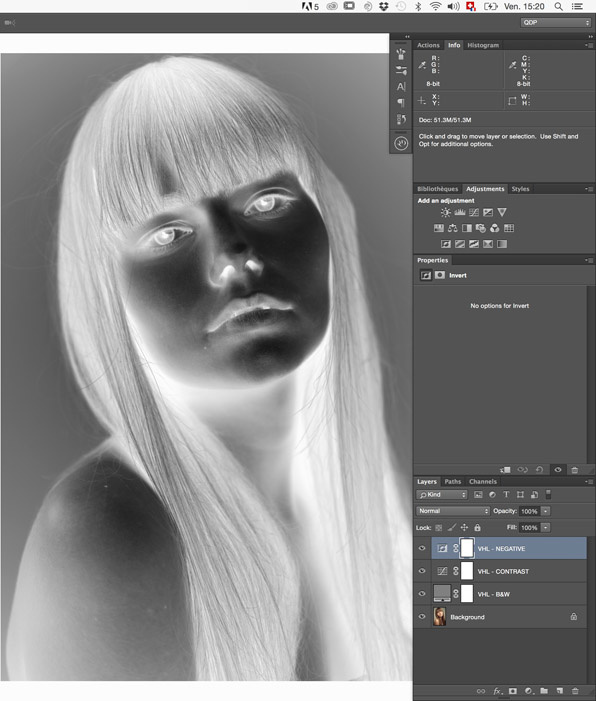
Last, but not least, a negative view of your image might also help you. I am not talking about negative criticism here, but "negative" just like in the old film days. I went in-depth on this precise topic in a previous article you can read here. To keep it short and sweet, negative will "refresh" what your eyes see and your brain analyzes. Some people tend to correct the highlights more than the shadows; by creating a negative, you will get a more even result. To create it, simply create a new invert adjustment layer.

Go Faster than Your Mouse
One thing that bothers me when dodging and burning is going back and forth to my layers panel to switch between the dodge and the burn layer. However, there is a way to avoid that useless time spent moving our mouse or pen from left to right constantly. It is called "shortcuts" and Photoshop has already one set up for us to change layers!
You can change layers by simply pressing alt + [ (previous/below layer) or alt + ] (next/above layer). Note that this shortcut only works with active layers. Another note, as I am sure some of our international readers will try this out: this shortcut varies depending on the language of your Photoshop version. For example, the French version of Photoshop has these shortcuts: alt + : and alt + !.
Shortcuts are a powerful tool to help you go faster in your workflow. You can actually customize them in the menu: Edit > Keyboard Shortcuts or Cmd/Ctrl + Alt + Shift + k. For example, if, like me, you use a lot of curves for your retouching, you could set a shortcut to create a new curve adjustment layer. You could even add shortcuts to your custom actions so that they are even more useful and fast.
With these four tricks, you should be able to speed up your dodging and burning quite a bit. If you want more tips like this to make your retouching even faster, browse through my previously written articles, such as how to optimize your workspace or a couple of tricks to make your overall retouching workflow quicker. Retouching can be awesome and a lifesaver from time to time. However, you should keep in mind that all the time spent in front of your computer is time you do not make money taking on another project… unless you offer retouching services, but this is another story! So, always make sure to retouch what is needed and not lose time working with high-end techniques for something that is probably not worth it and might not even need such precise and refined work.


You can also improve contrast by creating a black and white adjustment layer and tweaking the various colour sliders. It's often easier to visualise
I created an account just to say thank you for this article. Not so much the Dodge and burn stuff because it doesn't apply to 90% of my photography but for the one line in here that will change my life forever. Edit > Keyboard Shortcuts or Cmd/Ctrl + Alt + Shift + k. I have watched and read many photoshop tutorials and this is the first time anyone has mentioned this. Thank you!!!!!
Not every head shot has to be a publishable beauty shot. Often times quick fixes are needed to meet client demand or on site conditions. Inverted high pass is a long time go to method for quick and clean softening on the fly.