Matt Kloskowski from onOne has released another great Lightroom tip video that can help with recovering shadows from your images. In some situations, you might need to recover more out of the shadows than you originally intended when taking the photo. Basically, by reverting the Lightroom Process Version to 2010 or earlier you can tap into some recovery options that could make all the difference to your image.
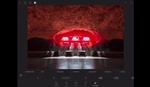
Before Lightroom 4, there was a "Fill Light" slider that allowed us to tap into parts of the image otherwise gone underexposed. By simply going into Settings > Process > 2010, you can revert to these earlier Lightroom platforms. Sure, you could just ramp up the exposure, but then you'll also blow out the highlights along with it. In this example photo, I shot it at 2 seconds f/5.6 ISO100, but I'd like to see what was in the photo without losing the highlights in the sky. Though I prefer the silhouetted version of this image better, I'd like to pull out the shadows to see what is there. This simple video teaches us how we can access otherwise underexposed and lost areas while still keeping your highlights just where you want them. Here is a quick photo rundown for you:


Be careful though, you cannot revert back to the contemporary Lightroom platform within the photo once you switch, so it can get to be kind of a pain. Additionally, older platforms have a slightly different color profile, so once you revert you might need to re-tweak your image a bit. Kloskowski suggests creating a new preset that allows you to see the shadow relief before you go switching the platform around between photos. It must be said that pulling out shadows from an image that is so far gone is going to cause a fair amount of noise, however in the most desperate scenarios this trick can help recover what might otherwise land in the trash can.
I once heard that photo editing should be used more like an emery board than a chainsaw. Keeping this great advice in mind, I wouldn't recommend making practice of relying on your editing software to save images. Having said that, sometimes you might need the save. Enjoy this great Lightroom tip that you may not have known about.
[via onOne]


I still prefer the 2010 over 2012 camera calibration solely on fill light and continue to use it still to this day for practically every one of my photos. Personally to me I like bringing up the slider a little bit to give my blacks a bit more detail which helps me when I grade my pictures.
Great video though! Never thought of using it to recover that much shadows
Got to be honest, missing Matt over on Kelby.
I've pulled a lot away from this fella over the last 4 or 5 years