
Jake Hicks is a U.K.-based photographer who adds dramatic color to his portraits. He was kind enough to share a few tricks he uses to achieve his signature technique. It doesn’t matter if you are using studio lights or speed lights, this is a simple recipe you can use to color and bounce light and create different effects in your work.
A great little cost effective way of adding a bit of variety to your shots is to add some color. I’m sure we’ve all seen the lovely 80s neon-looking hard light gels floating about the Internet, but for those that want a more subtle color tone why not try softening the gel light.
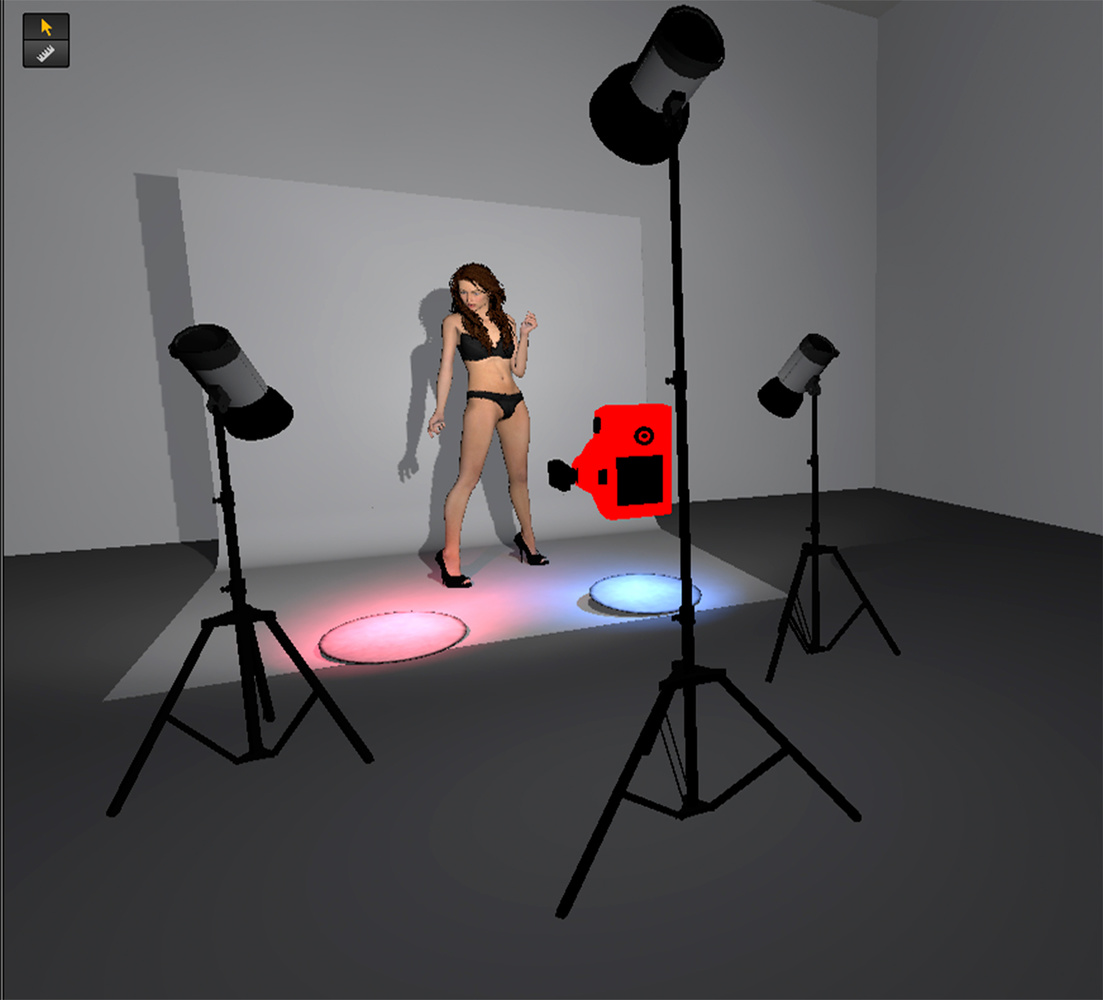
As we know, the smaller the light source, the harder the light source, so if we enlarge it we will also soften it. All this technique requires is for you to angle your hard gel light at the floor in front of or to the side of your model, taking care not to get any spill onto the model directly. With some careful placement you can now bounce your colored light off a reflector placed on the floor. The gelled light is now effectively being scattered and softened giving it the impression of being a far larger light as it falls onto your model.
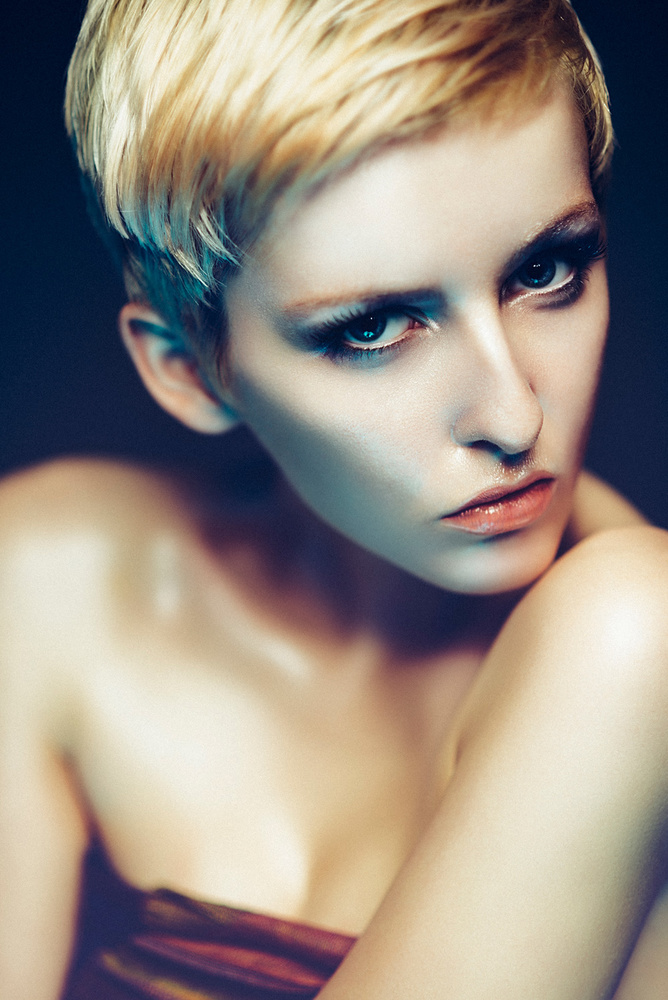
As you can see here the soft blue color falls softly and evenly across the models shadowed areas lifting the image and giving a lot more interest without looking like an 80s top music video.
This gel light is effectively your fill light so take great care not to overpower your key light above. The hardness of your gel fill light can also be affected by whether you use a silver or white reflector to bounce the light.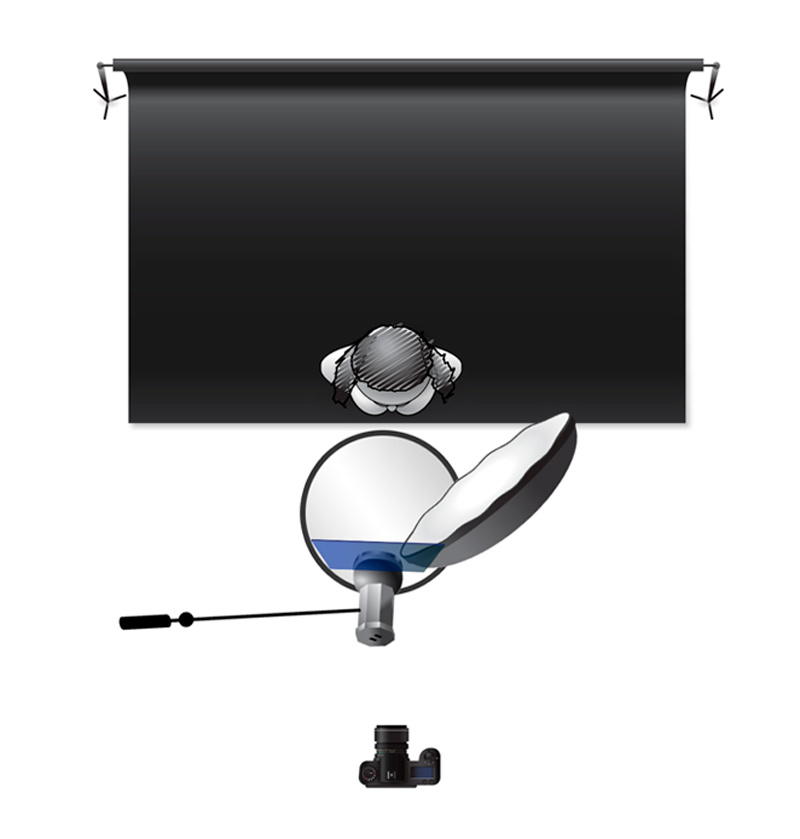
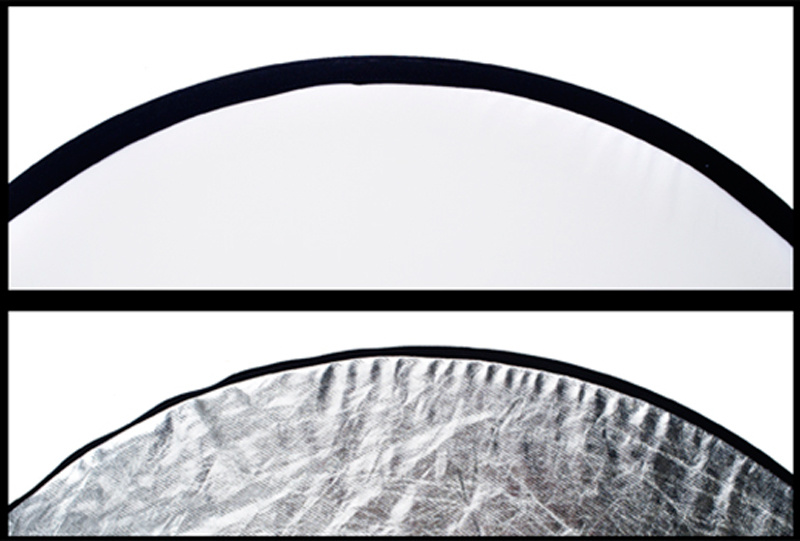
The Reflector Choice
The type of reflector you use to bounce the light will effect the type of light reaching the model. Using a white reflector will result in a more subtle effect where as the silver reflector will have more contrast.
Coloring the Shadows
You can increase the complexity of bouncing gels a little by introducing additional colors into the shadows on the model as well as the background.
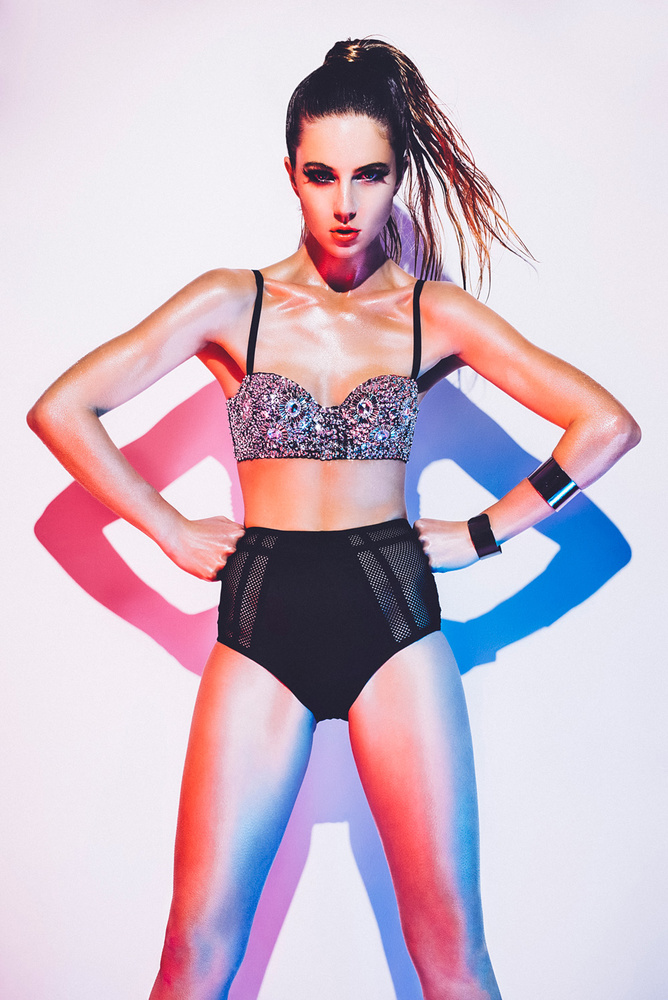
The secret to this technique is to have as hard a key light as possible.
This particular shot was achieved with the Bowens Universal Spot, and creates razor sharp shadows that are easily filled with color. The two colors come from two gels bounced off reflectors in front of the model and they in turn fill the shadows without coloring the body.
This can only happen with such a hard key-light; using a softbox or other soft light would wrap and spill light, heavily reducing the color effect.
Another thing to bear in mind is model placement. Her shadow is now a key feature of the shot so bear that in mind whilst composing your shot too.
If you want to see more incredible portrait work from Jake Hicks, check out his website. He also offers a series of courses through Amersham Studios in the U.K.


Wonder how different this looks compared to what it would look like with color grading (the close up head shot, not the half body photo).
BTW, love this technique, and will be trying it out soon.
great! Will try it
Lovely technique for a more subtle look!
For a more "in your face" approach to gels looks up Julia McKim's work. She did a fascinating bit in her workshop around gels and how to get the results you want.
I'm familiar with this guys work. I think you'll find it is Jake hicks rather than Jack :-)