
Have you ever looked at a picture of a dish and been embarrassed? It could be that a sliver of drool escapes from your salivating mouth. Or you could be a crowded place and looking at a food shot causes an embarrassingly loud rumble from your stomach. Looking around and pretending that it wasn't you won't save you. The food photographer and stylist have done their jobs. They have made you hungry. So how did that do it? Every dish will have a slightly different approach, but behind every plate presentation, is that goal of making you embarrassingly hungry. The approach isn't difficult, it only requires planning, patience, and looking at your food as the camera would see it. Let me show you what I mean.
Before you begin shooting a dish, think about what the elements of the dish are and how they physically interact with each other. There are layers to a food dish that will build upon each other. In order to see all the layers, you will need to strategically place each layer on top of one another. The strategy behind layering and placement is to show all of the elements of the dish that you want to appear in the frame. The only way to know if you are doing this correctly is to style your food at the same angle you are shooting from. This may mean standing in awkward positions, but the results will be worth it. Here are a few examples. The foods and approaches will be slightly different, but notice how they are all styled from the camera's shooting angle.
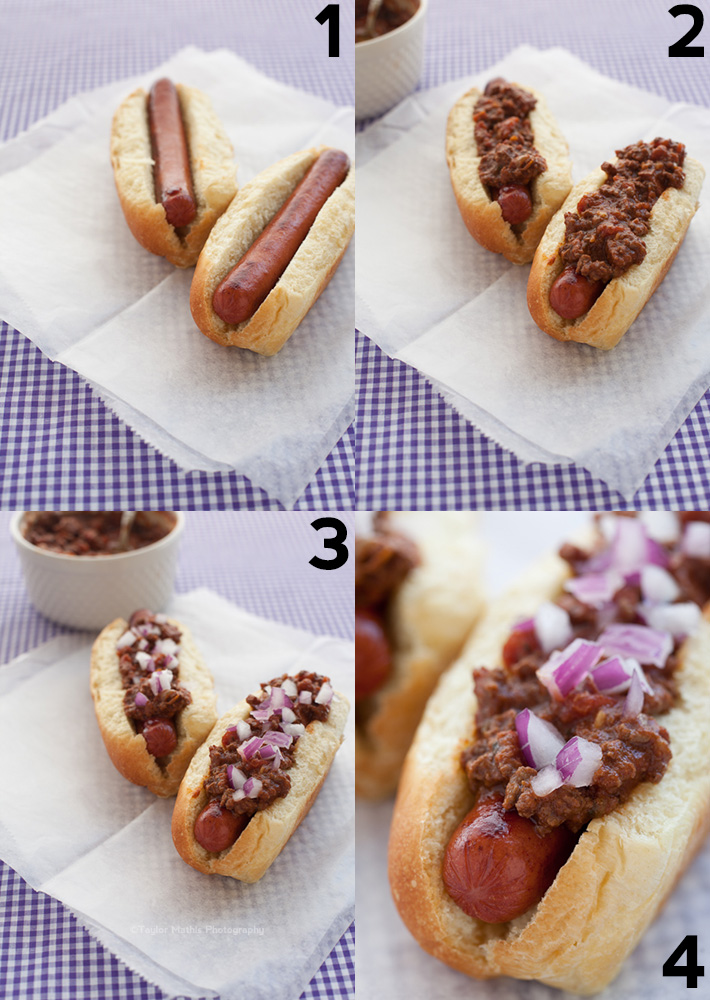
Let's look at an example involving a chili dog. The bean-less meaty chili that commonly sits on top of a hot dog falls into the category of delicious but ugly food. In order to add some color and liven up the chili, condiments will be strategically placed on top. In this example, I am using diced red onion. Look at the progression of the layers. I begin with a bun and to that add the hot dog. I position the hot dog so that the dog is right up to the edge of the bun. The chili is then spooned on in a way that will leave some of the hot dog below showing. On top of that, the red onion garnish is added. The onions are positioned into the gaps of the larger pieces of meat and tilted so that they are showing their distinctive red/purple red color towards the camera.
Here is another example involving pancakes. With a pancake stack, you want to see each layer building the stack. This will require positioning each pancake so it has its best and ideal edges looking towards the camera. On top, make sure you select the pancake with the prettiest top. For a uniform stack, you may have to cook the pancakes one at a time using a precisely measured amount of batter each time. This will help make them all the same size. When adding a topping, like nuts, carefully place the nuts using a spoon or tweezer tongs. If you are shooting a closer up macro shot that will cut off part of the pancakes, look through your camera as you are adding nuts. This will ensure that the nuts you are placing will be in the frame. Before adding the syrup, set your focus and how shallow you want your depth of field to be. Have an idea of what portions of the image will be in focus. knowing this will allow you to pour the syrup without your auto-focus causing a delay and your missing the shot of it cascading over the sides.

Sometimes, you will need to separate a topping out into two components. In the case of this berry topped cheesecake, the blueberries were separated from their syrup. If the berries and syrup were placed on the cheesecake together, you wouldn't have any control over how and where the syrup flowed over the edge of the cheesecake.
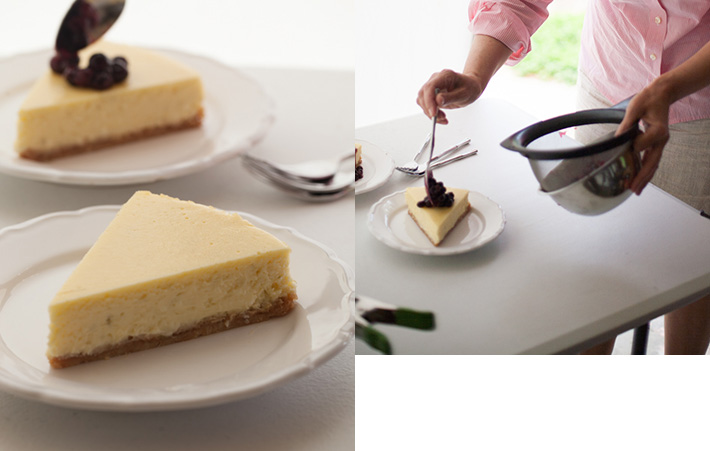
Separating the berries from the syrup allows for precise placement on the cheesecake without having the syrup run all over the cheesecake.

Once the berries are exactly where you want them, the syrup is then spooned over them. With a spoon, you can precisely place the syrup so that it will fall in the frame where the camera will be able to capture it.
In these three examples, there are little tricks that emphasize different aspects of the dish. The common factor in all of these shots and for all food styling is to style from the same angle that you are shooting from. This may sound basic, but if you are in a hurry on set or working with a stylist, it may be easy to forget. Styling from the same angle that you are shooting will ensure that your styling efforts will show up in the final image.
For more food photography tips and tutorials check out issues 1-8 of photographing FOOD.


Great tips! Makes me hungry :)
Very helpful tips!