
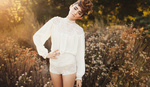
Finding the right light for your images can be a daunting task, especially when shooting outdoors and with unpredictable lighting conditions. Professional fashion and portrait photographer Lindsay Adler, is here to give you her list of the worst lighting conditions outdoors, and how to correct them in camera, to give you the best possible photos.
Sometimes the best locations have the worst lighting, or we simply have no choice on our location. The light may be terrible, but we photographers are problem solvers! We have to make the best out of any situation-- that's our job!
For this reason we must work to be prepared for the best and worst of situations. Practice and preparation make perfect! I’d like to share 3 of the most terrible lighting scenarios and we can shoot our way out of them!
DIRECT SUNLIGHT
Every photographer hopes for blue skies on the day of an outdoor shoot, but bright sun, especially at high-noon, doesn't always translate to the ideal lighting environment. Direct sunlight can be brutal and harsh. Here’s how to regain control of your light on bright sunny days:
The DIY Fix:
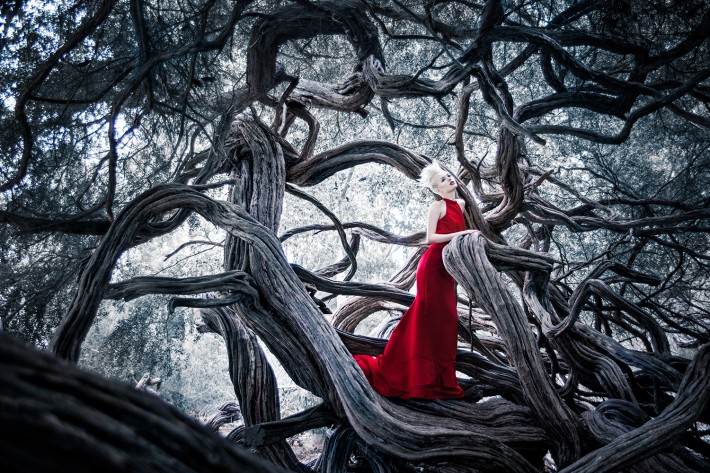
Find shade! If you have no reflectors, no diffuser, and no flash, just moving your subjects out of the direct sunlight is going to make a huge difference. Look for large trees or building overhangs to shade your subject and eliminate squinting and too-bright highlights. However, it’s important to remember that not all shades are created equal. Watch out for overhead light, which will illuminate your subject’s face in unflattering ways. Opt for covered shade (under a tree or structure like a porch) instead of open shade whenever possible, because covered shade provides more frontal and even light.
The Gear Fix:
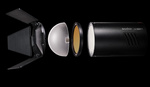
Create your own shade by holding a piece of white foam core over your subject’s head. Once you've found some shade, using a reflector will help you direct light onto your subject. Opt for a round reflector to create catchlights in your subject’s eyes. Use a larger rectangular reflector if you’re looking for more even light over a greater surface area.

CLOUDY SKIES
The most important thing to remember when shooting outdoors and under overcast skies is to watch your angles. Cloud cover doesn't mean you're working with static light; in fact, you're working with a number of different lighting environments under the same sky.
The DIY Fix:
Examine the light on your subject’s face, and slowly rotate his or her face and body, trying different angles and poses to capture the ideal highlights. Even a slight change in position can drastically change the light available to you.
The Gear Fix:
If you can't pinpoint the right highlights, or you simply want more light to work with, use a 5-in-1 reflector. This piece of equipment multiplies the light available to you. Consider blocking off the overhead light with a piece of foam core or black side of a reflector if your fill won’t overpower shadows in the eyes.

SHOOTING AT NIGHT
Some of the most compelling shots can be taken as darkness falls — whether it’s a candid celebratory wedding shot or a nighttime shoot on a city street. The hardest part about shooting at night is finding the right focus and exposure. Luckily, there are a few and tools built into your camera already:
The Focus Fix:
Both your Auto-Focus (AF) Assist Illuminator and Wide-Area AF-Assist Illuminator will help you grab focus in dark lighting environments. The AF-Assist Illuminator is a small light at the front of your camera and is activated by pressing a button on your camera’s menu (check your manual for exactly where). Some cameras may prompt you to manually select the area of focus before activating the AF-Assist Illuminator. Unlike the AF-Assist Illuminator, the Wide-Angle AF-Assist Illuminator is built into the flash itself. The Wide-Area illuminator helps your camera find focus by beaming a patterned light onto your subject. By hitting your “Depth of Field Preview Button” on your camera, you can make your flash kick out light to focus by.
The DIY Fix:
Use a flashlight. There are two major benefits of using a flashlight instead of using your camera’s built-in illuminator:
1) The flashlight won’t drain your camera battery.
2) Not only does the light from the flashlight help your camera find focus, but it also helps counteract pupil dilation, drawing out your subject’s natural eye color.
The Gear Fix:
After you find the right focus light for your shot, the next step is to find the right exposure. Finding the right light balance for both your subject and your background is a delicate balance. This sweet spot is best found by using the Manual (M) mode setting. The most efficient way to gather ambient light is to turn up your ISO setting, which also allows you to use a faster shutter speed and reduces blurriness. It’s up to you to pinpoint which ISO setting gathers the right light for your shot. Use a lower ISO if you want to focus the light purely on your subject and a high ISO if you want to blend the subject into the background. Your shutter speed also controls the amount of ambient light in the scene. The longer the shutter speed, the more ambient light is visible. Just be sure your exposure isn't so long that you get camera shake!

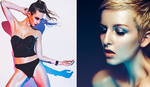
Some of Lindsay Adler's Work -


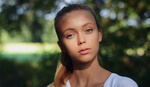
Some of Erik Valind's work -


If you want to learn more about my lighting hacks and lighting techniques in general, check out Lindsay and Erik Valind’s creativeLIVE workshop August 12-14.
Lindsay Adler is a professional portrait and fashion photographer based in New York. Her editorials have appeared in dozens of publications internationally including Bullett Magazine, Zink Magazine, Fault and more. She regularly contributes to a variety of major photo publications including Professional Photographer, Rangefinder Magazine, and Popular Photography.


Did anyone proof this before they published it?
My thoughts exactly!
how is a cloudy sky a "nightmare environment?" lol That's my favorite time to shoot!! You can literally do anything you want, and shoot wherever....
thought the same thing...
I have experiennced that shooting in cloudy weather can be tricky because the clouds are moving - getting thicker and thinner all the time and you need to adjust light like.. ALL THE TIME. But clouds - and shading highlights Works :)
What would your DIY fix be for noonday sunlight when it's straight overhead and you couldn't get the umbrella out of the shot?
find some shade or photoshop out the umbrella. those are really your only options.
I would shoot wide, with an off camera flash to overpower the sun...make a nice, dramatic, contrasty type photo that pops....if it's a couple, direct them where their eyes can be closed (hugging, laughing or kissing, etc)...where you cant see how bad they're squinting....or just dont shoot at high noon :-)
I say just (don't) do it! Was a nice picture ever made of a person other than Gary Cooper at High Noon? Go eat lunch. Shoot later.
Start using a tripod to keep shots in register. Your first shot should be of the background without the model. Then keeping the camera in a fixed/tripod/in register position, go ahead and shoot the model. THEN you can put umbrellas, light stands, assistants, whatever you want right up to the model, as long as you do not cross in front of the model. When you get back to do POST, just place the BACKGROUND ONLY shot on a separate layer BEHIND each of the shots of the model. Then anything at all that you want to remove, just use the eraser tool with soft edges on the brush to erase the top layer where the offensive items are and the background only BACK layer will show through. Since you used a tripod and the background only layer is in perfect register with the layer with the model, the erasing of the offensive objects in the foreground will be seamless. This technique will allow you to LIGHT subjects in a way that you would not otherwise be able to do, since this allows you to include light stands, umbrellas, soft boxes, assistants holding reflectors, beauty dishes without concern, because as long as you shot a BACKGROUND ONLY layer prior to bringing the model into the frame, you can just ERASE anything you don't want in the photo.
My shooting times are normally around noon (not by choice), so this is something I learned to deal with. Gear fix would be: ND Filters and powerful strobes. They are your best friends in this situation. I try to put the sun behind them as best you can so the face has no shadows on it. The sun is never directly over you. chin down helps to lose any highlight you might get hitting the nose.
it's called the Nikon D800 :)
grab a huge bounce, like 2m x 2m and use it... though i still haven't fixed squinty eyes
I pray for cloudy skies. Much can be done with nice diffused light...not sure about "pinpointing" but I guess one should be aware of where light falls, wherever they happen to be. It looks like a good way to stuff some of your portfolio into a web page many people will see. So I am going to do that too. Was pretty cloudy that day.
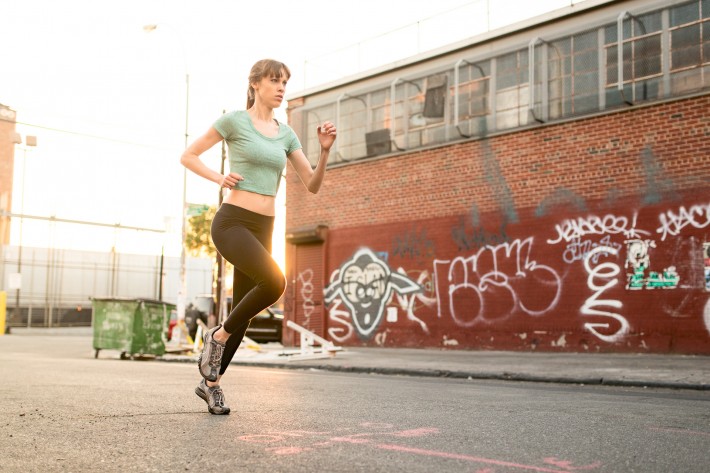
Anyone else find the photo of the jogger is too staged? At first I thought "wow she's positioned exactly in the right spot, with the sun between her and the building in the background!" then I realized the photo lacked a certain energy, her hair should be moving from jogging, not hanging straight down. Then looking at it more, I also noticed some awkward composition, what's with the edge of the building to the left of the frame? Either frame more of it or crop it out entirely. Plus the top of the street light looks like a flying saucer. Perhaps shooting a second frame a few stops under exposed and blending them to save some of the sky and highlight details would've been a good idea. (But I guess these are all the reasons why that photo isn't in Valind's portfolio)
How is nighttime a nightmare environment? Is dragging the shutter too mainstream?
a cloudy sky is a nightmare environment? really? then i have to start from scratch as i must have gotten something terribly wrong :-)
That's why your 5 in 1 Collapsible Diffusers have a TRANSLUCENT option. Use the SUN as the light source for your SOFTBOX, errrrrr.... Translucent Collapsible Diffuser or, use a SCRIM.
The WHITE looking reflector is actually a TRANSLUCENT diffuser which is removing the harsh white HOT SPOTS caused by the sun, the gold reflector is redirecting that light back inside the truck as controlled key light.
First FLATTEN the light, then bring in your own CONTROLLED KEY LIGHT... works the same with NOON OVERHEAD LIGHT!
Do you mean partly cloudy or an overcast?