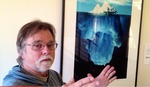
Architectural photography is something I can never seem to get down. I love shooting people much more than buildings, but when it is executed correctly I love it, even though it is not my favorite thing to shoot. I could look at good architectural photography all day. What's interesting is how architectural photographers use light to sculpt, add contrast, and bring out details in their work. Check out this really in depth tutorial from Vancouver architectural photographer Roger Brooks on how he lights and retouches an architectural interior.
Related Articles


Nice video and good result. Completely bamboozled as to why Roger added a black mask and painted the left half back in after he'd aligned the images? Seems like a completely unnecessary step?
You and me both. If he just painted it white, what would be the point of adding å layer mask in the first place?
i agree, TOTALLY un-necessary...not exactly how i'd have done it...
I believe he did that to deal with mixed lighting issues. If you look when he first merges the two haves, the purple pillow in the foreground has two different lighting sources on it (depending on which side of the stitch). The overlap between the two sides allows him to pick which side he prefers, and to feather the transition by using a lower opacity brush...thus avoiding any harsh transitions in the stitch.
I have used this technique before unfortunately on a not so well aligned image and it really helps you see and correct the mistakes in the alignment. Make sure your brush is feathered though!
interesting work and technic, but the voice and the speed at which things happen are dead boring...
This is some wonky shit!
I get the strobe exposures bit, although I don't always like his effect. His PS methods are time consuming and he needs to learn some basic keyboard shortcuts!
His repeating the select mask > Edit menu > Fill routine for every layer is redundant. Just hold down your Option key when you click a New Mask from the Layer Palette and it starts as Black instead of White.
As others here said, why the masking of the final left and right sides? And the hand painting of its mask seems ridiculous. So does pulling back the opacity to line it up. Just change the top layer Blending Mode to Difference and bingo you see what's out of alignment.
And IMHO, the final image was dull and anti-climactic! I would have shot this at some better time, like dusk for more drama!
John
www.johnmaclean.com
Here's a technique I did 5 years ago to deal with five different color light sources. There's no supplemental lighting used, just the house lights. It involves layer masks and something else I discovered to make the color matching much easier, although choosing exposure frames and painting the masks was a royal P.I.T.A.
http://www.johnmaclean.com/leanarch_anatomy/index.htm
excellent final image! What was/is your color matching method?
Bryan, I tried to reply to this several times yesterday, and it wouldn't post. So, I'm using this as a test reply.
something fishy is going on and it won't allow my posts with links here?
Thanks Bryan, Well that's the tidbit that I don't reveal! I have to keep some alchemy to myself! ;) But here it is with a some more refinements in LR4, like Lens Correction.
nice video, but was it just me or was the last step really unnecessary? I mean I know everyone has their own way to do things in photoshop but why didn't he just leave it white and paint black down the middle to merge the images seamlessly?
you can tell how much he loves his job in his voice!