
The Parrot Anafi is tiny and films in 4K, but does it deliver? What is the image quality like? Can it handle wind? What about the battery life and range? After weeks of intensive use, here is a detailed review of this Mavic Air challenger.
The Hardware
The Parrot Anafi is available for $699. This is a very aggressive pricing approach since the Mavic Air costs $100 more at $799. The ready-to-fly bundle includes the following items:
- Anafi drone
- Parrot Skycontroller 3
- Carry case
- 16 GB microSD card
- USB-A to USB-C cable
- Additional propellor blades
- Mounting tool
The Drone
At 0.7 pounds (320 grams), the Anafi is much lighter than the Mavic Air. However, the Parrot drone is longer than the DJI drone. The bundle comes with a nice carrying case for the drone. At first, the drone seems very fragile due to the lightweight construction, but Parrot used carbon fiber materials to shave weight and maximize portability and flight time. The propellors are designed with a leaf-like profile and prove to reduce noise effectively. The 16 GB microSD card is located underneath the battery, which is not very convenient. The card holding system seems fragile. Removing the card is not very intuitive. Fortunately, file transfer can be done with the USB-C cable plugged into the drone (the drone must be turned on). Folding and unfolding the drone is very easy as the legs don’t cross each other.

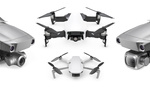
Size comparison with the DJI Mavic Air.


The Anafi includes a 16 GB microSD card. The location is not very convenient, but the files can be downloaded directly via the USB-C connector on the battery (drone turned on).
The Controller
Ironically, the controller (0.85 lbs) is heavier than the drone itself, but the unit is compact and well made, albeit very basic. The main issue with this controller is the lack of features: no programmable buttons or extra wheel to control the exposure settings such as EV or shutter speed. Unlike the Mavic Air, the sticks are not detachable. Unfold the smartphone holder upward to turn the controller on and off. The unit is large enough to accept most phones, but tablets won’t fit. The phone can be connected via a standard USB port. On top of it, a USB-C connector is used to recharge the controller. Unfortunately, the bundle only includes one cable and the user must choose to use it to recharge the drone or the controller.


The controller is good but basic. There is a lack of programmable buttons and wheel to control the exposure.
The Charger and the Battery
The smart battery can be charged via the USB-C connector. Parrot includes one USB-C cable for the battery, but the bundle doesn’t contain a charger, so you will have to use your computer, tablet, or smartphone charger to recharge the battery. This system is convenient since any charger can be used to recharge the battery. There's no need to buy and carry a dedicated charger. However, the recharge process is very long. Expect 2 to 3 hours to recharge the battery with a regular iPhone or Galaxy 2 charger. Special high-capacity power banks and chargers can expedite the process in 90 minutes or less. As with DJI batteries, four LED lights indicate the energy level left in the battery. Each additional battery comes at $99, which is very expensive for a small 2S 2,700 mAh LiPo. By contrast, the Mavic Air battery costs $79.
In Flight
Getting Started and Application
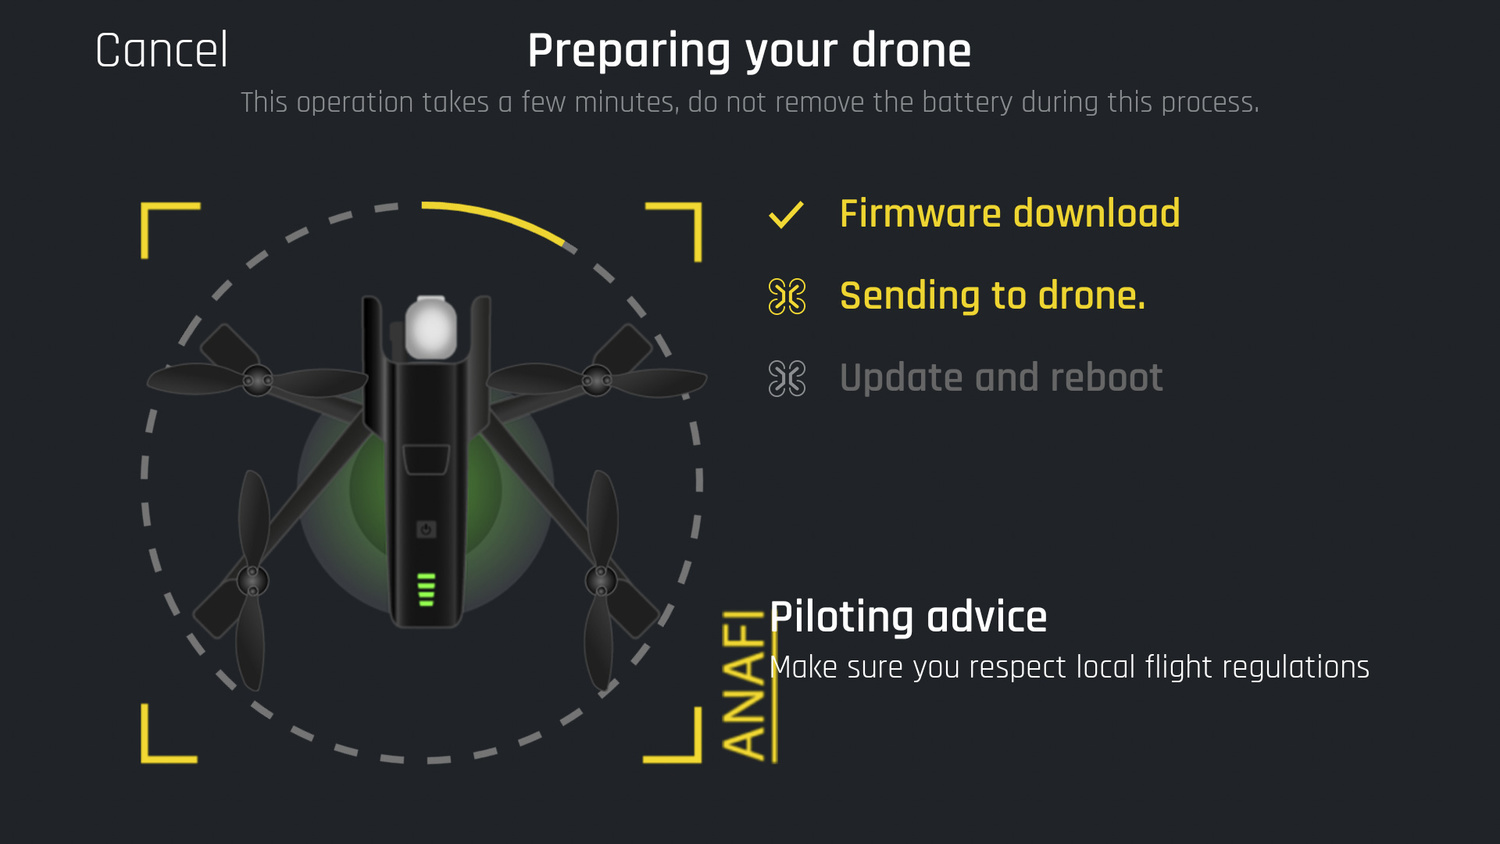
The first step is to download the Parrot App called Freeflight 6 on your smartphone. The app is compatible with Android and iOS devices. Then, plug the device into the controller, turn on the drone, and follow the steps in the app. Upon startup, the system will launch all the firmware updates via the smartphone and upload the files directly to the controller and drone. There is no need to plug the drone separately into a computer or load any files on the memory card. The whole process is hassle free and takes place automatically over the air.
Flight Restrictions and Privacy
Unlike DJI, Parrot respects your privacy, and the French company doesn’t force you to log in or create an account to use your drone. The app doesn’t send data back to servers in China. Take note, DJI. Another difference with the Chinese company is the absence of no-fly zones, but the user can set up a maximum distance and altitude to create a custom geo-fencing perimeter. Personally, I salute this decision, since the no-fly zones can be a massive pain to deal with. DJI no-fly zones are not based on any coherent patterns (official Class A, B, C airspace for instance), and larger airports are not immune to drone flights with the DJI system. On the other hand, many DJI users find themselves blocked when they need to take off in the vicinity of a tiny local airport. The DJI unlocking procedure is annoying and the company’s response is not always fast. With DJI, I always have this annoying feeling that I don’t completely own my drone.


There aren't no-fly zones with the Anafi, but a maximum altitude of 492 feet (150 meters).
On the other hand, Parrot arbitrarily set the maximum flight altitude to 492 feet (150 meters), while DJI allow its drone to fly up to 1,640 feet (500 meters). This altitude seems to be based on a French regulation, but commercial drone pilots in the U.S.A. can fly over 400 feet when near a tall structure.
Flight Performance
Despite its weight, the Anafi is surprisingly stable and agile. The drone handles moderate winds very well, and I managed to reach a top speed of 34 mph (55 kmh) in sport mode, as advertised by Parrot. Each flight mode (Film and Sport) can be customized with various settings such as tilt angle and rotation speed in order to increase the control smoothness in-flight. The drone is easy to fly and the controllability is excellent (no jerky motion or inaccurate trajectory).

The control settings can be adjusted for each flight mode (standard or film and sport). An equivalent of the DJI tripod mode is lacking.
Unlike DJI, there is no stick combination to start the motors. The takeoff procedure must be launched via the dedicated button on the controller or the app. The Anafi takes off automatically and hovers at 3 feet (1 meter), waiting for the pilot’s input. Parrot designed a very smart “hand-launch” mode that works as follows:
However, the hand-landing procedure can sometimes be complicated. If the drone doesn’t sense a perfectly stable hand, the motors will keep spinning. This can be an issue when landing on boats. The easier way to shut off an uncooperative Anafi is to firmly grab the drone in flight and flip it 180 degrees head down. The Anafi will associate the maneuver with a crash and cut-off the engine right away.
Once in the air, the Anafi is very silent, much quieter than the Mavic Air thanks to the leaf propellors and lightweight design of the aircraft.
The failsafe procedure works as it should, but there is a major flaw in the system, because the return to home (RTH) altitude is locked to 65 feet (20 meters) and the user cannot dial a custom RTH attitude .At the moment, the RTH works the following way:
- If the Anafi enters in RTH mode below 65 feet, the drone will climb to 65 feet and fly back home (crashing into any building or obstacle taller than 65 feet)
- If the Anafi enters in RTH mode above 65 feet, the drone will fly back home at its current altitude (crashing into any building or obstacle taller than the current altitude...)
This RTH system is very similar to the old days of FPV with the DJI Naza flight controller. Countless users have reported the problem to Parrot, but the company hasn’t corrected this issue yet via a firmware update.
Battery Life
Manufacturers tend to be optimistic to say the least with battery endurance. In my Mavic Air review, I noted that the 21 minutes of flight time listed by DJI was not realistic since the aircraft ran out of power after 15 to 16 minutes of flight. With the Anafi, I was able to fly between 20 and 23 minutes based on my flight profile (slow or use of sport mode). This value is somewhat close to the 25 minutes of flight time advertised by Parrot. Therefore, the Anafi has the best endurance in this class of drone. When the battery level reaches 5 percent, the drone starts to descend, but the pilot can still control the trajectory.
Radio Range
Like the Mavic Air, Parrot opted for Wi-Fi radio technology, which causes the exact same issues. In the countryside, free of any radio interference, a quick range test gave me more than 1.2 miles of range before seeing the first video lags on the screen. However, the situation is considerably worst in urban and suburban neighborhoods, where you may struggle to reach as little as 1,000 feet (300 meters). Switching between 5 GHz and 2.4 GHz bands won’t help much. In any case, remember that FAA regulations require you to fly the drone within visual line-of-sight. I also noticed a strange issue with the radio system. Normally, the transmission system should switch automatically to the best channels, but for some reason my drone did a poor job to avoid interference. I had much better results once I manually switched to the cleanest channel.

I found that the auto channel selection didn't work great in my test. I had much better range by manually selecting the best channel.
US pilots are lucky because FCC regulations are relatively permissive with radio transmission power. Bring your drone overseas and the Anafi (like the Mavic Air) will automatically switch to the low CE (European) transmission power setting based on the GPS coordinates. In this mode, the range is severely affected in urban and suburban areas.
I must admit that I didn’t conduct a scientific and side-by-side range test with the Parrot versus the Mavic Air, but both drones employ a similar Wi-Fi technology, and my flights with the two drones in the same area gave me more or less the same range. Sometimes, the Mavic Air had better results in one area while the Parrot was beating DJI in another location. The local radio frequency background noise can explain these differences. In any case, the radio range seems similar for these two aircraft.
Anti-Collision Systems
The Anafi is not equipped with any anti-collision sensors. The only sensors are located underneath the drone (optical and sonar) to assist the aircraft with vision positioning and landing. Personally, I believe that the lack of anti-collision sensors is a positive point since these sensors give a false sense of safety and many pilots crash their drones because they don’t understand the limits of the anti-collision system. For instance, the sensor on the Mavic Air does not work in sport mode and the sides of the drone are not protected against uncooperative trees. Sensors also add weight (thus less flight time and agility) and costs to the drone. That being said, beginners might prefer the Mavic Air thanks to its forward and backward anti-collision system.
Intelligent Flight Modes
I never use the automatic flight modes, but the few modes available on the Anafi work as advertised. Overall, they are not very useful except for rookie pilots. Unfortunately, the Follow Me and Flight Plan (waypoints) are locked and must be purchased in the App. Even though the flight parameters can be adjusted in the app (maximum inclination, max rotation speed, etc.), the Parrot is missing an equivalent of the DJI Tripod mode to fly very smoothly and slowly when doing close up flights.


Image Quality
Sensor and Gimbal Stabilization
The sensor of the Anafi is slightly bigger than the Mavic Air but is tiny nonetheless. Don’t expect to notice any improvement in terms of low-light performance. The main difference comes from the resolution, as the Anafi comes with a 21-megapixel sensor, whereas DJI limits the pixel count to 12 megapixels on the Mavic Air. Why are they cramming so many pixels into a tiny camera? Because the Anafi only comes with a two-axis gimbal and it needs a larger area to electronically stabilize the footage on the yaw axis. Despite the lack of mechanical yaw axis on the gimbal, the camera stabilization is very good even in zoomed mode. In flight, the system works and the image is very stable. Parrot has some experience in this field since the Bebop drones also used a similar technique to stabilize the video. However, the electronic stabilization doesn’t work in picture mode, which is a problem for long exposure photography at night. The main advantage of this gimbal design is the ability to tilt the camera all the way up, clear of any frame obstruction. Contrary to the Mavic and Phantom drones, the propellors never appear in the field of view of the camera even when the Anafi moves forward with the camera facing the horizon.
But the most interesting aspect of this higher pixel count is the possibility to digitally zoom inside the frame without (theoretically) degrading the image quality. Indeed, 4K video only uses 8 megapixels and there is a lot of room to punch in. This zoom feature enables up to 2.8x lossless digital zoom in full HD (1.4x in 4K), which translates to a useable range of 23-69mm in photo mode and 26-78mm in video mode.
The only issue with the gimbal is the presence of some horizon tilt (gimbal drift). The tilt never goes beyond a few degrees but is noticeable nonetheless. This tilt is not constant, but there is no dedicated calibration procedure for the gimbal. The so-called “Gimbal Calibration” option in the App is simply a tool to correct the tilt if the camera always drifts in the same direction (DJI drones also have this feature).

The so called "Gimbal Calibration" is not a real calibration but a tilt offset. The user must set the value manually.
Bitrate, Resolutions, and Crop
Video lovers will notice that the Anafi can film in cinema 4K (DCI), while the Mavic Air is limited to regular 4K UHD. However, the 4K DCI can only record at 24 frames per second. In terms of field of views, both drones are using a relatively wide angle lens: 23mm for the Anafi and 24mm for the Mavic Air. Unlike the Mavic Air, the Anafi doesn’t crop in any video mode. The 2.7k resolution mode is missing on the Anafi. In high-frame-rate modes (1080/60p), it seems that the camera does some sort of pixel-binning or line skipping readout of the sensor, which creates a lot of aliasing in the video. Check the comparison below (200 percent crop):


Here are some of the average bit rates observed depending on the resolution and frame rate:
- 4K DCI at 24 fps: 100 Mbps
- 4K UHD at 24 and 30 fps: 100 Mbps
- 1080 at 24 and 30 fps: 30 Mbps
- 1080 at 60 fps: 60 Mbps (in SloMo and HFR mode)
Image Distortion
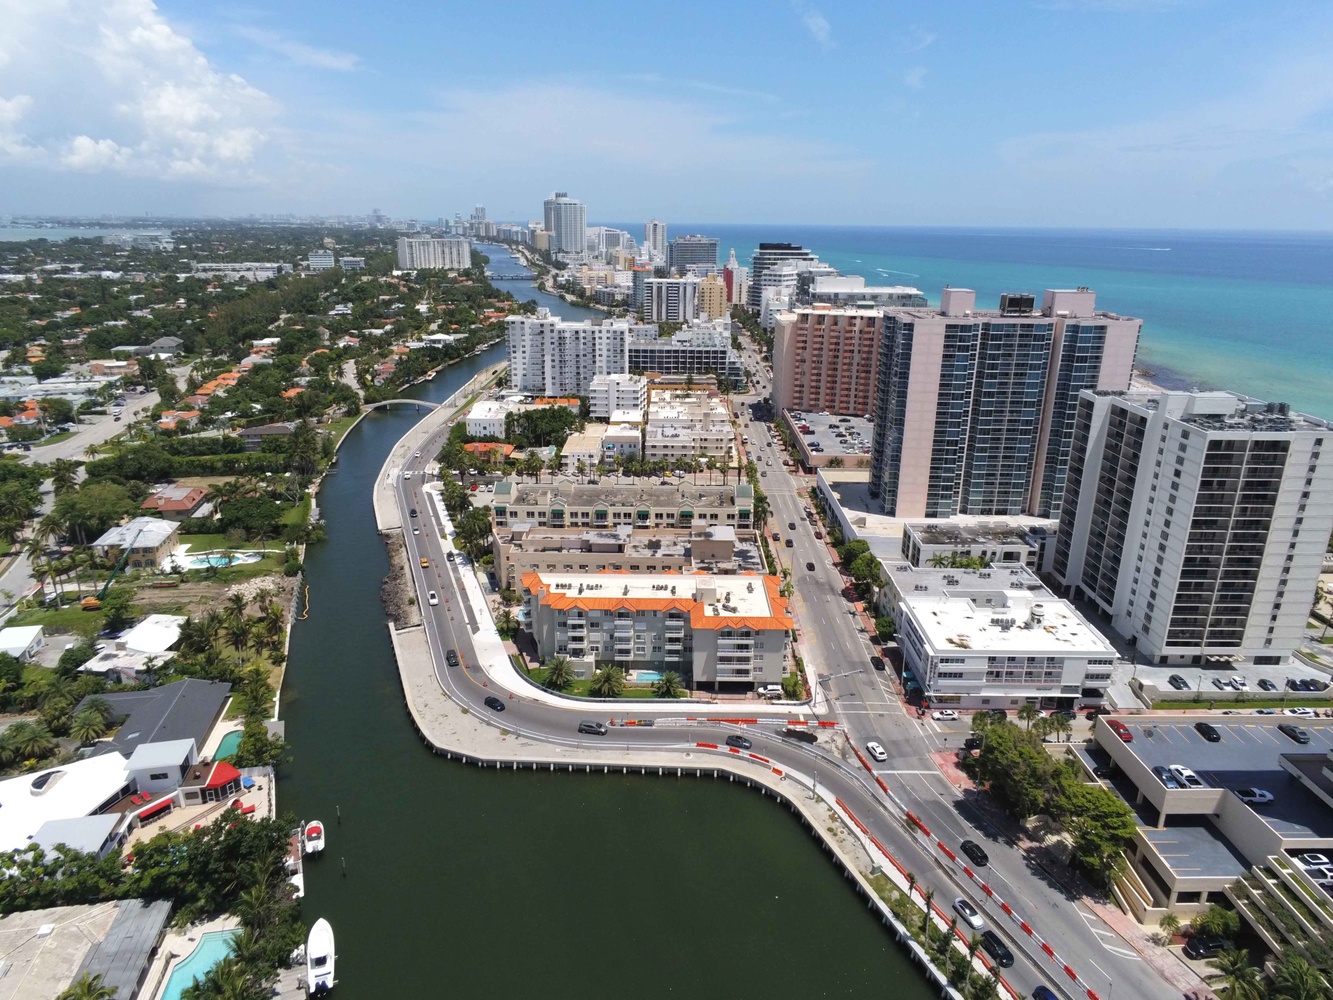
In video mode, the distortion is extremely well corrected and unnoticeable. Here are a few screen captures from the video:


Sharpness, Noise, and Dynamic Range
Overall, the image quality is good. The footage is not overly sharp and the colors are pleasing. As for dynamic range and low-light sensitivity, there is no miracle. The Anafi comes with a tiny 21-megapixel sensor and you can notice the presence of noise in the image, even at base ISO. This noise is not a deal breaker, but it’s there. In terms of sensitivity, I would never venture beyond ISO 400. At ISO 200, additional noise is already visible. The Mavic Air is also affected by this type of noise.
The problem comes from the zoom mode. Pixel-wise, the zoom might be lossless, but in real life, the image quality takes a hit because the background noise becomes significantly noticeable at the extreme end of the zoom range. This is especially true in 1080, where the zoom can reach 2.8x.
Picture Profiles, HDR, and Log
There is no option to set a custom picture profile by tuning various image settings such as contrast, saturation and sharpness. However, the user can select three main profiles: standard, Log, and HDR. The standard mode will be the default choice for most casual users who don’t plan to perform advanced color grading in postproduction. Seasoned video editors will record in Log mode, which is a flat profile designed to maximize dynamic range. Finally, the HDR mode looks very unnatural with flashy colors and boosted shadows. The image is “stretched” and additional noise is visible in HDR mode. I wouldn’t recommend it unless you like the overdone look.
Exposure Control
In auto exposure mode, the metering module does a good job, but this drone was clearly not designed for advanced users, as the exposure assist tools are nonexistent. Of course, the pilot can switch to manual mode to adjust the shutter speed and ISO, but the app doesn’t provide any exposure support such as EV indication or zebra. In the field, the user must set the manual exposure only based on what he/she sees on the tiny smartphone screen. This is technically challenging, especially in bright daylight conditions. Hopefully, Parrot will fix this problem via a firmware update. At the moment, the EV icon stays desperately static and is only there to offset the auto-exposure value.

The exposure can be controlled manually but the app doesn't provide any exposure assist feature. For instance, notice the EV indicator in this underexposed image. The EV icon is only used to compensate exposure.
Still Mode
The 21-megapixel camera can deliver two types of images:
- Wide 21-megapixel picture (5,344 x 4,016) with heavy barrel distortion (fisheye)
- Rectilinear 16-megapixel picture (4,608 x 3,456) corrected for distortion

The rectilinear picture is just a cropped and distortion-free version of the wide file. Both files are in squarish 4:3 ratio and the Anafi can output files in JPEG and DNG format or both. Unfortunately, the DNG files only come in wide settings and the distortion must be corrected in post. In terms of quality, the tiny sensor produces acceptable images, but there is no miracle. The image is on the soft side. The bracketing (AEB) option to create HDR images is missing and the Anafi does not offer any auto-panoramic mode like the Mavic Air. Finally, keep in mind that the electronic stabilization is disabled in still mode. Don’t expect to capture long exposure photography at night with the Anafi.
What I Liked
- Portability and size. Very lightweight.
- Lossless zoom in video modes.
- Good video stabilization overall even in zoomed mode, despite some horizon tilt from time to time.
- Adequate video bitrate of 100 Mbps in 4K.
- Excellent distortion control in video.
- Log profile (no Log on the Mavic Air).
- No crop in video mode.
- Unique 180-degree gimbal range (can tilt the camera up and down).
- The propellors never appear in the field of view of the camera even when tilted forward and up.
- No need to log in or to create an account to use the app (unlike DJI).
- Low acoustic signature, discrete in flight.
- Resistance to moderate winds.
- Speed and agility in sport mode, but slower than the Mavic Air.
- Best flight time (20-23 minutes) in this class of drone.
- No forward and backward anti-collision sensors (good point for advanced drone pilots).
- Absence of no-fly zones.
- Easy recharge via any USB-C charger.
- Includes a 16 GB micro SD card.
- Competitive price ($699).
What I Didn't Like
- No EV indication or any exposure tool (zebra) in manual exposure mode.
- The return to home altitude is locked to 20 meters / 65 feet.
- Maximum altitude set to 150 meters (492 feet).
- Like the Mavic Air, horrible signal quality and range in CE transmission mode (in many countries outside USA).
- Presence of some horizon tilt (roll) on the gimbal and lack of real gimbal calibration procedure.
- Noticeable noise and grain in the image even at base ISO (like the Mavic Air).
- Lower video quality (noise) at the extreme end of the lossless zoom.
- Heavy noise in HDR video mode.
- Heavy aliasing in 1080/60p.
- No yaw stabilization in still mode. Can’t take long exposure pictures at night.
- No forward and backward anti-collision sensors (bad point for beginners).
- Radio link based on Wi-Fi, which can be bad in urban environments.
- Basic controller. No wheel to adjust the exposure, EV, or shutter speed. No programmable buttons.
- Long recharge time of the battery (2-3 hours on most USB chargers, faster with high-power chargers).
- Expensive spare battery at $99 versus $79 for the Mavic Air.
- No bracketing option in still mode (AEB/HDR).
- Heavy barrel distortion (fisheye) in DNG still mode. The distortion is only corrected on JPEG pictures.
- In-app purchase of the Follow Me and Waypoints modes.
Conclusion: A Serious Challenger to the DJI Mavic Air
I must admit that I was not impressed by the previous drones made by Parrot. The Bebop was a horrible aircraft unable to fly straight and capture descent imagery. At first, the Anafi looks very flimsy and fragile, but the French drone-maker did some serious design work on this machine. Past the initial impression, the Anafi is a well-rounded aircraft. Unlike many DJI competitors, Parrot didn’t just try to produce a cheap copy of a DJI drone, but they innovated and came up with an original product filled with interesting features: lossless zoom mode, best endurance in this class of drone, very discrete acoustic signature, and 180-degree gimbal range free of propellors in the field of view, just to name a few. Of course, the Anafi is not a perfect drone, but neither is the Mavic Air. Fortunately, the main issues of the aircraft are not related to the hardware and can be fixed via firmware update: the strange 65-feet RTH altitude, the lack of exposure assist tools, and the maximum altitude set to 492 feet can easily be corrected. Should you buy the Anafi or the Mavic Air? I cannot answer this question for you. It depends of your needs and budget, but the Anafi is a good drone.


It's coning but It's not as good as the Anafi. There is a lot of gimbal drift on the EVO.