
For me, August is a great month. The nights become longer and the Milky Way core is rising above the horizon again. But the highlight is the Perseid meteor shower. I have 10 tips for planning and photographing this annual event.
The Perseids are one of the most active meteor showers. It can produce on average about 85 meteors per hour when the radiant is at its highest point in the sky. Only the Geminids in December, at 120 meteors per hour, are more active.
The amount of meteors depends on your location on Earth. The numbers I mention are for a viewer that is somewhere at 50 degrees latitude in the northern hemisphere. But the longitude is also important.

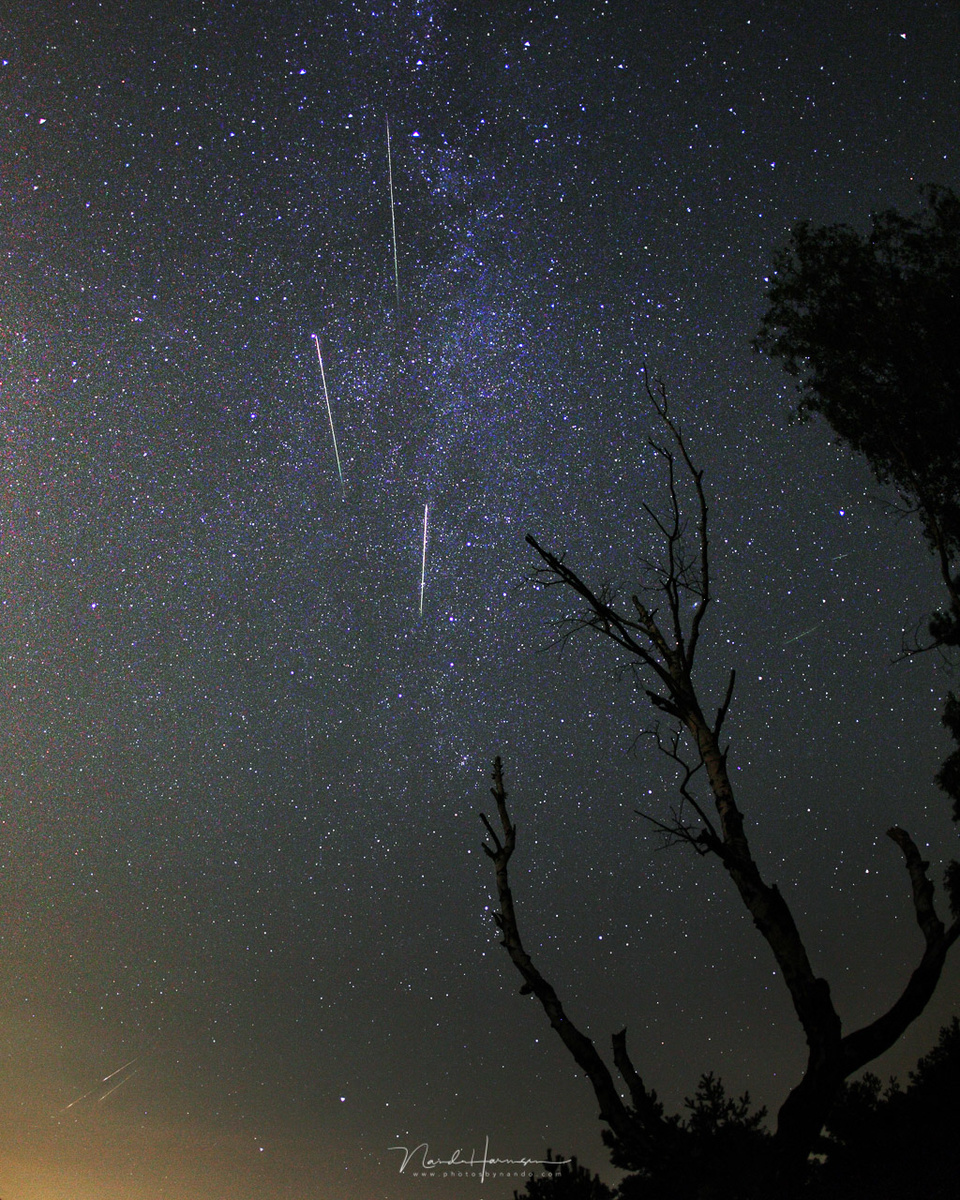
Can you spot all the meteors in this image?
Watching the meteor shower is not limited to its maximum. Although the amount of visible meteors is reduced before and after its peak, you still can see and photograph the Perseids. About three days before and after the maximum, you can still see 28 meteors per hour, giving a lot of opportunities to photograph these falling stars.
Where Do the Perseids Originate From?
The debris from comet 109P/Shift-Tuttle is responsible for the Perseids. The meteor shower is already described by the Chinese in the year 36. Every 12 years the debris is pushed by the gravity of planet Jupiter, resulting in an even more active meteor shower. Unfortunately, this was in 2016 and is expected to occur again in 2028.
It is not always about catching the maximum amount of meteors.
The dust particles of the Perseids enter the atmosphere at 59 kilometers per second. While evaporating, the air gets ionized, resulting in a short flash of light along the trajectory of the dust particle. This all happens at 80-120 kilometers altitude. The flash of light is very brief. Although it might be a very bright flash, the total amount of light is not that much. This bit of information is important when photographing meteors.
The meteors seem to originate from one point in the night sky. This is called the radiant. For the Perseids, the radiant is located in the constellation of Perseus, hence the name. If you can find the constellation in the sky, you know where to look.

If you can't find Perseus in the night sky, use one of the many night sky apps.
Tips for Planning and Photographing
I assume you know the basics of shooting in a dark environment. First of all, you need a good and sturdy tripod. Turn off image stabilization and use manual focusing. A built-in time-lapse function can be used, but don’t use the time-lapse film function. You can also use a remote that can lock the shutter release button.
Turn off long exposure noise reduction, but high ISO noise reduction is no problem. Shoot in raw file format. Use a full battery and an empty memory card, or keep a spare for both. Watch out for the LCD screen brightness. If it’s too bright, it will ruin your night vision, but it can also misguide you when you check for exposure.
With these basics out of the way, now let us look at some practical tips.
1. Find the Right Location
First of all, make sure you know where to find the constellation of Perseus and the radiant of the Perseids. Next, find a nice location with an interesting foreground. Shooting only the sky may be a bit boring. But most important, find a dark location, far away from city lights and other light-polluted areas.
There are also websites or apps that show the amount of light pollution. One example is the Light Pollution Map (LPM) app. It’s a free app that works worldwide. Try to find at least a yellow zone, preferably even darker.
You can use the app PhotoPills for planning a location. It helps you determine the right time of shooting the meteor shower, the location of the radiant at the location you have chosen, and how many meteors you may expect.

PhotoPills offers a lot of useful information for planning your Perseids photo.
A clear view of the sky is advisable. But the image may be much more interesting if you have something nice in the foreground, even if it's blocking a part of the sky. Just be creative.
2. Use the Best Possible Exposure Settings
I mentioned the speed of the meteors and the brief flash of light they produce. The total amount of light generated by the meteor is not that much since it’s produced in a very short time. That is why you need to collect as much light as possible.
Use a large aperture if possible. Although I have shot the Perseids also with f/4 and f/5.6, though an aperture of at least f/2.8 is advisable. One stop larger will double the amount of light that reaches the sensor. Two stops means four times the amount of light.
Use a high ISO level, but make sure you don’t exceed the possibilities of your camera. If the noise level becomes too high, the meteor can become invisible. I find ISO 1,600 the minimum that works and advise to go up to ISO 6,400 if possible.

Choose the right settings for the best possible result. The amount of light pollution will determine what settings those will be.
Regarding shutter speed, shooting meteors is like shooting with a flashgun. The shutter speed is of no importance. But don’t go beyond the point where the stars begin to show motion blur. Use the rule of 500 for the maximum shutter speed. PhotoPills can help determine the maximum shutter speed.

PhotoPills can help you determine the maximum shutter speed to keep stars little points of light instead of star trails.
3. Make Sure Your Exposure Is Correct
Using the largest aperture, the maximum shutter speed possible without blurring star trails, and the highest ISO level possible can result in an overexposed image. Use the histogram on your camera to determine the correct exposure. For star photography, I always advise boosting the exposure until the histogram is just beyond the right side of the center.

Don't underexpose your images. Use the histogram and try to mimic the this one. But don't use too much exposure to the right.
The best way to get the right exposure is to use the maximum aperture, the highest ISO level that still produces good quality, and the shutter speed for the correct exposure. If the shutter speed exceeds the rule of 500, you might need to bump up the ISO level a bit further.
4. Use a Wide Angle Lens… or Perhaps Not
Shooting with a wide angle lens will capture a large part of the sky. This way, the chance of capturing a meteor is at its best. But because the wide angle lens will reduce the size of things, the meteors will also become much smaller in the frame.

The result of using a fisheye lens is obvious. The meteors will become relatively short due to the large field of view.
Using a longer focal length will make the meteors you capture more impressive. On the other hand, the chance of capturing one will be reduced. Determine what you find important. It is also possible to shoot with two cameras, one with an extreme wide angle, the other one with a longer focal length.
6. Take a Lot of Pictures
You never know where and when a meteor will show up. If you wait until you see one and then push the shutter release button, you will not succeed unless you are extremely lucky. For capturing meteors, you have to shoot continuously as long as possible, preferably for hours. This can be done with a time-lapse function or with a remote.
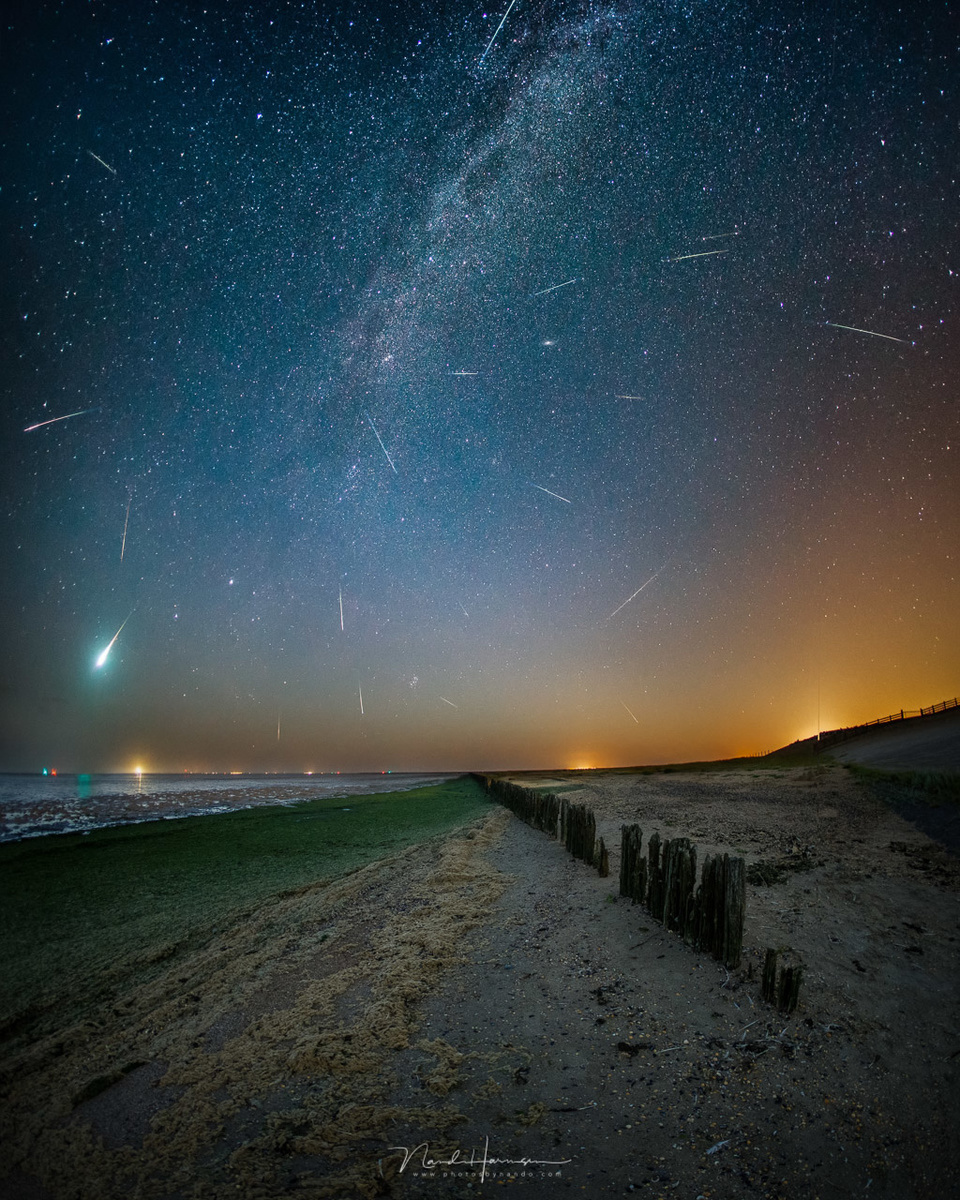
Except a few, every meteor here belongs to the Perseids. I was lucky to capture that fireball also.
7. Make Yourself Comfortable and Safe
Because you have to wait for hours, you need to prepare yourself. Take a chair with you. Have something to drink and eat. Dress warm because it can cool down during the night.
Make sure you’re safe. And if you don’t want to be all alone in the location you’ve chosen, ask someone to join you — a fellow photographer or a friend who is willing to accompany you.

Enjoying company while watching the night sky for Perseid meteors.
8. Protect Your Equipment Against Condensation
It can cool down at night. If you’re shooting for hours, your camera will also cool down. When the temperature of your lens gets below the dew point, your front lens will suffer from condensation. If that happens, you can’t get rid of it anymore unless you have a way of heating the lens until the temperature is above the dew point again.
Don’t use a UV or protection filter. The low mass of a small filter allows it to cool much faster, and condensation will occur much sooner. The best way to prevent condensation is to keep your lens warm. An anti-fog belt or other heating device is the best solution.

If condensation occurs, you may as well stop shooting unless you have another lens at hand.
9. Take a Shot of the Milky Way Also
If you’re out there shooting the Perseids, you are probably at a dark location. And if your eyes are adjusted to the darkness, you will see the Milky Way in all of its glory. Why not take a few images of the Milky Way also? Who knows, perhaps you will also capture a few meteors in the frame.

While you are out there, you may as well take a picture of the Milky Way. Perhaps you will capture a Perseid meteor as well.
10. Enjoy Your Time in the Field
Being out there in the field, looking at the stars, where falling meteors appear in random parts of the sky, is a lot of fun. Forget about the camera that is doing all the work, and enjoy the moment.

If you go out shooting the Perseids, make sure you enjoy your time in the field.
It’s not all about photography, but also the experience under the night sky. I think enjoying the things you do is important. And if you see a shooting star, make a wish. Who knows, perhaps you can make over 50 wishes per hour.
I wish you all the luck capturing the Perseids this year. Enjoy.


For once, an article of this kind that does not get published after the fact. Just in time, thanks!
Nice article, lots of great tips! I captured this perseid Saturday around 12:20am and blended it into a 3 panel mosaic to get a wider field of view. Used a R6 running in intervelometer mode, 35mm f/2 and continuous 20 second exposures.
Unless you are close to the peak of the shower, it takes some luck to get a nice bright meteor like this -2 mag perseid. Clear skies!
Great shot. I wish I could capture such a Milky Way like that close to my home.
Indeed, you need some luck with meteors. THat makes it even more fun when you succeed