
With the digital age stacking techniques make it possible to shoot a star trail in the middle of a city. But when I got my hands on a great medium format camera, I also ran into a problem: the star trail had strange patterns in the stacked image. Fortunately I found out why this is, and how to avoid it.
I have been shooting star trails for many years. My first star trail was made in the eighties of the previous millennium, using a 400ASA slide film and a remote to lock the shutter in bulb for about five minutes. At that time it was quite challenging to make a star trail as long as possible without over exposing the film. It needed a lot of experience which – by the way – I never had. Film was expensive and I couldn’t afford to use a complete film role for experimenting.

My first star trail, taken on a 400ASA color slide film with a exposure time of approximately 5 minutes and a 50mm focal length. In those years the only method achieving these images was a long exposure with the bulb setting.
Digital photography made a lot of things much easier, including star trail photography. Exposing for five, ten, fifteen, or thirty minutes is possible, and you can check the exposure afterwards and do another try if the first time was faulty. You just have to be patient. How long you can expose depends on the ISO level, aperture, and the amount of ambient light or light pollution. I managed to expose for half an hour in a dark part of the Netherlands, where light pollution level is among the worst in the world. I had to rely on the dynamic range of the camera to turn down the exposure enough to see the stars. Just like the photo from the eighties, I used ISO400 for this 1800 second shot. The result is shown below.


But a long exposure has a major downside, especially with higher ISO levels. After fifteen or twenty minutes the amount of noise becomes very annoying, with the risk of rendering the image unusable. What the maximum usable exposure time will be is camera dependent of course. Although it might be interesting to found out, it is probably better to use a series of shorter exposures that can be stacked into one virtual long exposure. I think most of the people that do star trails use this method.

It is easy to shoot star trails in the middle of the city, if the settings are correct. This is composed from 329 individual shots, each 8 seconds at ISO3200 and f/8, and a seperate foreground shot. (EOS 5D mark III TS-E 17mm | ISO3200 | f/4 | 329x 8 seconds)
Using the stacking method makes it easy to do star trails in pretty much any location, even in the middle of the city by choosing the right combination between shutter times, aperture and ISO values. I used this technique for many years, with different kind of cameras. When I got the change of reviewing the Fujifilm GFX-50s I also made some star trails. To my surprise I stumbled upon a strange effect which I never seen before. There was some kind of moire effect visible in the picture, as shown below.

A stack of images made with full resolution Fujifilm, GFX-50s frames. Look at the patterns in the sky. No matter what I tried, it kept coming back when stacking all those images. What could be the reason?
It took quite a while before I found out what caused it. It turned out to be the lens distortion correction that Fujifilm build into the raw files of the GFX-50s. And the funny thing was; Lightroom lacked the ability to turn this lens distortion correction off. After a lot of experimenting I found out I had to reduce the resolution by 50% to get rid of this effect.

The patterns are generated due to the build in lens distortion correction, as it turned out. This setting is fixed into the raw files and cannot be turned off in any way. It is quite frustrating when you love shooting star trails. It means you cannot use the Fujifilm GFX-50s for this.
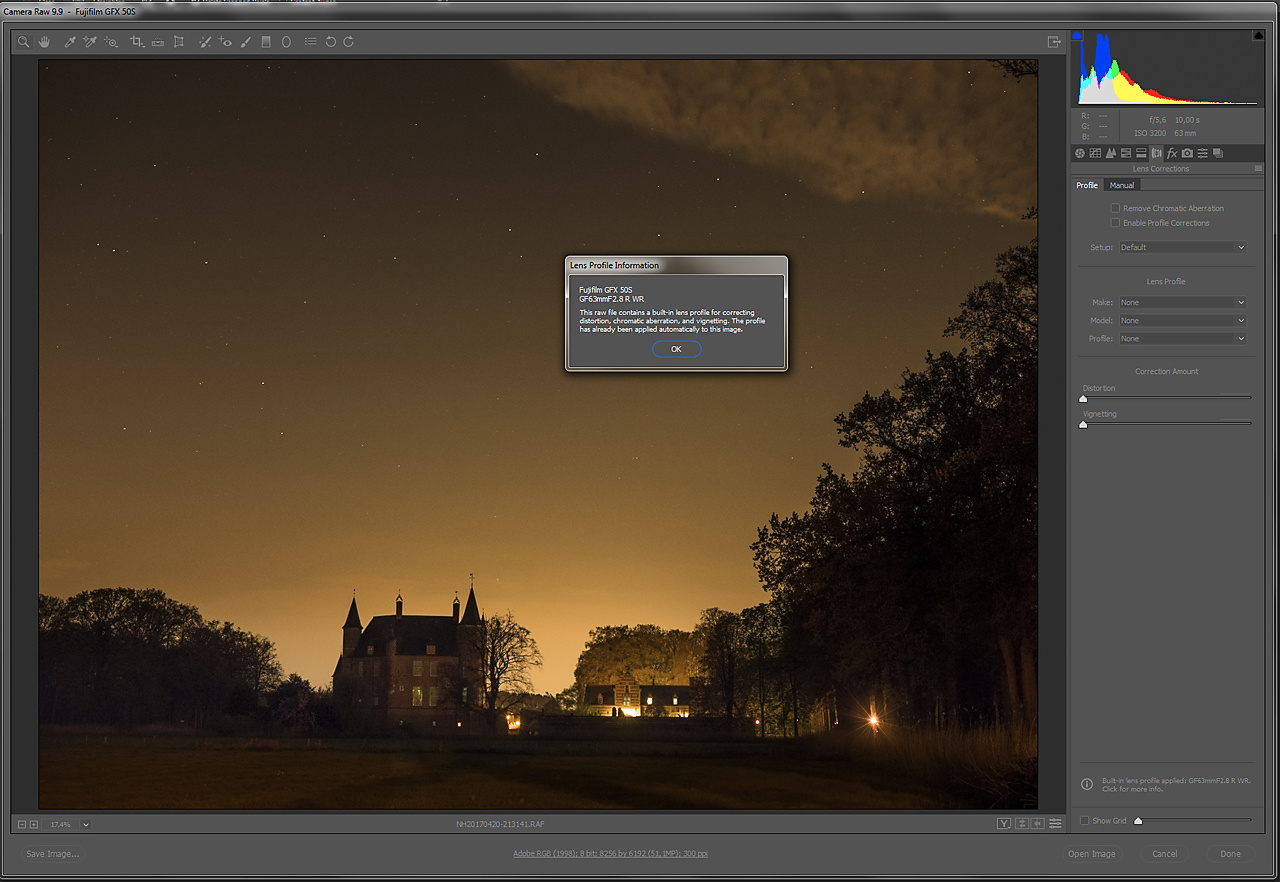
It doesn't matter what raw editor you use. Most editors cannot turn off the build in lens correction. In this case it is the same raw editor that is used by Lightroom: Adobe Camera Raw (ACR)
Finally, after searching the internet for a long time, I stumbled upon a raw editor that was able to turn the GFX-50s build in lens distortion correction off. This was a piece of free software called RawTherapee. Even now, I still don’t understand why Lightroom lacks the ability to turn off the lens distortion correction. It means you still don't have full control over the raw files
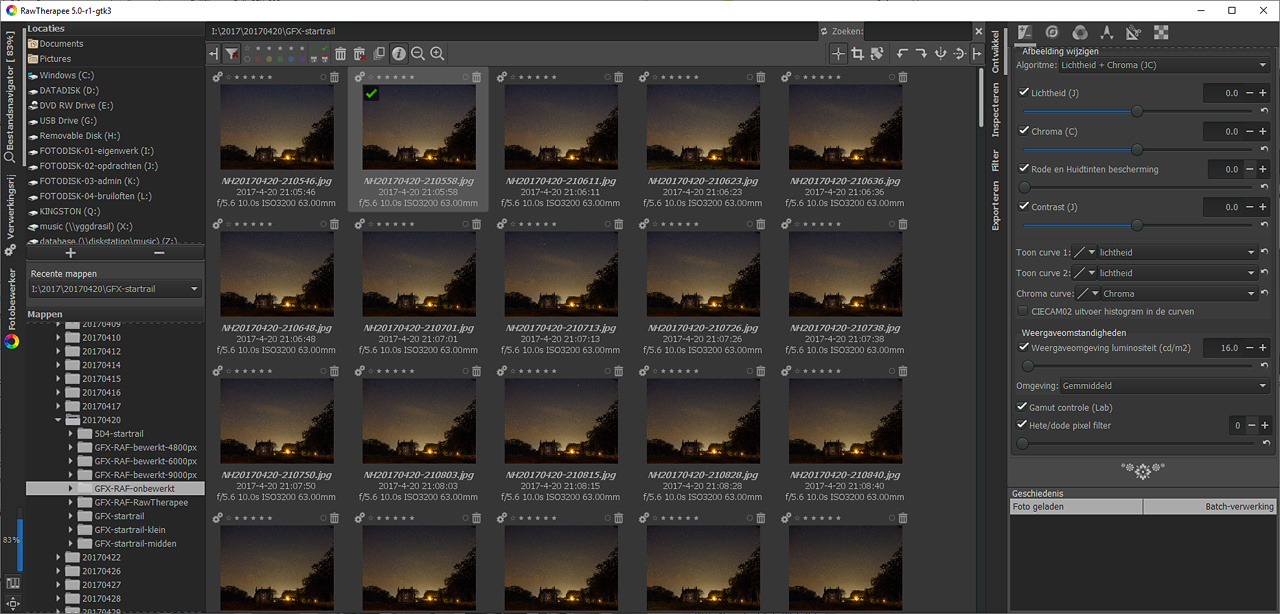
After a long search I found RawTherapee to be the only raw editor that ignores the build in lens distortion correction. Or perhaps the program lacks the ability? In any way; this little program made it possible to use the Fujifilm GFX-50s for star trails after all.
Sometimes I get a question from someone, that is following my star trail tutorial, about these strange effects in the stacked image. And in all cases they have turned on the lens distortion correction in the raw editor they are using. It deforms every image just a little bit, and it varies with every image, even if the same lens and aperture settings are used. When stacking many images, the small deformations will form the patterns as I witnessed with the GFX-50s star trails.
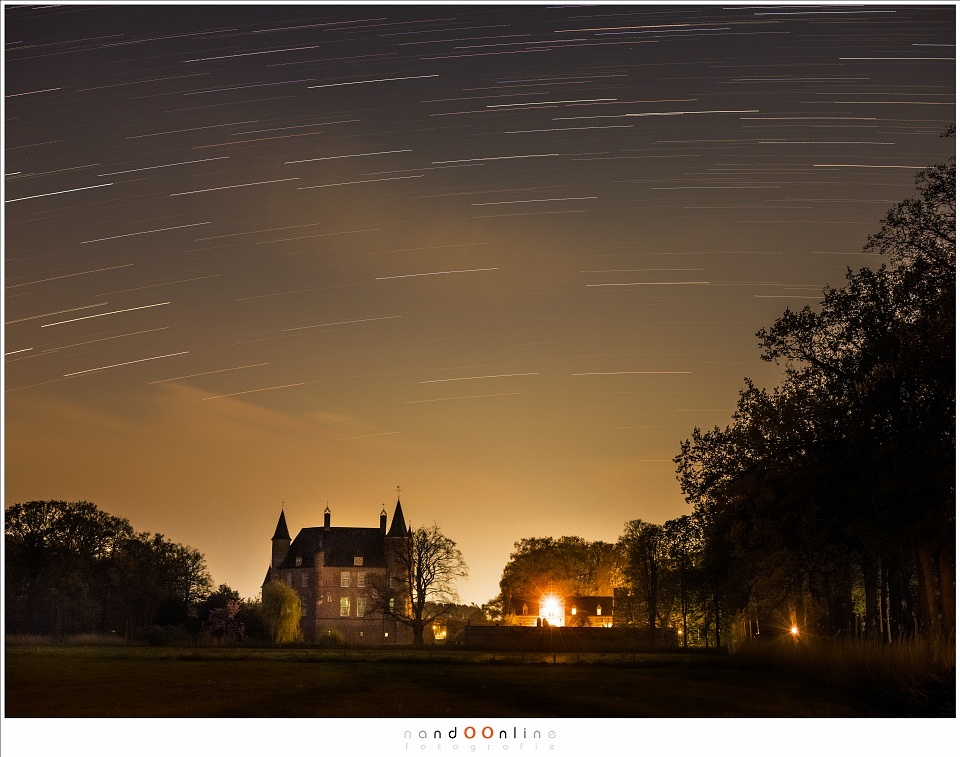
The end result with images that are generated with RawTherapee. No patterns are visible. It took weeks before I finally came up with the solution (Fujifilm GFX-50s 63mm | ISO3200 | f/5,6 | 189x 10 sec)

As I found out, reducing resolution also eliminates the patterns. A reduction of 50% is enough, so you end up with 25 megapixel shots when using the 50 megapixel Fujifilm GFX-50s. This shouldn't be necessary. (63mm | ISO1000 | f/2,8 | 318x 5 sec)
So next time you are going to shoot star trails, make sure you turn off any lens distortion corrections prior to the stacking. Unless your camera has the lens distortion correction fixed in the raw file, you will be okay.
Have you ever experienced these effects in your star trails? Please let me know in the comments and specify what kind of camera you are using. If you found another solution for this problem, please let me know.


FYI, Capture One allows for turning off the lens distortion correction setting, or turning down as a percentage of correction. You can even substitute a generic profile or any profile in the lens database.
i want to move over to C1 so badly but i'm hamstrung by their lack of availability on ipad pro. converting all of my hardware to wintel just isn't a solution i'm willing to accept at this time.
although i'll admit to having started shopping for a Microsoft Surface Pro with enough horsepower to run C1 as well as my ipad pro runs lightroom mobile after the latest BS adobe pulled with pricing on their website.
That is good to know. Unfortunately I had no access to C1. Thanks
In case you are interested in why this happens, I've stumbled upon that problem years ago while doing some experiments. Turns out that the distortion correction basically applies multiple local transformations, and that causes the once completely random noise to turn into patches of non-random noise.
Here is a correction profile applied to a completely random gaussian noise generated in PS.
Those non removable profiles are terrible, they effectively make startrail impossible for some lenses if used with Lightroom, and that kills the workflow. I hope they'll fix that because nobody's happy with it, especially since if I really wanted correction to be already applied at file opening I could just tick that box in the preset....
Thanks Paolo. Nice to know the reason
i've run into this with my APS-C Fujifilm XT-3 before. i added iridient x-transformer to my workflow when i moved to Fujifilm to give me control over things like lens correction and to create a clean dng for use in lightroom since adobe isn't great with resolving x-trans files.
So I understand this is a work around?
This also occurs with stacking Milky Way photos and why when I make my editing tutorials I recommend not ticking the lens correction box.
Never thought of that, but indeed. Thanks
Interesting. I sat up for an hour last night hoping to catch some action during the Eta Aquariid meteor shower. But zip...not a single streak.
In a related image effect, who's seen a random dot image? If you know how to look at these, there's a striking 3D image hiding inside. Send yourself nuts, try it!
http://pages.cs.wisc.edu/~glesener/stereograms.html
This is also a problem with the new Nikon Z series cameras with the Z series lenses. Built in corrections non removable in Lightroom. Becomes a major problem when you stack Milky Way photos to remove noise. I haven’t found the problem when I use F mount lenses on Z camera though
I have used the Z 7 for a month or so, but did not do any startrails or stacking. Should have done it.
Note that the results the author got using Rawtherapee are poor because the author is using an out of date version, and doesn't understand how to get the best image out of it. Rawtherapee does in fact have lens distortion correction capabilities (just not enabled by default), and using the current Dynamic Range Compression module and wavelets, can get a similar punchy image feel as Lightroom can. See http://rawpedia.rawtherapee.com/Main_Page if you want to learn more about Rawtherapee, a very powerful raw editor.
What a strange remark. My results weren't poor with Rawtherapee. I think you did not read the article very well.
And about the version; when I ran into this problem, I downloaded the newest version.
Perhaps you should read my article again.
Can confirm the moire effect on Canon S95 (and I'd guess the S90, S100, S110, and S120 - all the same series). I do time-lapses of sunsets as well as star trails with my S95 and have been really frustrated by this! Thanks for the tip on rawtharapee - I've looked at it before, but didn't realize it could disable/ignore this effect. Thanks for the legwork, it's much appreciated!
I'm so glad I found your post. This has been driving me crazy! I really don't understand why this isn't all over the internet or why Fujifilm or Adobe haven't found or posted a simple fix for this. My only question is, okay, I got Raw Therapee, opened my Fujifilm photos... now what? Do I simply resave them? And how do I do that. Guess I need to look at some Raw Therapee manuals. I was trying to figure it out from your screen shots, but I only know English and Spanish, haha. Thanks again!