Neutral density filters seem to be all the rage these days. If you are a landscape photographer, ND filters are a crucial tool for smoothing out rough water and giving your skies a nice blurred effect. For portrait photographers, neutral density filters are great for maintaining wide open apertures in super bright situations while using strobes. Recently, we tested five different brands' filters to see which one produced the sharpest and most accurate color renditions. The results were pretty shocking.
As the owner of Fstoppers, I personally get tons of emails and messages from all sorts of manufacturers, distributors, crowd funders, and startups claiming that their particular product is better than the competition. Since Fstoppers is not sponsored by any camera company, we are in a unique situation in which we can pretty much review any series of products and pit them against each other in an all out "winner takes all" competition. Some of our reviews are pretty subjective, based on our own desires and applications (take our Sony vs. Nikon vs. Canon high-megapixel camera shootout video, for example), while others are much more objective in nature. In today's neutral density filter review, we find ourselves in the latter category.
If you have ever been in the market for a neutral density filter, you have probably read or heard that "this brand" has the most color-neutral filter, or that this company produces the absolute sharpest filter glass with a highly sophisticated xenon astrospace coating that makes your images suddenly come to life. As a photographer who values capturing the highest quality imagery, I can understand how one might buy into this hype and shell out a couple extra dollars to buy the best of the best. But most photographers simply read the reviews and make the plunge once or twice, hoping that they have made the correct decision. Recently, I was able to test five of the most popular neutral density filters side by side and see for myself how different ND filters affect the overall image quality of my photographs.
The Setup
As I explain in the full video above, I wanted to approach this test a bit differently than what I've seen on other websites. Instead of opting to take these filters out into the "real world" and photograph a beautiful landscape, I wanted to run my test in the studio and reduce as many variables as possible. Since I use neutral density filters much more often for portraits than landscapes, this seemed not only like a great variation on a common test, but one that would produce the most compelling results as well.

Simple one light studio setup against white cyc wall.
In order to reduce any outside variables that might be caused by our atmosphere and changes in weather, our staff set up a simple experiment station in our studio. We used one Nikon D750 camera outfitted with a Tamron 24-70mm f/2.8 lens (our favorite all-around lens for both video and stills) so that every filter would be shot on the exact same camera and lens system. This lens was set to shoot at the widest setting (24mm), and we set our aperture at f/8.0, which would reproduce a common setup any landscape photographer might choose. We then used a single Profoto D1 studio flash firing at a white cyclorama wall to emulate our constant sunlight. We kept this light hard-edged so that no light modifier fabric would add any color to our tests.
The Filters
For this test, I decided to use neutral density filters with six stops of light-blocking material. Having six stops of light reduction is pretty heavy for any serious studio work, but as I found working with Elia Locardi for his Photographing the World landscape series, six stops is a very common filter density for many landscape photographers. Elia actually includes a 1.2 and 3.0 ND filter in his signature Formatt Hitech Kit, which correspond to four stops and ten stops respectively. So, for this test, I wanted to split the difference and use a six-stop filter since it would cover most of the exposure times desired by landscape photographers. With a six-stop ND, you can take a relatively short shutter exposure of say 1/4th of a second, all the way to 16 full seconds.

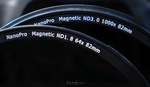
Hoya, Tiffen, Formatt Hitech, B W, and Breakthrough Filters.
For the actual brands we tested, I wanted to include some of the most respected filter manufacturers, as well as a wide range of prices. Here are the actual filters we used; I've linked to them on B&H so you can see the overall reviews and prices.
Tiffen 82mm Neutral Density 1.8 Filter: $139
Formatt Hitech 82mm HD ND 1.8 Filter: $101
B+W 82mm 1.8 ND MRC 106M Filter: $286
Breakthrough Photography 82mm x3 Solid Neutral Density 1.8 Filter: $179
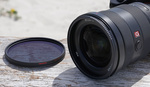
Keep in mind that all of these filters are the 82mm threaded type so that they would fit perfectly on our Tamron lens. Many landscape photographers, like Elia, prefer square filters and a filter holder instead of the ones that thread directly onto the lens. I did not test these square filters, but I do think they might have significantly less vignetting because of their overall design. Keep that in mind when reading this review and ultimately choosing which filter system to buy.
The Tests
In order to see which filters were the absolute best bang for the buck, I had to come up with a few tests. The main things I wanted to compare between the five brands were color consistency, overall sharpness, and the amount of vignetting each filter might add to our photograph. Upon running these three tests, I soon realized that not every filter produced the exact same exposure, so I added an exposure test that compared the overall darkening effect caused by adding the filter to the lens. It was clear not every filter was actually cutting light by a full and constant six stops. By using Lightroom's histogram, I was able to match the overall exposure from each filter to an unfiltered control image to see how much neutral density power was being applied to each of our images.
Another thing I wanted to see was how easily I could remove any color casts that were introduced by any given filter. For this test, I used Lightroom's custom WB dropper tool on a specific area of the Fstoppers Flash Disc gray card. This allowed me to average out any change in color caused by the filter and, in theory, get five images with the exact same white balance as our control image, which did not contain a ND filter.
The Results
If all you are really interested in which filter performed the best, then this is the section to read. In a nutshell, each filter did display some sort of color cast when compared to the unfiltered control image, and every filter did display some level of vignetting. So, on one hand, none of these filters really passed with flying colors when you compare the images straight out of the camera. On the other hand, though, almost all of these filters were pretty acceptable when the raw files were processed and corrected for both color casts and slight exposure differences.
Color Cast: The animated GIF image below shows how all of the filters compared with the unfiltered control image. As you can see, every filter added some bit of color cast to the image. The most extreme results were produced by the Tiffen and Formatt Hitech filters, while the Breakthrough and Hoya showed the smallest amount of color shift. For me, the Breakthrough looks the closest in color to the control, even though it is slightly cooler in color than the control.

Color cast test results.
Vignetting: The following GIF image shows the differences in vignetting between each filter manufacturer. For this animation, I switched the files around so that they show the least amount of vignetting first and end with the filters having the strongest vignetting effect. As you can see, the Breakthrough and Hoya filters have the least amount of vignetting around the edges, while the B+W and Formatt Hitech have some of the strongest shading around the outermost part of the image. I will note that the decrease in quality required by turning this comparison into a gif does make the results a little hard to see because of the banding artifacts created in the GIF file itself, but you can still clearly see how much variance there is among all five different filters.

Different vignette properties of each neautral density filter.
Sharpness: As I stated in the video, the sharpness test proved to be very difficult in determining a winner. I found myself splitting hairs trying to create an order of sharpest to softest, but I did find the Tiffen and Breakthrough filters to be the sharpest, while of course the control image had the absolute sharpest detail, which was to be expected. Overall, I would say from our tests that no one should really use sharpness as a criteria when choosing a neutral density filter if they are deciding between one of the five filters we tested. Perhaps some of the cheaper budget filters could be softer than any of these, but all five of these particular filters came out with great scores in the sharpness category. I did not include a GIF for this test because the results were so similar and the loss in quality from the gif file would not be useful in making any sort of conclusion.
Exposure: As I mentioned above, I did not set out to compare the differences in exposure because I guess it slipped my mind that exposure would vary from filter to filter. After taking each test image from the five filters, I did notice a slight variance of less than one stop between all five shots. Using the histogram feature in Lightroom, I was able to adjust the exposure to get all the images to fall on the same exposure range. In doing so, I found that the filter with the greatest difference in exposure was the Tiffen filter, which showed 3/4 of a stop more density than advertised. The Breakthrough and Formatt Hitech filters were almost exactly six stops in density, so they won this test if exposure is super important to you. Keep in mind that for many photographers, extra density is actually preferred because it gives you even longer exposure times. So, while I'm not sure this is really a negative result, the density on each of these filters was slightly different.
My Conclusion
I must say, this was a really fun test to run, and I hope you guys enjoyed a studio test of these filters as an alternative to something out on location. From the different tests I ran, it was pretty clear that the Breakthrough Nanotech Filter was the overall winner. It is worth noting that this filter is the second most expensive filter of the group, which still leaves us with the question: "are more expensive filters worth their higher price tag?" In this case, I'm still not sure. All of the filters balanced out pretty well when set to a custom white balance based off a gray card, and I'm sure you could easily remove most or all of the vignetting shown throughout this test. However, if you want the best results straight out of the camera that do not require any post-processing, then the Breakthrough filter really shines, despite being a little more pricey than the other brands.

On the other end of the spectrum, the Formatt Hitech filter we tested did have some of the worst color-casting and vignetting from the group, so I would tend to say it was the worst performer. As stated above with the winning filter, I have no doubt that the overall color cast can be easily fixed in any raw editor, and the vignetting may or may not be an effect that you like in your photography (I kind of do like it for certain applications). It's also worth noting that the Formatt filter was just over $100, making it the second least expensive filter of the bunch. Fstoppers personally owns a few Formatt Hitech 100mm Filters that we picked up while filming Elia Locardi's Landscape and Cityscape tutorials last year, and I have really enjoyed using them. These filters are the more expensive Firecrest Series, which claim to have newer technology in them than the standard filter we tested. To be honest with myself, I would never have really noticed the findings we found in this review out in the real world unless we put all these filters side by side. So, even though my results showed the Formatt Hitech filter to be the clear loser, I have no doubt that you can still produce amazing imagery with it even though you may have to make a few adjustments in Lightroom or Photoshop to mitigate the color shift and vignetting.
I hope this test helps you pick out the right neutral density filter for your own photography. As we always say, great photography usually has little to do with the actual gear and more to do with the photographer, the planning, the concept, the execution, and the post-processing. So, don't get too bent out of shape over this stuff, and spend more time learning, practicing, and exploring your craft and less time searching for the unobtainable "perfect gear."
Since I referenced Elia Locardi a lot in this article, and I have personally learned more from him about landscape photography than anyone else, I would urge you to check out the promo video we made for his full 12-hour landscape photography workshop, Photographing the World. He covers everything: scouting, composing, using ND filters, choosing the right lenses, picking the right time of day to shoot, and everything in-between. Elia's post-processing is absolutely eye-opening not just for landscape photography, but also any genre of photography where you need to expand the detail and clarity of an image. He goes through all of his Lightroom and Photoshop tricks and I am more proud of this video series than anything else I have ever helped create. We also released a much more intense and advanced tutorial, Photographing the World: Cityscapes, if that interests you more than vacant landscapes. Enjoy!


Great article, very informative. You also saved me money, so thanks!
Thanks for sharing, I've been looking for a resource on color cast results from these shortly ago while picking a set for the Zeiss Loxia set of lenses to be used on A7Rii/A7Sii for video. Shooting S-Log on either of those does require 6+ stops of ND if you want to shoot at anything other than F16 in daytime ;)
Ultimately I went with Formatt Hitech Firecrest IRND and like you I did notice a slight color shift but not enough to make it a deal breaker. One thing that Formatt seemed to have no negligible effect on is sharpness when shooting 4K (and pixel peeing the A7Rii stills files) so I kept the set.
Good to hear that Breakthrough live up to the hype - would've bought those if they were available in 52mm at the time.
I can confirm the difference between standard and Firecrest filters. At some point I ordered a set of standard ND grad Hitech filters and had to return them as they were useless unless you were after an 'alien sky' effect.
I then got Hitech Firecrest filters (both grad and plain) and they are absolutely fantastic. The colour cast is pretty much negligible. All of the above were square filters, not screw-in kind.
I agree that you often need a lot of ND to shoot outdoors, but I don't think S-log makes it worse. I rate S-Log on the A7RII at ISO 200.
Eh? Not following you on S-Log on A7Rii at ISO 200? S-Log2 and 3 have a minimum ISO 800 on A7Rii?
Right, so overexpose it by two stops. You'll almost never blow highlights (but verify with the histogram) and you'll get a much cleaner image. If you use a light meter, just set it for ISO 200.
Yeah I get it, I do +2/+3 with S-Log, sure. That still won't get you anywhere close to where you need during the daylight as you'll be somewhere between F11-F16 at 1/50, so the need for 3-6 or more stops NDs is real. I look to keep things at F2.8-8 most of the time, and sometimes go even wider for closeup shots. This is the challenge with shooting S-Log... FS5 looks very interesting with that built-in variable ND, I would suspect that this is going to start showing up in more and more prosumer bodies soon.
Don't get me wrong; I always use ND in daylight, but it's comparable to what you'd use for film. I usually shoot one to three stops above wide open, so I'm at F2.0 to F4 most of the time. If I'm really wide and there's a lot of motion I'll go F5.6 or F8 to be kind to the AC. I avoid variable ND filters because they matte skin at certain densities and you have no control over it.
"Pixel peeing" sounds painful -- I hope it's not contagious! LOL :-)
They don't make a 1.8, and the ones they do are oddly made of plastic.
Sorry, that's not correct, SR filters are metal. And they have 5, 10, 15 and 20-stop solid ND filters, the widest selection available and well known to be the highest optical quality. Use them all the time.
Well to be fair 1.8 is 6 stops and you just said they didn't make that one
You must be a lawyer!
Would be nice to do a follow-up on DSLR video, as that is the other major use case, and it has specific additional factors.
For example at 1080p, you can do away with the expensive end of the scale (all the filters shown), and depending on how a particular camera acquires its 4k, the same may apply there.
Another issue to bear in mind for video is that you are more likely to use a ND with people in the shot. A variable ND is a polariser (its actually two), and at certain angles it kills all skin highlights, giving you flat skin. (not sure how the video was graded/lit, but it may actually show a perfect example of this!).
I use a BW ND1000 and have color problems on all my cameras (greenish), Didn't get an answer from BW.
Anybody else has a similar issue?
Hey Patrick, thanks for testing these filters. You did a great job. Actually I'm looking for a ND filter (set) to achieve a shallow depth of field look when using flash outdoors. You helped a lot with my dicision. Greetings from Frankfurt, Germany.
Really helpful thank you! Patrick I have question, which is the battery grip you're using? is it the Meike? if so, how you like it?
Yes it is a third party grip....I think the Meika with the IR remote option (for photobooths and remote cameras). I've had a few issues with one or two of them (we have 5 for our 5 d750s) but since they are like 1/4th price of a real Nikon grip it's totally worth it. I love Nikon gear but their grips are such a rip off.
Thanks for your ND test. It was a surprise that you did not include the Singh-Ray filters as I think they are the state of the art in the matter (very expensive also). Hope you can test them in the future.
And what about comparison with cheap filters? I'm really surprised that even these pricy ones have so much different results
These are the cheap ones! There are some $40 ones that are total garbage but there are also $200+ ones that are the most expensive of the group. These really fall in the cheap to average price range
Yes, that's what I mean - $40 range. Compared to these "cheap" filters, garbage? :/
Bad timing! I've just bought there Genustech 77mm Eclipse ND Filter (with free 77mm Step Up Ring Set), costing £95 (UK). Hope it does well - shame it's not in your test. I haven't used it yet; now wondering if I should try and swap it for the Breakthrough Nanotech Filter.
Thanks for the review and testing.
I think you should have just skipped the normal "cheap" Formatt Hitech, and went straight to testing the Firecrest version. After all, at $147, it's still cheaper than the other two.
I loved it. I'd love even more an article like that with square filters!
I've seen cyclorama rental http://thecamdenstudio.com/cyclorama-studio/ being used as backgrounds in films, TV shows and commercials, and music videos to easily change the background. But this idea is ingenious. Great article too, lots of helpful information.
This is a really good article and methodology, but the use of 1.8 filters is just not strong enough to fully explore the problem areas. The question is about the coatings on the filter - what wavelengths are filtered and what color casts exist at different strengths.
As we all know, modern digital cameras filter IR and UV light on the sensor. But they don't filter all light. I've tested my D800E and it looks like there is 14.5 stops of IR filtering. What this means is when you put a 1.8 (6 stops) filter on the camera, you are underexposing IR light by about 8.5 stops and that is still too much to show IR light. IR spectrum - which shows as magenta cast - would be insignificant.
Switch to a 3.0 filter (10 stops) and you begin to get enough visible light blocked that an IR color cast can show up. If the filter does not block IR spectrum, the color cast will be noticeable. At 15-16 stops of ND, a filter that blocks IR spectrum is required.
How do you test these filters for IR leakage? You use an IR camera - a converted camera that only transmits IR light. If you have a conversion at 830nm, the light is pure IR spectrum. At 720nm and 665 nm conversions, you have a good bit of red spectrum, but with a converted camera you can still stack a screw on 830nm IR filter and block all visible light for your test. If the filter is really a 3.0 ND filter and blocks IR light as well as visible spectrum, you should see a 10 stop difference in IR exposure.
I tested the Formatt HiTech Firecrest filters using this methodology and found the filters block IR spectrum fully. Color casts from IR do not show up on a conventional camera.
Of course, there are other sources of color casts. It's unlikely, but it is possible a blue cast can come from UV leakage. You can also get color casts based on the wavelengths of lighting used for the test especially with an indoor test. Sunlight is full spectrum and produces a more reliable test for outdoor use.
You can also pick up a color cast from light leakage. Light leaks can come from the viewfinder, focus distance scale, or other small cracks including the mount and focus ring. A good test covers these areas to block light.
One more note - all variable ND filters (as far as I know) use polarizing films. Polarizing films don't block IR spectrum at all, so stacking a variable ND filter with a 6 stop filter is pretty sure to produce a color cast at the higher end.
Umm..... hard G on the Gif. Not trying to troll but this has to stop! Lol if for no other reason than it’s Graphics Interchange Format, not Jraphics Interchange Format.
Thanks for the time and effort to run the test. This should help several people who are about to invest in filters. I just went through my filter pouch being stolen on location and need to buy ALL of them again!
It would also be interesting to have your view on the Formatt Hitech Firecrest Elia Locardi set (square filters) vs these screw on filters. You have watched him use the square filters so it would be interesting to get your two cents on this matter as well. Given that I am buying all my filters again, I have the advantage of not feeling like I wish I hadn't bought the one or two filters which are already in my bag before I make the decision.
Am I the only person who sees the color cast results differently? Both the Hoya and Breakthrough filters give a blue color cast compared to the unfiltered image, yet they're the best? To my eyes the B+W filter gives a much more neutral color which resembles the unfiltered image. Am I missing something?
Would love to see an update to this, using the polarpro nd filters as well
If some people come across this article, I am reviewing ND filters from several brands: Breakthrough, NiSi, Haida, B+W, Kolari Vision, STC Optical, Formatt-Hitech and I also check how they behave with IR light.
Here is my ND filter comparison article: https://www.mathieu.photography/Articles/IR-Neutral-Density-Filters