
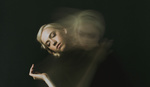
Lighting is key. It has an influence on just about everything we do when making an image. Light will affect what time of day we shoot, where we place our subject, our shutter speed, our aperture, how we edit the images, blah blah blah. You get the idea, right? Understanding and controlling light is crucial to the success of your work. Without understanding it, you are doing nothing more than guessing and hoping for the best. This means you aren't able to create certain looks on the spot and you aren't able to replicate looks that you've shot and loved in the past. Experts aren't experts because they guess, they are experts because they understand the ins and outs of what they do. Just for the record, I'm not writing this because I consider myself an expert but education happens when we share ideas, so here I am sharing my ideas in the hopes that it some of you will benefit from it and will be able to pass that on to someone else.
If you follow my work at all, it should be pretty clear by now that I am a huge fan of back light. In fact, sometimes if the light just right, this happens on set. I'm not here to say that any particular lighting scenario is better than another as they each are great for certain looks, but back lighting has always been a favorite of mine. In the beginning I found myself drawn to it for the imperfections and the happy accidents caused by the sun hitting the lens and over time I have grown to appreciate it for its ability to be specifically manipulated. I used to think that back lighting was all about sun flares but there is so much more to it. Depending on the lenses used, the time of day, and the personality of the subject, back lighting can give you anything from a flare-filled dynamic lifestyle shot to a hazy and peaceful editorial portrait.
TYPES OF BACK LIGHTING
Just like any other lighting scenario, back lighting has it's quirks and can give you completely different looks depending on how you control it. Below are a few of the different looks that tend utilize the most.
SOFT LIGHT
Shooting back lit in soft light tends to deliver a calmer, more intimate image. If you are just looking for that simple soft light, wait until the sun is just below the horizon or hidden by something else (trees, mountains, buildings, etc.) and shoot with your subject completely in the shade. That will give you a soft luminous light that envelops your subject.

5D III + 50L
In this image of Brianna I wanted to bring out a soft golden glow so I shot her when the sun was just barely peaking over the mountains behind her. When the sun is just about to pass below the horizon you are left with a soft wash of light that can bring out a more peaceful tone in your images than you might see if the sun is higher in the sky and putting direct light onto the back of your subject. More from this shoot here!
HAZE
Haze is one of the more versatile looks you can use with back lighting as you can manipulate it to bring out a soft summer glow in a lifestyle image, or you can make it a bit stronger for a completely different look that might fit a harder editorial. If you are looking for a soft hazy glow to come across your image, shoot when the sun is still in the sky (not hidden by mountains or under the horizon), and have the sun hidden just outside of the frame. This will allow some of the stray light to sneak into the side of your frame leaving a soft wash of light and color across your frame. If you are looking for a harsher haze with more flares and light artifacts, allow the sun to shine directly into your lens (longer lenses work best for this) and you will find a haze that has a bit more substance to it.

5D III + 35L
When I set up this shoot I wanted to play with the balance between the softness of the lace and the harder look of the model. Using a hazy back light with the sun just outside of the frame allowed me to mimic that sentiment by having the a softer haze come across the image while still having the sun place a hard rim light on her to define her silhouette.

5D II + 85L II
Holy lens flare! Longer lenses and direct light coming into the lens tends to create a much more dramatic haze that takes over the image. When the sunlight bounces around on the glass in your lens it also creates the random light and color washes you see here. Shooting like this will take a bit of practice to tune it how you like but once you get it, it is a blast to play with.
RAYS
Having streaks of light coming into your frame is a great way to add dynamic energy into your image. To create rays in your frame, your best bet is to shoot with a wider lens which will stretch the light a bit and leave it streaking across the frame. Instead of hiding the sun just outside of the frame or behind something in the frame, allow it to peek in. Whether it is peeking out from behind something in the image, or peeking in from the outside of the frame, make sure that there is a little sliver of direct sunlight hitting your lens. This little sliver is what will create your rays. Also, the more you stop down your aperture, the more defined your rays will become.

5D II + 35L
To create a bit of energy and movement into the frame (which matches and emphasizes the mood from my couple), I shoot with the sun just peaking over the lens hood into the frame. That introduced the streaks of light you can see coming in from the top left corner of the image.
TIPS AND TRICKS
Something you will learn pretty quickly is that every lens handles the sun differently. Longer focal lengths will handle it differently than wider ones and even two different lenses of the same focal length will give you two different results. This is because the sun flare is a result of the sun shining into the lens and bouncing around the glass inside. Since the glass is different from lens to lens (both in shape,and quality), you will always end up with a unique result. Longer lenses will give you larger washed out artifacts while wider lenses will give you smaller and more dynamic flare. The distance the subject is from your lens and the aperture that the image was shot at will also effect the final image. The reason I am telling you this is so you experiment. Shoot with all of your lenses and change up your settings to see what you prefer. I could go into a lengthy explanation of the differences I've found but the best way to learn them is to shoot them for yourself. Don't be afraid to experiment a bit!
One of the more common mistakes that photographers make when starting to shoot into the sun is that they will expose for the sky instead of exposing for their subject. This leaves the subject drastically underexposed and much less of a focal point. The reason that this is such an easy mistake to make is because most of us were taught not to overexpose because you will lose detail in that area of the image. While that is true, The detail that I want to preserve is in my subject, not the sky. I overexpose the sky almost every time that I shoot back lit because the sky isn't my main concern (sorry, sky). What I typically aim for is the limit right before I overexpose my subject. Make sure you read that correctly, I aim for the limit right BEFORE I overexpose. Even if you are shooting RAW, if you accidentally overexpose, you will not be able to get back blown out details in post because the image data is simply not there. A good way to find that limit is to turn on the highlight alert on your camera. Every camera has a different way to turn it on which can be found online (thank you Google) or in your camera's manual without much trouble. The highlight alert will tell you where you have lost the details due to overexposure in your image. Every pixel on your image that has lost detail will flash on your LCD screen. If you see flashing pixels on your subject, dial down the exposure to the point right before it starts to flash. This way if you choose to push it father in post, you still can but the details will remain in your image either way.
Another difficulty you may come across when shooting into the sun is acquiring focus. With the sun beating through your lens and into the sensor the camera will have a hard time finding the point of focus. An easy way to battle this is to focus and recompose. I almost always have my center focus point selected and focus on my subject and then recompose the shot to how I want it before firing the shutter. To battle your misfocusing camera, you just need to hide sun, focus, bring the sun back, and fire. It is a pretty simple process that will save you a lot of frustration from waiting for you camera to focus. Hide the sun, focus and then recompose. Bam! Problem solved.
EDITING

5D III + 50L
Shooting back lit can leave you with images that are a lot more washed out than you might be used to but no need to worry, you can always bring the richness back!
The last thing that I wanted to touch on is editing for back lighting because it can actually be quite a bit different than other lighting situations. In fact, one of the patterns I've noticed during my Editing and Workflow sessions is that most of the photographers I mentor think they are shooting their back lit images incorrectly because they come out so washed out. At least half of the photographers who brought it up said that they typically just throw them out because they can never get the "pop" back into them. Since I LOVE back lighting, I wanted to put this out into the world: Don't get discouraged! Shooting back lit will give you very flat images straight out of the camera. It's okay. No need to panic. When you edit these, bring up the contrast. If you need more, bring up the blacks slider, or bring down the shadows or mid tones in your tone curve. Obviously the amount of contrast that you need to bring back will vary from image to image depending on how much light was coming into your lens (which is what washes out your image), but you can expect to add a decent amount back in to anything you shoot back lit. The good news, it's an easy fix!

5D II + 85L
The sun here was hidden just barely by the mountain behind her which left a bit of soft light coming from behind her to make her pop from the darker background. To emphasize the haziness in the image I shot through a few leaves which I held up right against the side of my lens. Since I shoot with a shallower DOF, those leaves left a soft blur coming across the image. Straight out of the camera I was left with a pretty flat image so I had to bring up the contrast and down the blacks in post to bring back the richness that I wanted.
I feel like anytime I am teach, I wrap it up by telling people to experiment. Well here I go again, the best way to learn the ins and outs of back lighting (and anything else) is to experiment with it. Shoot with different lenses, put the sun in different spots in and out of the frame, shoot at different times of day, etc. The more you experiment, the more you will learn what works, what doesn't, and why. Happy experimenting!
If you felt like you learned something, feel free to pass it along. Education starts when we share ideas. Long live back lighting!


Great read!
Thanks Shawn!
very nicely written!
Thanks so much Bryan
Nice article, and great pictures, too.
One thought of mine to the camera's "highlight alert" : As far as i know, the highlight alert in the camera is based on the preview-jpeg the camera creates for each raw-file. So, when editing the raw-file on your computer, you can restore usually lots of details out of the already as "highlighted" labeled areas of the image, because this areas are not overexposed in the raw but only in the jpeg.
I don't know if the histogram is computed out of the jpeg-preview or the raw file is used, but maybe it is more reliable to look at the histogram if the picture ist overexposed or not.
But yeah, I know, this is more a theoretical thing. During a shooting, the highlight alert is absolutely a nice-to-have feature :)
Thanks for the input Thomas. It's great to hear another side of things!
Great article. Concise and to the point.
Thanks for the kind words!
Nice write up Ben, I pretty much shoot exclusively back lit images and find it's a great way to get your head focussed on other areas such as expression and pose. Thanks for sharing :)
You're welcome PJ. Thanks for the compliments!
Do you use strobes or just bounce the light back with reflectors? Love the pics from the haze part of the article.
Thanks Toni! I didn't use either. I typically wear a lighter and neutral colored shirt to bound a tiny bit of light back, but for the most part I like to keep it natural. The reason I do that is because I like to have the backgrounds of my image be a bit brighter and if i bounced more light into my subject, I would have to stop down more which would make my background brighter.
Thank you Ben.
Great Article!
Thanks!
Great article!
Glad you enjoyed it!
Great write up Ben!
Thanks Kyle!
Very well written! I love back lighting as well and I think I'm going to give a few of these tips a try Thursday! :)
Thank you! I hope the tips help out today!
Another thing I find that helps is, when you're shooting backlit subjects, get in the habit of switching your metering mode from Matrix or Evaluative, or whatever it's called on your particular camera, to Spot. And then place your metering/focus point right on the eye of your subject.
If you have your AF and metering coupled -- through half-press of the shutter, or keyed to the AF-On button, as I do -- then you may still experience difficulty locking this in. In which case, use Ben's suggestions above for overcoming this, shift back to your preferred shooting angle and snap.
I find the spot metering on my D700 to be so reliably accurate that I pretty much never switch off it now, even for subjects that aren't backlit. You gotta be careful about where you place your metering point, though.
Thanks for the insight Jonathan. I always use spot metering. When I shoot back lit I typically meter by eye though because the light coming into your lens can play tricks on the metering and may send you far off in the wrong direction.
Thanks for the editing tips!
Of course!
Nice ! thank you a loooot for this article !
You are welcome!
Yes!!! Just took your self paced class for editing and workflow- excited to see a post by you on fstoppers! Thanks!
Oh cool! i hope you enjoyed it!
As a newbie, one question I have about this kind of technique - is it OK for your eyes to be looking through the viewfinder at the Sun? I've seen different viewpoints on this: some people say, no, it's bad for your eye to look at the Sun through a lens; some say they use Live View; and others say that Live View is bad for the camera because it exposes the sensor for too long too the Sun and could ruin the sensor.
I'm interested in what your experience is, and what (if any) precaution you take?
To be honest, I have never had an issue with it. Sure, you shouldn't stare into the sun, but shooting back lit and seeing it through your viewfinder doesn't even compare to that. I don't find it to be a problem for me!
awesome article since this is based on most of my work. Love backlighting!
New to the idea of backlid, thanks for sharing the amazing writeup. Looking forward to your next article
Great article Ben!