
The impact of the final composited images depends more on the directing of the cute little model, than the image manipulation trickery. In this article I will share how I did both.
Surprisingly, we didn't have the budget to build a scene with flying islands and we had to make the series with the help of computer-generated imagery. Respect to those who have made such images on real sets.
The Project
"Alice in Wonderland" is a license to execute any fantastic and defying-the-laws-of-nature ideas. It also allows you to use any means to turn those into tangible visuals. I had a client who wanted me to do such a project and I was given the creative freedom to think of concepts.
Preparation
The ideas had to obey the direction given by the original book, the cartoons, and feature films on the topic. I watched as much as I could from them and left the content marinate in my head. Every idea that popped up in my head was sketched or taken as a screenshot from a film. I got 17 different scenarios and we finally decided to create five of them as composites, although we photographed the model for most of the others too. The only prop I brought was the map. I created it out of two glued 8 by 10 sheets of paper, each of them dipped in coffee and dried.

Some of the 17 ideas that were finished as composites
Location
I wanted to use real props as much as possible and being outside provides the lighting and the environment I would need for the job. I could also photograph quite a few real, non-manipulated images of the model. A local park was ideal for that purpose.

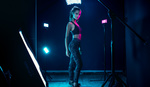
Lighting
These photographs can be shot in many different ways if you have the proper lighting conditions. I planned to use two artificial light sources, but at the end I used only one 53-inch Elinchrom Rotalux octa with an Elinchrom Quadra head. The strobe was positioned on the sunny side of the model and I used the ambient light as a fill. I kept my ISO down at 100, the aperture was set to about f/7.1 or f/8.0, because this is the sweet spot of most lenses. Having the aperture closed down gives me enough depth of field so when cut out the model from the background I may have crisp and sharp edges.

Should You Photograph on a Seamless Background?
In order to cut out models easily, sure, you can use a seamless gray, green, or other color background. I didn't use one, because I didn't want to bring a lot of gear. Having a blonde model in bright clothing would be a fairly easy task to cut out against the greens of the park or against the sky.
Raw Images
The following images of the model were used for the final composites.

Directing
For each scene I had only about five or six shots to choose from. This is very important when working with children that you don't overshoot. For that purpose you need have the technical part down and at the back of your head, while focusing entirely on directing. Children can lose interest very quickly and if you don't keep them engaged in the process, but fiddle with your lights and constantly look at the back of your camera.
In such projects, children must be approached as grown-ups. I usually work with the latter kind of humans and it comes to me naturally to talk to my model as to an adult. On every new scene I asked her to take look at the idea as I showed her a screenshot on my phone. I explained what the situation was and what I was going to put later on the computer. I also described what her expression had to be. Believe it or not, children can be much more cooperative than grown-ups. I was lucky with such a model. After each couple of frames I was asking her to put her jacket on (it was windy) and to come and see the results. I explained to her what I liked about the shots and what I didn't. This is very important, especially if you see your little model not doing what they should. Just talk to them as you would do to an adult. Don't tell them it's OK when it's not.
'Two Days Later...'
This was the average time for me to complete every single one of those composites. I used both photographs and 3D-rendered objects to build the scenes. Most of the midnight oil was burned while rendering 3D in a nice free software, called Blender. The following "making-of" videos are quite long not because it's that much work, but because I'm trying to figure out how things are made in that software, building and trashing objects, until I get them the right way. Throughout my career have made composites both ways: by shooting real props or miniatures, and by creating them entirely as computer-generated assets. It all depends on what you have and what the budget is.
Some Details on the Compositing
When I say compositing, to some it may sound like I clicked a special button in Photoshop and with five awesome (paid) actions I've got what I got. In reality, it's a tedious process of cutting the subject out, placing them on a different background or adding different elements to the existing photograph while matching them as lighting, tonality, and saturation.

Cutting Out
I don't like it, but have to use the Pen tool sometimes. Cutting out may not be a glorious process, but someone has to do it. When I can, I tend to just use a mask with a white and a black brush, but the Pen Tool is frequently a time-saver despite the "love" it gets.

Cutting Out Hair
One of the most common difficulties with compositing from images that have been shot on-location, is cutting hair out. If the hair is nicely separated from the background you can make a mask with the Quick Mask tool and then refine it with the Refine Mask utility. In my case I didn't have that luxury all the time. I had the same issue with the image of the dog.

In both cases, I roughly cut out the subjects and then manually painted the hairs back by sampling colors from the original image and a standard "hard" brush of two or three pixels of width and then blurring the hairs a little.

Here's a detail from a completed hair-painting.

Final Images
Those are the final images. One of them took only a little darkening a spot in Photoshop to create the rabbit hole.


Conclusion
The compositing part in these images is only a fraction of the process. The lack of a suitable model or not having the right expressions would ruin everything. Don't be afraid of working with children on such projects. Treat them respectfully and you will be amazed how cooperative they can be.


Lovely work and thanks for showing how you did this.
I appreciate that
Absolutely agree. I love seeing pieces like this. Thank you.
"Solid fifteen or twenty minutes." That was funny :)
In my case we've got a solid hour which probably makes her a supermodel-child level :)
Really nice article Tihomir. And, like you, I too am the best photographer and editor......in my house. Though some think the dog is quickly approaching my abilities.
Hahahaha