
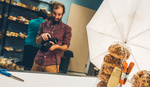
When it comes to studio product photography, we use a lot of tools in the studio. Sure, there’s the obvious: cameras, lenses, and lights. But today I want to talk about one of those little indispensable tools that can really make all the difference on set. If there’s one thing that I’ve learned over the years of working in a studio environment, it’s that you can never have enough clamps! There’s always something that you need to hold in place, or simply rig.
The Almighty A-Clamp
There are many types of clamps each with their own unique strengths and weaknesses. In this article, I wanted to focus on one of the most common, the almighty A-Clamp. Don’t be fooled by its simplicity. This affordable little tool has been around the block a few times and has served many industries since it’s conception. The best part is that they’re super affordable and readily available at any hardware or big box store. Be aware that if you buy them online and see the word “photography” placed anywhere next to it, you’re likely going to pay more.
When you’ve tried as many a-clamps as I have, you’ll soon realize that all a-clamps are not made equal. In fact, there are various sizes and colors, some are made of sturdy metal, some are made completely from plastic, some have a really good bite while others don’t. From my experience in shooting product photography, I find that I prefer the sturdy metal a-clamps with the gray or black rubber grips. Why you ask? Well, if you’re photographing a reflective product, and you’re using a bright colored a-clamp on set, two things will likely happen; 1. You may cause color contamination on your set if the clamp is too close to the product you’re photographing, and 2. You may see the reflection of the bright colored clamp and you’ll have to retouch it out later in post-production. My suggestion is to purchase an a-clamp that has gray or black rubber tips because they won’t cause color contamination and are easier to hide if you're photographing a reflective product.
Here Are Just a Few Real-World Examples of How I Use A-Clamps in My Studio:
Hold Your Seamless in Place With an A-Clamp
I think this is probably the most obvious use of an a-clamp in a studio setting. When using a roll of seamless paper, the a-clamp can hold the paper in place so the roll doesn’t keep unrolling itself.

Hold a Piece of Foam Core on a Stand With an A-Clamp
This example is from my tutorial How To Photograph And Composite A Commercial Beverage Image In Photoshop. As you can see, I simply clamped a piece of foam core on a stand to use as a background for my bottle image. Sure, I could have used a seamless, but it would have taken up a lot more room on set, and it would have taken much more time. Also, note the a-clamp that I used. It was all plastic and had plastic tips that move around on you. I hate those kinds of a-clamps, and I don’t recommend them. That’s what I had to use on set that day, so I made it work. Through the magic of video editing, you didn’t see the struggle I had with this particular a-clamp. But the struggle was real my friends. What should have taken about three seconds felt more like a minute. Again, not all a-clamps are made equal.

Hold a Fill Card in Place With an A-Clamp
This is a behind the scenes look at one of my sets a couple years ago. As you can see, you can use small a-clamps to hold a fill card in place to fill in and soften the shadows on a product.

Rig Products With A-Clamps
Here’s another behind the scenes example from a product shoot that I did a couple years ago. I used two small a-clamps to hold a matte board in order to rig some jewelry. The a-clamps supported the weight of both the matte board and the product in order to provide stability on set.

In Conclusion
Always keep A-clamps handy because you never know when you’re going to need one. It’s good to have a variety of large and small clamps for various purposes. Even if you’re working on location, throw a handful into your camera bag. I can’t tell you how many times these small and affordable clamps have helped me while working on location.
I always enjoy seeing how other photographers problem solve and transform simple tools into creative solutions. I’m curious to know, are you using A-Clamps? If so, how? Post your behind the scenes photos below, I'd love to see them!
Want to Learn More About Product Photography?
Fstoppers and I have collaborated to produce an in-depth tutorial on commercial product photography and post-processing. If you're interested in product photography, be sure to check out my tutorial The Hero Shot - How To Light And Composite Product Photography.


My advice would just be for new photographers to spend time being an assistant in a studio. You'll get to learn all this sort of stuff inside out.
Absolutely true
Very improvised lighting. Simple LED work light clamped on to a small foldable softbox. I've also clamped on a grid for Speedlites. I just love A-clamps - so versatile!
Very cool, thanks for sharing Marius!
I like them for weighing out clothing wrinkles too!
Clever
I've used that little trick before photographing doctors. Sometimes they are a bit too heavy, so I'll use clothespins instead. Thanks for sharing the BTS photo John!