
Have you ever fantasized about transforming a corner of your home into a professional photography haven? Are you eager to cut costs, minimize stress, and craft remarkable images for your clients, all from the comfort of your own space? If so, this article is for you. As a seasoned headshot and portrait photographer, I've recently transitioned from a sprawling industrial studio in Richmond, Virginia to my cozy, basement-based studio in Atlanta, and I couldn't be more delighted.
Along this journey, I've uncovered a treasure trove of inventive and affordable practices for maximizing the potential of domestic spaces. In this article, you'll uncover the perks, obstacles, must-haves, and delightful extras involved in crafting a top-notch home studio without breaking the bank. Regardless of whether you're eyeing the garage, the basement, or a vacant bedroom, you'll gain insight into the vital steps for converting any space within your abode into an awe-inspiring photography studio that captivates your clients and propels your business forward. Novices and seasoned pros alike will discover valuable nuggets of wisdom to enhance their home studio adventures and make them both enjoyable and fruitful.
Home Studio Versus a Leased or Owned Studio

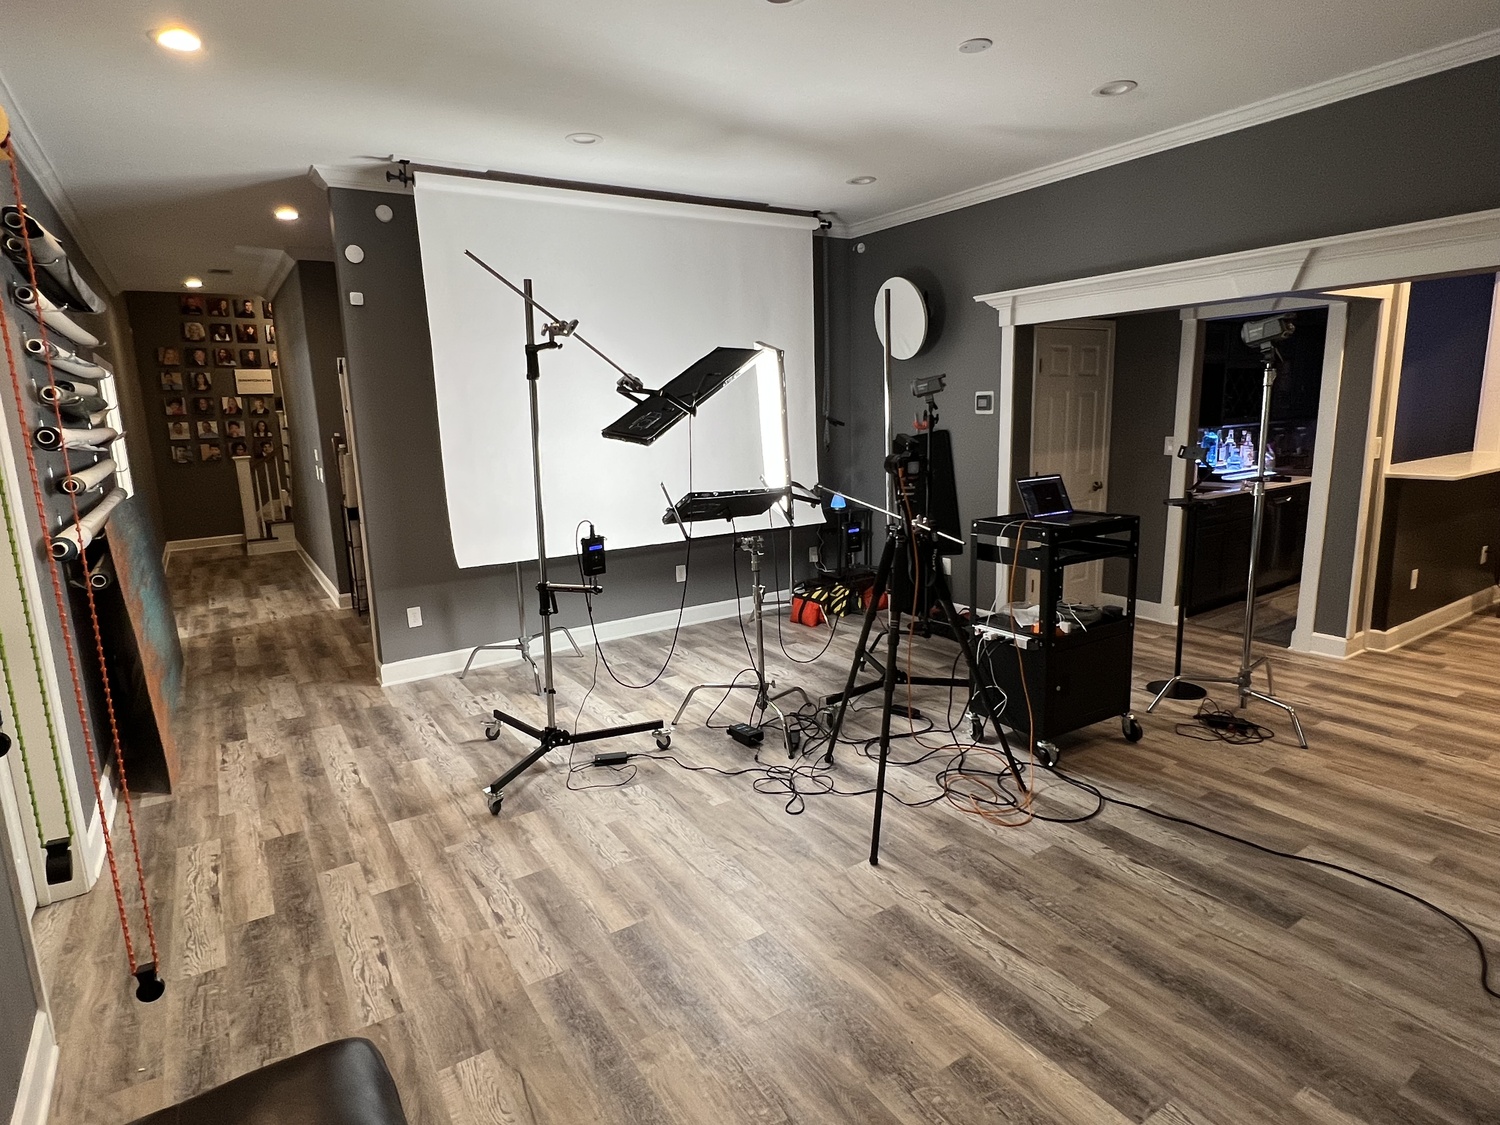
I recently moved my entire industrial studio space from Richmond, Virginia into a modest basement in my home in Atlanta, Georgia.
As a professional photographer, you may believe that establishing a home studio is more trouble than it's worth. After all, you likely have access to a variety of commercial studios equipped with all the necessary space and tools for your photo sessions. However, a home studio can save you ample time, money, and stress while producing equally captivating images for your clients as a larger studio would. Here are some benefits of a home studio that you might not have considered.
Economize and Thrive
My Richmond studio set me back $1,600 each month, which consistently chipped away at my profit margins. For many photographers, renting studios by the hour is financially daunting. During my headshot events in other cities, I realized that hourly or daily studio rentals can quickly burn a hole in your pocket. Rates in Atlanta can be as low as $25 per hour, while I've rented spaces in Washington, D.C. and New York for over $400 per hour. Owning a studio is currently out of the question for me, and as a studio owner, there are additional expenses like maintenance, utilities, trash collection, and business insurance to consider. Renting or owning a studio can rapidly inflate your business costs. In contrast, my home studio saves me $1,600 every month, and I was even able to deduct the studio's square footage as a business expense on my 2023 taxes — a considerable write-off.
Maximize Time, Minimize Costs, and Embrace Freedom
Envision a world where your workplace is just a few steps away, devoid of traffic jams, fuel expenses, and hassles. That's the charm of a home photography studio. You can forgo the cumbersome process of packing and unpacking your gear, commuting to a rented or owned space — 15 miles for me back in Virginia — and assembling everything. A home studio allows you to work at your preferred pace without worrying about studio availability or rush hour, offering you the liberty and convenience to craft your art on your own terms.
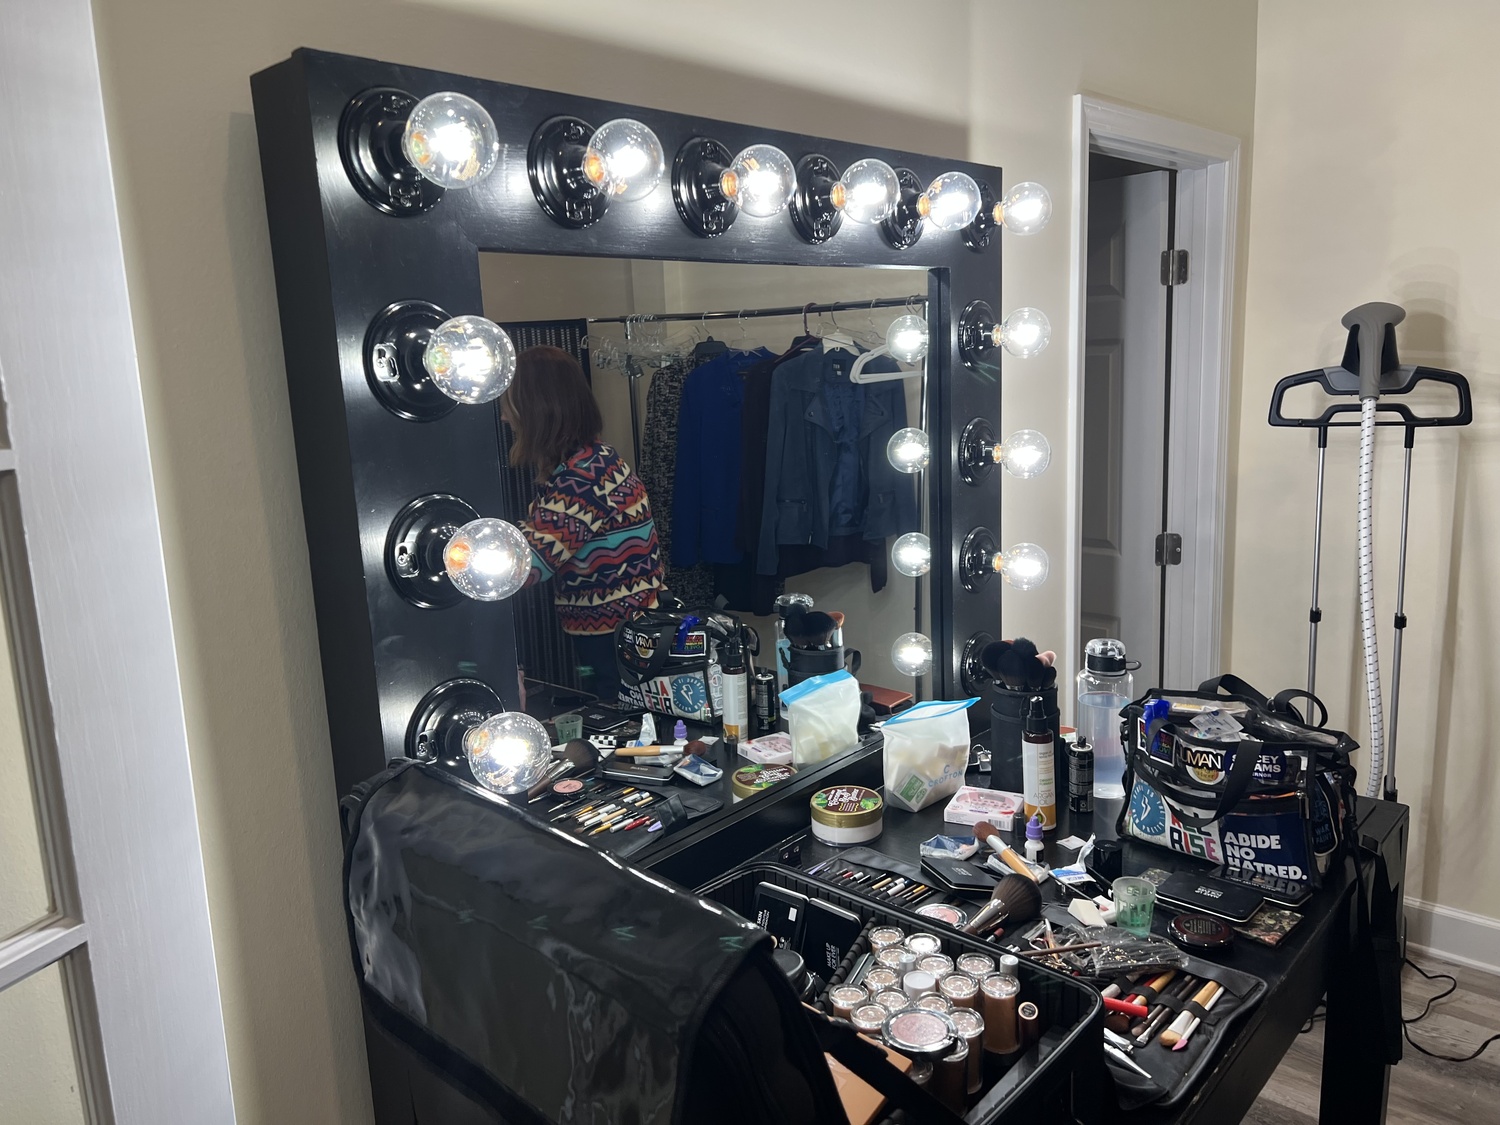
Craft an unparalleled and unforgettable client experience. A home studio provides the opportunity to design a one-of-a-kind and tailored atmosphere for both you and your clients. In my home studio, I created a cozy and welcoming ambiance, putting my headshot and portrait clients at ease from the moment they step inside. While my Richmond studio boasted a larger area, my basement studio in Atlanta exudes a more premium vibe. The extra basement bedrooms enabled me to repurpose them into hair, makeup, and wardrobe rooms, as well as a bar offering clients wine, beer, or craft cocktails. Every little detail counts when operating from your home.


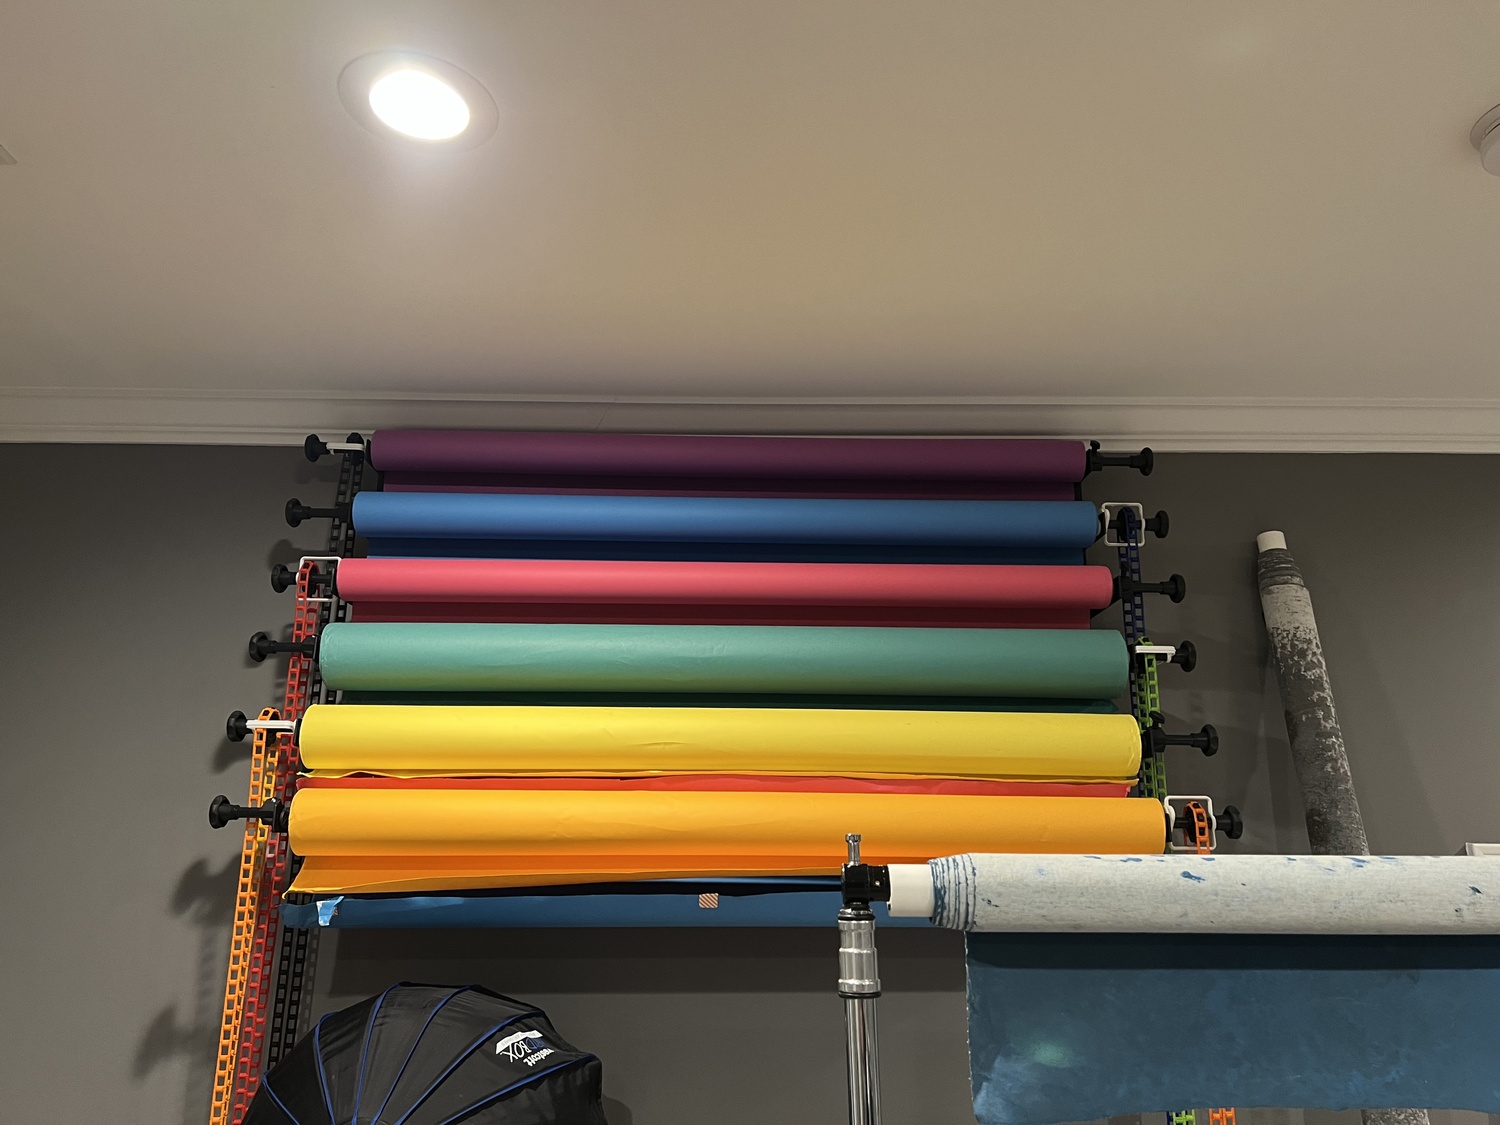
Get creative with storage accessories that can be bought at your local hardware store.
The Hurdles of Establishing My Home Studio
Transitioning from a spacious studio to my basement at home was a formidable task. Although a home studio comes with numerous advantages, it also presents certain challenges that demand awareness and preparation. Establishing a home studio is not a walk in the park, as you may face constraints and complications that can impact the quality and effectiveness of your photo sessions if left unaddressed. Here are some common obstacles photographers encounter when creating a home studio and how to overcome them.
Overcoming Spatial Constraints
A significant hurdle when setting up a home studio is securing sufficient space for your equipment and subjects. You may lack a basement, garage or sizable living area to dedicate to your studio. You'll have to get creative with storage and may be limited in the types of photography clients you can take on. I spent less than a hundred bucks on pegboards, hooks, and clamps, available at most local hardware stores. These must-haves go a long way to help organize your studio. There are also budget-friendly options for mounting paper backdrops to walls. I highly recommend Manfrotto light stand holders and this Kupo C-stand door rack.
Dispelling the amateur myth. Despite the numerous advantages of a home studio, there is a common misconception that shooting in a residential space equates to amateur photography. When the first thing my clients see on Google is a picture of my house, I know it has a tendency to send an inaccurate message about me and my studio. Some people may not realize that a well-equipped home studio can rival even the most sophisticated industrial spaces. This misperception may lead them to underestimate the professionalism and expertise of photographers working in a home studio setting. However, a photographer's skill and the quality of their work should not be judged by the location of their studio but rather by their talent, experience, and portfolio. As long as we deliver exceptional results that surpass clients' expectations, we can successfully demonstrate that a home studio is a professional and practical choice.
Navigating Local Regulations
Prior to embarking on your home photography studio journey, familiarize yourself with local regulations. Depending on your area and photography specialty, you may need to obtain a business license, zoning permit, insurance policy, or tax registration. In my case, I also had to seek special permissions from the homeowners association board, as the bylaws forbid business to be conducted inside the house. I diplomatically brought the request to the board and ensured there would be no trouble or constant traffic through the neighborhood, and they made an exception in my case. Be aware that some clients may be legally restricted from working in your studio due to company policies. In such instances, I typically bring my portable studio to their workplace.
The Fundamentals for Any Home Studio
Understanding the advantages and challenges of a home studio, you may now be curious about the necessary equipment and accessories to be a successful home studio photographer. The specifics depend on your budget, available space, and photography style, but certain essential items are indispensable for any home studio. Here are the fundamental components to invest in when establishing your home studio as well as some hacks for how I started on a shoestring budget.
Dependable Camera
You don’t need a fancy or expensive model, but you do need one that lets you adjust shutter speed, ISO, and exposure compensation manually. You also may need one that can handle low-light situations and capture images in raw format. A DSLR or mirrorless camera with interchangeable lenses is ideal for a home studio. I started with a Sony A6000 and later upgraded to the Sony a7R III, a7 III, and a7 IV when my experimentation exploded into a six-figure side hustle.
Lens Selection
The best lenses for your home studio depend on what you like to shoot and how much space you have. A 24-70mm zoom lens is great for general photography, giving you flexibility in angles and distances. For portrait and product photography, a prime lens with a wide aperture (f/2 or lower) creates a beautiful bokeh effect and blurred backgrounds. An 85mm lens is a favorite for portrait photography, producing flattering results without distorting features. I use different lenses depending on the shoot. When I'm shooting actor headshots, I opt for my 24-70mm lens as it gives me freedom to get as close to the subject as I want. For business headshots, I use my 85mm prime lens. A variety of macro lenses are great if you are interested in shooting product photos, which is also a very good use of a home studio space.
Keep Everything Steady With the Right Tripod
A tripod is an essential accessory for any home studio, as it can help you stabilize your camera and avoid blurry shots. A tripod can also help you achieve consistent framing and composition, especially if you are shooting products or self-portraits. I shoot a lot of corporate headshots in my studio, and companies I work with want a consistent look, not only in lighting but also in camera height and positioning, so a tripod is a must. In my earlier photography, I used a cheap tripod you might find at a big box retailer, but I quickly found that a tripod with a multi-angle column and built-in leveler is best. My go-to tripod is my Feisol.
Elevate Your Home Studio With the Perfect Backdrop
The right backdrop plays a crucial role in any home studio, providing a polished and professional background for your images. Backdrops not only help manage light and color within your space, but also set the tone and theme for each photoshoot. A seamless white paper roll serves as a versatile option for any subject or style, allowing you to create white, gray, or even black backgrounds. For a burst of color, consider Savage Universal's wide range of seamless paper backdrops. For those willing to invest more, hand-painted canvas backdrops from Gravity Backdrops or Backdrops by Ethan Alex come highly recommended. For a touch of luxury, opt for a custom gold leaf canvas from Franklin Backdrops. Easily suspend your backdrops using a stand, wall, or ceiling with the aid of clamps.
Mastering the Art of Lighting in Your Home Studio
Lighting plays a pivotal role in your home studio, as it directly impacts the quality of your photos. Effective lighting allows you to showcase your subject, sculpt shadows and highlights, and enrich the colors and textures in your images. Additionally, lighting helps establish the desired mood and atmosphere for your photoshoots. Natural light is an excellent, free option for any home studio. You'll just want to ensure your home studio space has windows with great natural light pouring in. You may need to diffuse the light with a sheet or curtains, depending on how much light is coming in. If you're just starting out, you may be tempted to buy a lot of expensive lighting gear. That will come in time. In the beginning, it's best to start with more affordable options like speed lights paired with soft boxes or umbrellas. As you invest more in your business, it's fun to experiment with different types of strobe lighting, color gels, and filters.


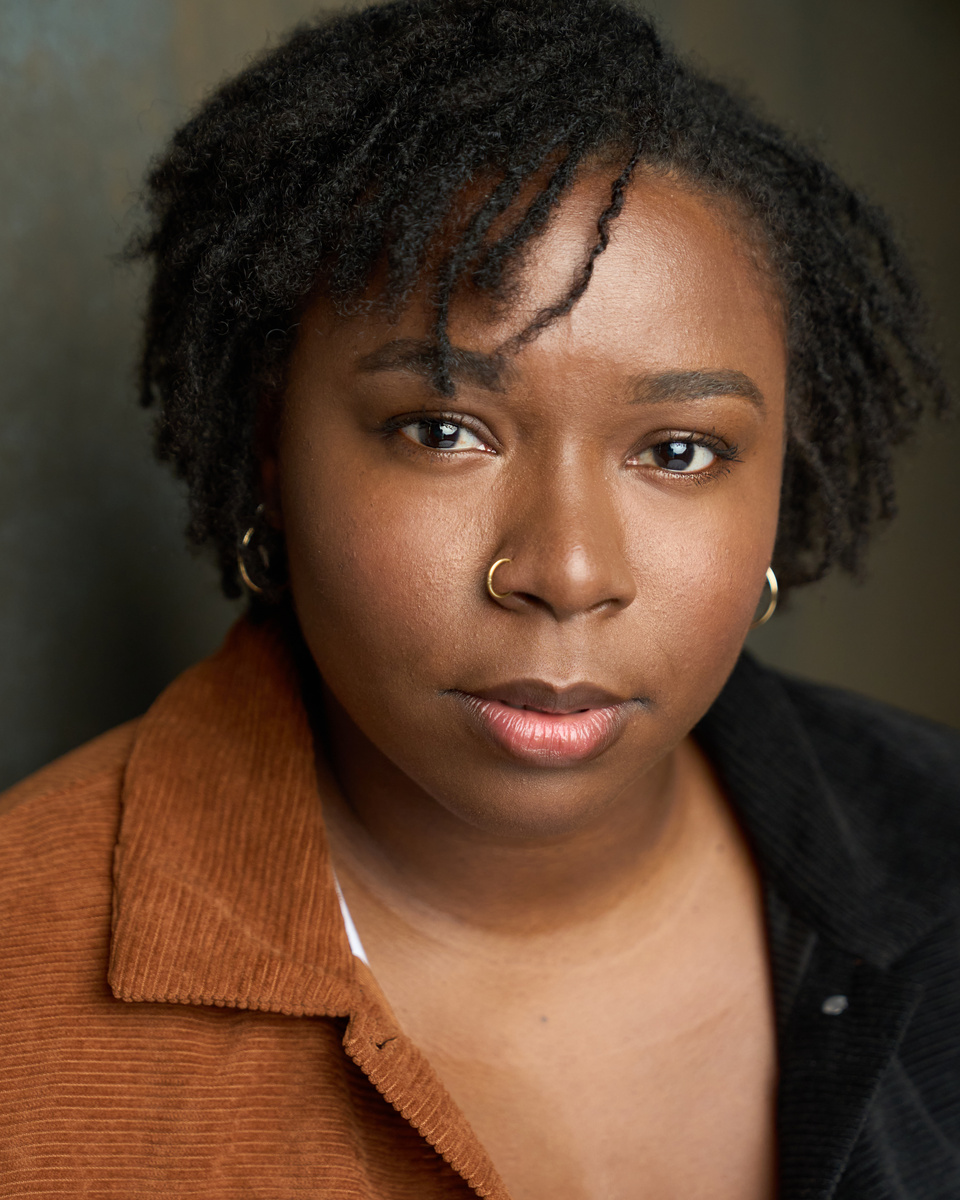


Portraits and headshots using a variety of hand painted canvases.
Elevate Your Home Studio With Affordable Additions and Client Comforts
Having covered the essential components of a home studio, you may now be considering ways to enhance the client experience and spark creativity. By incorporating some extras into your studio, you can provide a premium experience for your clients without breaking the bank. Here are five affordable additions that can elevate your home studio.
- Showcase Your Work With Mixtiles: Displaying your photography in your studio makes a powerful statement. Mixtiles offer an affordable way to purchase and easily switch out images as desired.
- Create Ambience With a Diffuser (under $50): Adding an oil diffuser to your studio can make a world of difference. The calming scents, like lavender, help relax clients and make them feel at home.
- Keep Wardrobes Wrinkle-Free With a Garment Steamer (about $75): Clients will appreciate having access to a quality steamer in your studio, ensuring their clothing remains crisp throughout the photoshoot.
- Organize Outfits with a Garment Rack ($50-$100): Although not essential, a dedicated garment rack can be a valuable addition to your studio. Alternatively, you can repurpose a closet rack to save on costs.
- Impress with a Wintersmiths Phantom Ice Maker: My personal favorite, this ice maker produces clear ice perfect for high-end craft cocktails. Offering your clients a variety of beverages with the perfect ice garnish is guaranteed to impress and elevate their experience.

Throughout this article, I've provided insights on establishing an exceptional home studio without breaking the bank. We've explored the advantages, obstacles, necessities, and additional touches for photographers when designing a home studio. Moreover, I've offered valuable advice on ensuring your home studio is both functional and appealing to you and your clients. It is my hope that you find this information beneficial and enlightening.


Thanks so much for this article, you have one of the best basement studio's that I've seen yet. I also live in the Atlanta area and created a studio in my basement but no where nice as yours. I hope to see more articles like this because it's very inspirational.
Thank you so much! Always love meeting new photographers!
How much did it cost you to renovate your basement into a studio?
The basement was already finished and most of the materials came from my previous studio. All in all, I spent about $500 on new things like pegboards, hooks, racks and another set of the Neewer backdrop rollers.
I was just wondering if it did cost tens of thousands, whether it would be worth it. In your case, it sure is!
Well a home studio is cost effective and practical. Most photographers don’t have a studio, either because the don’t see the need and value, or due to the cost. Newborn photographers tend to have a room at home.
The only limitation I see is the sealing height. 2.4 m or 7.8 feet limit put a limit to how high you can lift the main light. And also to how big modifier you can use. For a newborn photographer it’s not a problem, for a fashion photographer who use butterfly lighting it will.
This is true for some, maybe many homes. My studio in the basement is a 9 foot ceiling and I haven't found any limitation for the work I do (mostly full body and headshots with individuals).
When I lived in Atlanta area I used the bonus room - a large, open room above the garage. Basement, although daylight walk-out was located on the shady side of the house. And also because no ac/heat in basement. My husband installed a system of heavy duty shade rollers for backdrops so I could simply pull a chain for black, white or gray backdrops. I did headshots as well as a tabletop studio setup for product and floral art photography, and my processing in the bonus room. Everything else was outdoors, on location. Disclosure: I never went pro, although I've sold a good bit of large art pieces. I did not enjoy portraiture (too much pressure), although I'd do the occasional headshot and local social functions. I do love the challenge of photography and the satisfaction of doing something "just right" from start to finish.