
If you’re reading this, the likelihood is that you are currently or were recently a Lightroom user and are looking for better software with which to treat your images. That quest to find the best software is not necessarily an easy one, but it is necessary. While you may change camera bodies, lenses, lights, locations, and styles, the one constant that touches all of your images is the software used to develop them.
Capture One is multifaceted image processing and asset management software. As a raw processor, it is considered the gold standard, supporting over 500+ cameras, and with it comes a uniquely powerful toolset for developing, color grading, and tethering. But finding what is unique about it can sometimes be challenging, and comparative articles are often bathed in ambiguity and dappled with missing information to be suggestive rather than declarative — enough that it makes delivering unequivocal statements a near impossibility. Here, however, we’ll be direct and quickly highlight five things Capture One can do that Lightroom cannot.
Click here for a 30-day full trial of Capture One Pro so you can follow along.
Edit With Multiple Layers
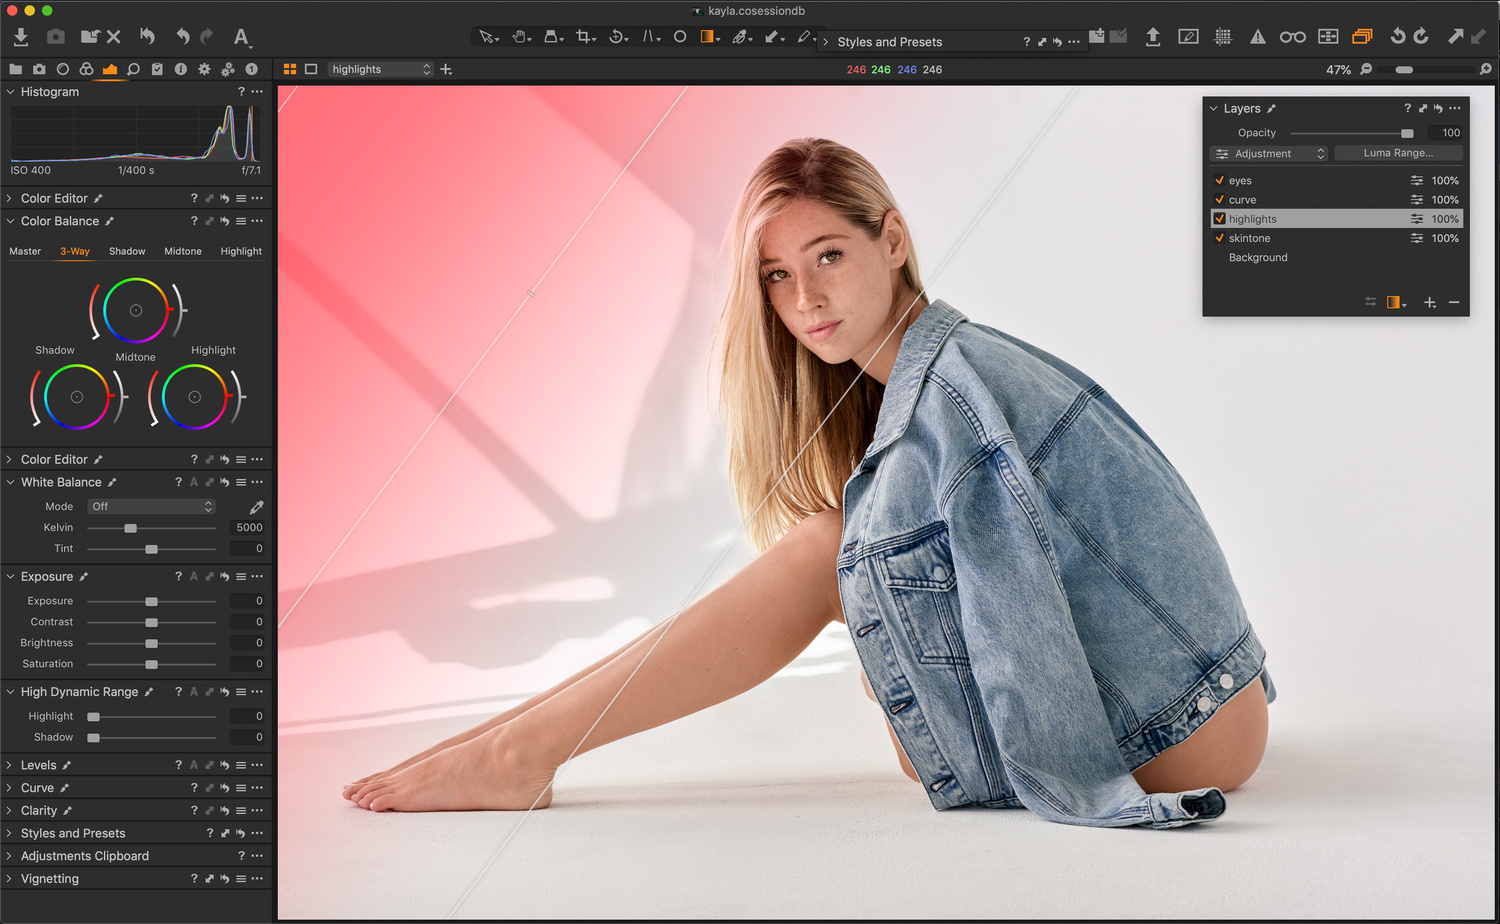
There is no way to overstate just how powerful layers in Capture One are, as they totally change the game in terms of power and flexibility. From high-quality healing and cloning to fine-masking, layer stacking, and layer opacity control, Capture One has a broad range of local adjustments, powerful layers, and layer masking tools that allow you to maximize the flexibility of your raw files. That means you can get the most out of each shot and do more with a raw processor than previously possible, all while saving time.
Each file in Capture One can have layer upon layer of local and global adjustments and the ability to make local adjustment masks from Color Editor selections. This functionality allows users to easily and quickly create more complicated masks and is a huge help when editing any and everything from landscapes to skin tone.
In contrast, Lightroom’s adjustment layer capabilities are almost nonexistent, and they are limited to just a single layer for all adjustments. While Capture One’s layers aren’t as robust as those in Photoshop, the power Capture One provides through layers covers the lion’s share of what the vast majority of photographers need.
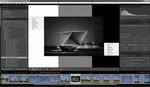
Fully Customize Your Workspace and Thus, Your Experience

Those of a pedantic persuasion might say there’s some argument to be made that Lightroom is also customizable, as there are parameters that can be changed, but its abilities in that department are incomparable to Capture One. Capture One’s entire interface is made of parts and panels that can be moved around, duplicated, adjusted in size, and made to float. You can pull tools out of the tool panels and into the image frame and snap them back when done, you can get rid of specific tools and double up on others, and there’s even a preset workspace that mirrors the look of Lightroom in case you want some help with a transition. Effectively, you can make Capture One look and behave precisely how you want it to.
Change the Default Value of Almost Any Tool for Any Specific Camera
Not all cameras are equal, and neither are personal tastes. If you find that you are consistently changing the base value of a tool when you begin to edit an image, you might want to consider changing the default setting for that tool and camera combo, and Capture One lets you quickly do this.
For example, if you find that you’d like a brighter white point or more sharpness on your images from a particular camera, you can change the value of almost any tool’s sliders to reflect that. Once you’ve done that, click the three dots in the top right corner of the tool you’re in, and select "Save as Defaults for (camera model)." Once you do that, each image from that camera model will have those new default values set.

If you think your images always seem a bit over- or under-sharpened out of the box, fear not. You can change the value of almost any slider and save this value as the new default for your camera. Click the three dots in the top right corner of the tool you’re in, and select "Save as Defaults for (camera model)." Every image from that specific camera model will now have these new default values applied.
Apply a Style / Preset as a Layer and Control Its Strength
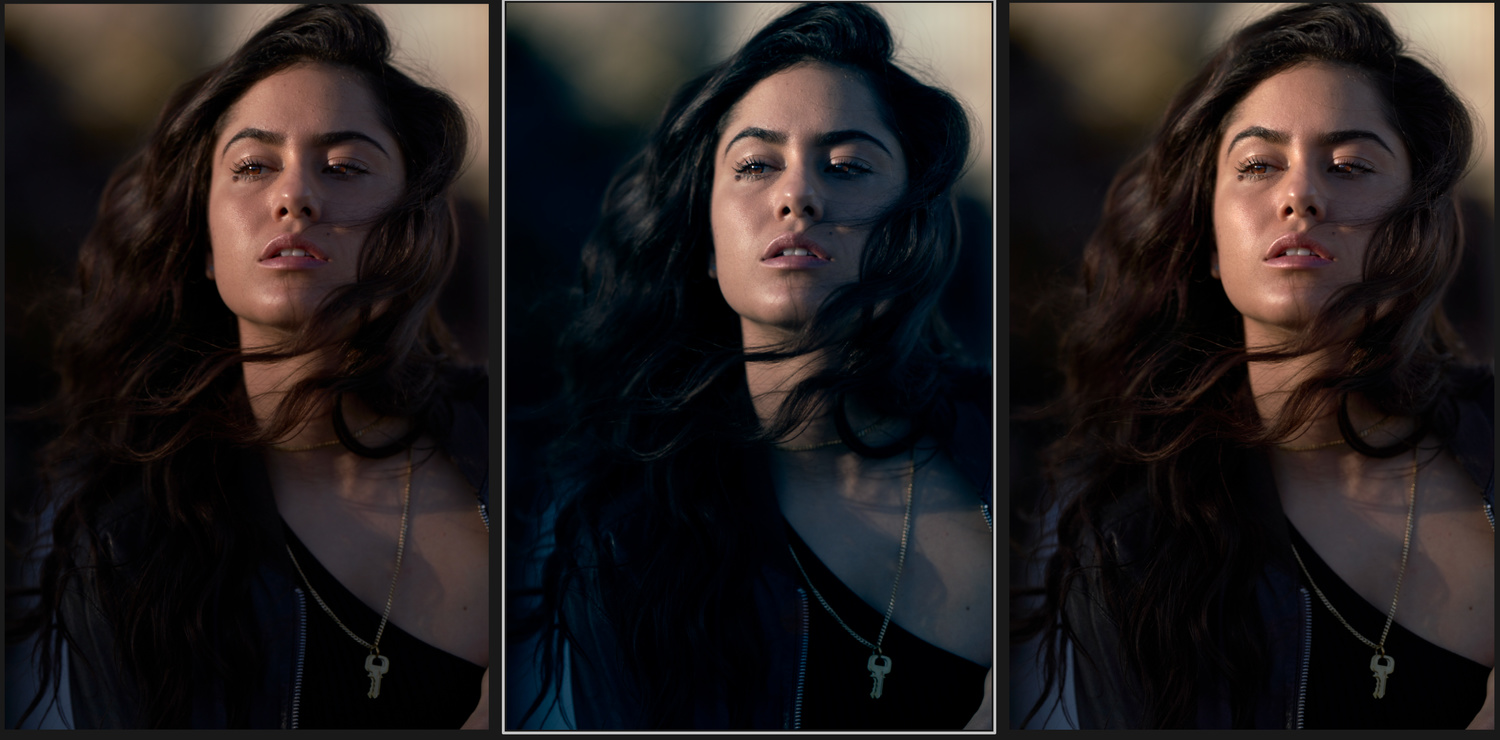
There’s no denying that Styles and presets are common and hugely popular, but what if you like a particular style/preset, but it’s just too strong for your image? In Lightroom, without the use of a purchased plug-in that’s still not entirely integrated, you’d need to go in and change all the various sliders and so on to reduce the effect. In Capture One, however, the story is much different.
To do this in Capture One, you apply the Style or preset as a layer, and then move the opacity slider to control the strength of that Style. That’s it.
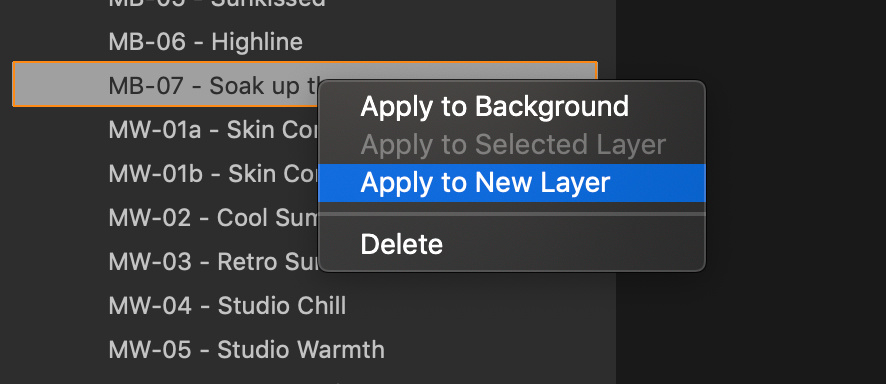
All you need to do is right-click a Style or Preset and select "Apply to New Layer." Doing this will create a new Layer with the name and adjustments of the Style or Preset, and right at the top of the Layers tool, you can adjust the opacity slider to control the level of impact that Style or preset makes.
*This feature requires that the tools included in the Style or Preset work on Layers. Black & White, Film Grain, Basic Color Editor, Vignetting among others don’t work on Layers. If a Style includes tools that don’t work on Layers, a warning will show.
Focus Mask

Since Capture One 9, the software has made it easy to determine quickly and easily if an image is in focus by using the Focus Mask.
The Focus Mask is a robust tool that’s incredibly simple to engage, as all it takes is an icon press. Once pressed, it works by analyzing each image in a catalog or session and determines the sharpest areas. Once it has done that, the sharpest areas of the image are overlaid with a bright color mask. It works quickly and is very accurate, and even better, this feature works in catalog view, which means users get a quick look at what images are to be ignored and which ones to focus on, basically allowing for accurate culling at speed and scale.
Conclusion
There are so many different and deeper ways Capture One is different than Lightroom. We'll address more in the near-future, but while I can list them off, there's no better way to understand it than trying it.
If you don’t have Capture One, this is the perfect time to try it, and you can click here for a 30-day full trial of Capture One Pro, or, if you're a Fujifilm or Sony shooter, click here to download Capture One Express for free so you can follow along.
If you're looking for a quick and effective way to learn Capture One, check out The Complete Capture One Editing Guide.


I have been an LR user since v1. Tethering is why I bought C1 Then I started experimenting using C1 as a replacement to LR Classic. I still have to use LR to do HDR and pano's, but C1 is working out well for me, especially in terms of color grading.
1. Wrong, simply not true.
2. True but meh.
3. More powerful tool defaults for sure, but not a biggie
4. Wrong, you can do exactly this but it's not well documented
5. Correct, and reasonably useful.
A pity the author could not get his facts straight as C1 is in fact excellent, just for none of the reasons mentioned.
if c1 can panoramic in the future and especially hdr then i think about a change, but before that it is not interesting for me.
How about a compare to Photoshop? I'd been a LR user for about three years. Just recently jumped to Capture One. As a portrait photographer, I love the skin tone color editing... and outside of the layers aspect, is the single biggest draw that makes me run far away from LR. But... does Photoshop have this feature (or a similar one)?
The pricing on the Photographer's bundle at ten bucks a month (including a web site host) is killer with Photoshop / LR. Double that for Capture One (and I'd need to pony up an additional $16 a month for Squarespace.
Currently debating this. Not big money, but I'd rather spend $10 than $36 a month if I can have similar features.
LR still can't do luminosity masks can it? This is a huge one for me in C1 and you can apply the masks to any layer. C1 adding luminosity masking has eliminated me ever bringing an image into CS6 probably 90% of the time now. Pretty much the only time I use Photoshop at all is if I need to clone or complex heal. It saves me a lot of time.
Not having to worry about tethering issues during a photo shoot is one of the 20 unsponsored reasons why I love @PhaseOne @CaptureOne. I always thought it was my cables causing issues when it came to tethering in Lightroom. Thank God for @CaptureOne. Perhaps it is time to monetize on my love for @PhaseOne and @CaptureOne. Anyone know the going sponsored rate for a gushing "250 Things @CaptureOne Can Do That Lightroom Can't" review?
Most people have the Photoshop + Lightroom CC bundle and combined with Photoshop and importing as smart objects, you can work with layers as well as change opacity of presets and a lot more.
This of article is so useful, i've learned 2 new things. Thanks!
"Change the Default Value of Almost Any Tool for Any Specific Camera"
You can do it in Lightroom… If you don't know how read the manual……
A couple of comments -
So, which version of LR are you comparing C1 to? It's nobody's fault but the Adobe Marketing Department that they have confused everybody with their product naming, but are you in fact comparing C1 to what is currently being called Lightroom Classic? Perhaps you should so indicate. Comparing C1 to Lightroom CC and letting people think you're comparing it to Classic would be pretty misleading.
If you're talking about Classic, your comment about not being able to "Apply a Style / Preset as a Layer and Control Its Strength" is just wrong, at least in current versions of Lightroom Classic, since you can in fact apply Profiles (which are basically Presets on steroids), and there is a strength slider to control how strongly they are applied. Furthermore, unlike the traditional Lightroom presets, when you apply a profile, it does not adjust any of the sliders, allowing you infinite latitude to make further adjustments. You can learn more about it here: https://blogs.adobe.com/jkost/2018/12/using-the-amount-slider-with-creat....
I'm not a fanboi of any software. It is a tool and I'm constantly looking for a tool which improves MY workflow, even though that may not be the same tool that works for someone else's workflow.
I went from Aperture to LR (for a number of years) to Affinity)+LR) to Luminar (which isn't perfect by any means but works great for me, great for layers. presets, opacity). C1 has been on my radar for a long time but most of the above is easily managed in Luminar so it's not a reason to switch just yet. I'll still be keeping an eye on C1 going forward.
Where is the asset management section? There is none as far as I can tell.
Nice try, but, Me thinks thou protests too much.
Either you are on C-1's payroll or Adobe has seriously pissed in your Wheaties.
I have tried other programs and I find myself back with Light Room every time.
Guess how many of those supposed unique features [in this sponsored article] work with Hasselblad or Pentax MF cameras? None. Fuji MF users have only just been allowed to use C1.
C1 didn't support my one of my cameras camera until after I'd stopped using it. Despite it having DNG files, so no specific support needed.
I will not purchase any software that tells me what camera I can or cannot use.
Getting a little tired of these constant sponsored posts for Capture One. And the "sponsored" in tiny font.
Given the monthly costs of these applications shouldn’t we be asking what features does C1 have that LR & PS do not have? Not sure I’d be happy paying double the monthly fee for C1 after that investigation.
Lightroom HAS layers:
Press "M" and move it so graduated area covers all the image. There, you have it!
And look for that TRIANGLE near "Effect" text. Push it.
Now you can ADJUST all the settings you had in your layer.
Enough lies..
I have CO and Exposure. Both have layers, layers are cool when working with a photo or two. But, and a huge but, they are a hassle when working with hundreds of photos. Sounds like I am in the minority, but I really like the local adjustment pins in LR, I can quickly make local adjustments that include mask range in seconds and move on to the next. If the series I’m working with is similar, I can quickly copy the adjustments and paste. If I need to fade the adjustments, I just click on a pin with the Alt key and tone it down. If and I mean rarely I need to tone down the preset, I use the fader tool that cost me a few bucks and that takes seconds too.
Layers are clunky and unnecessary for my workflow, although it is better in (Alienskin) Exposure, still not worth the effort. If an image really needs that much work, I take it to Photoshop.