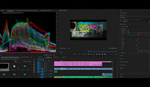
One of the most important steps of the editing process when it comes both to making your images look professional and adding a touch of personal style is color grading. This excellent video tutorial will show you how to complete the process on two different images using Capture One.
Coming to you from Fstoppers alum and tutorial star Clay Cook, this helpful video will show you the process of color grading in Capture One. Color grading is one of the finishing touches of any image, and it's a crucial step when it comes to putting your personal touch on the photo and crafting a certain mood. Capture One has some very refined and helpful tools to help you achieve whatever you're imagining. As Cook mentions, it's a very good idea to step away from your image after you're done and come back to it after a little while. It's easy to go a bit overboard with color grading, and coming back to an image with fresh eyes can help you avoid that. Check out the video above for Cook's full techniques.
And if you want to learn more from the very talented Clay Cook, check out "Fashion and Editorial Portrait Photography: Lighting, Retouching, and Shooting for Magazines," which is currently $50 off with the code SPRINGFS.


I really don't get why you would work on a tiff file especially changing color. the point of capture one is it harnesses all the advantages of the raw file. why work on a tiff file IN CAPTURE ONE when you can be export a tiff file to finish it off with stuff PS can do?
Because it has been retouched by his retoucher. As he said in the video, he doesn't want to color it before it's retouched.
why not color it before retouching?
There are various reasons. For instance, the client that one is working may want to go into a more of a dark, moody way than the version that was sent to them.
If you retouch after it's colored you're locked to that specific color grading. If you color after it's retouched you have much more flexibility with your options.
Good question Yin! While there are many reasons, the big reason why I color grade after the re-touch is because I want to finish the image. In other words, clients often have many re-touching requests that are hard to visualize, such as a sky replacement, location composite or wardrobe fixes, all of which can completely change the harmony of the image and ultimately the mood and subject matter. That is why I color and finish last. Hope this helps!
This video is really helpful. Color grading is definitely one of the most important steps in retouching. I do most of my color work with 3D Lut creator v1.52. There is so much to learn, and it is so fun to use what's available for color grading.
Thank you for watching!
I once got touched.
Then got retouched!
The best tip is to walk away for a bit then take a second look. Rarely do I say "perfect!" when I take the second look, I usually fine tune things up or down.
No doubt man!
Thank you for sharing, Alex!