
It’s amazing what mid or entry-level hardware can deliver when you pair it with great software. The best software will be able to make up for some of the weaknesses and exploit every ounce of its strengths – ideally with relative ease. That's what we'll see here with Capture One's Luma Range tool.
Despite the fact Capture One is often associated with top-tier studios because it's what they choose, the average Capture One user does not fall into that category; they are simply people who want to get the most out of their images, and know how critical software is. In fact, consider that while you may change bodies, lenses, lights, filters, or otherwise, it’s the software that typically remains the one constant that touches all your images.
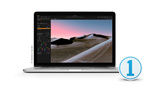
Even old files or files from old cameras often look as though they’ve had new life breathed into them when loaded into better software. Here is one example of a file from an old Nikon DSLR edited with Capture One, without a pen tablet, or brushwork, and in about two minutes using the indispensable Luma Range tool.
If you don’t have Capture One, this is the perfect time to try it, and you can click here for a 30-day full trial of Capture One Pro so you can follow along.

Luma Range
The Luma Range tool is an exceedingly powerful and helpful feature that allows you to apply a mask and refine it to specific areas depending on brightness values. That’s it in a nutshell.
The advantage of this is that it allows you to create the most complex of masks with extreme ease and speed. The Luma Range tool can be used with a global mask over the entire image, or local masks like those made with the gradient/linear tool or brush tool and can be refined as you like. It’s very flexible.
What are situations where it could be used? Anywhere, but for easy visualization, think of situations like landscapes with darker subjects and brighter skies, or portraits where you really want to add a pop to darks and whites, or as you’ll see in this working example, rescuing a throw-away holiday photo, and making it one to cherish.
Here’s how:
Step 1
Create a New Filled Layer. "Filled" means it has a mask applied over the whole image. From here we’ll refine it. In this layer we’ll address the darker values, so I’ve named it something incredibly original: "Darks"


*to see the mask over the image hit the "M" key to toggle it on and off.
Step 2
With the "Dark" layer selected hit "Luma Range" and the following dialogue box appears:
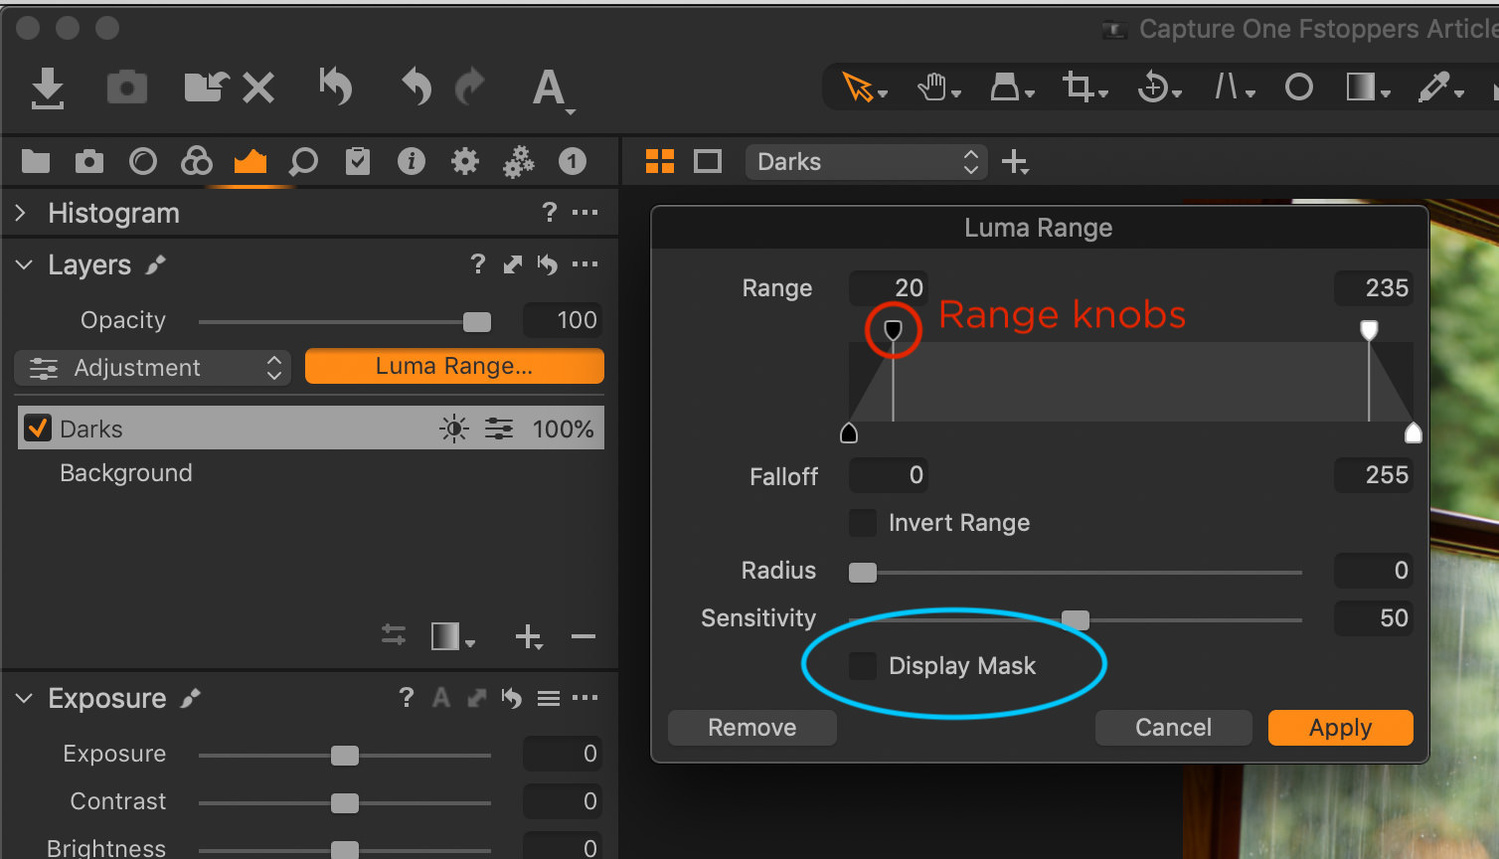
So that we can see what the Luma Range tool will be doing let’s select the "Display Mask" box which will reveal the whole mask. From there we’ll adjust the Range knobs to our liking. The left side of the range represents the dark values and the right represents the lighter values. You can drag the top knobs to adjust the greater values and the knobs on the bottom of the range can be used to adjust the falloff and make for smoother or harder transitions.
For this instance here’s a mask I’m happy with that I'd like to darken and saturate. If you look at the fine details in the trees, side of his face, hair, and shirt, you'll get an idea of how difficult this would be to brush in even with a Wacom tablet. it would be nearly impossible.

Step 3
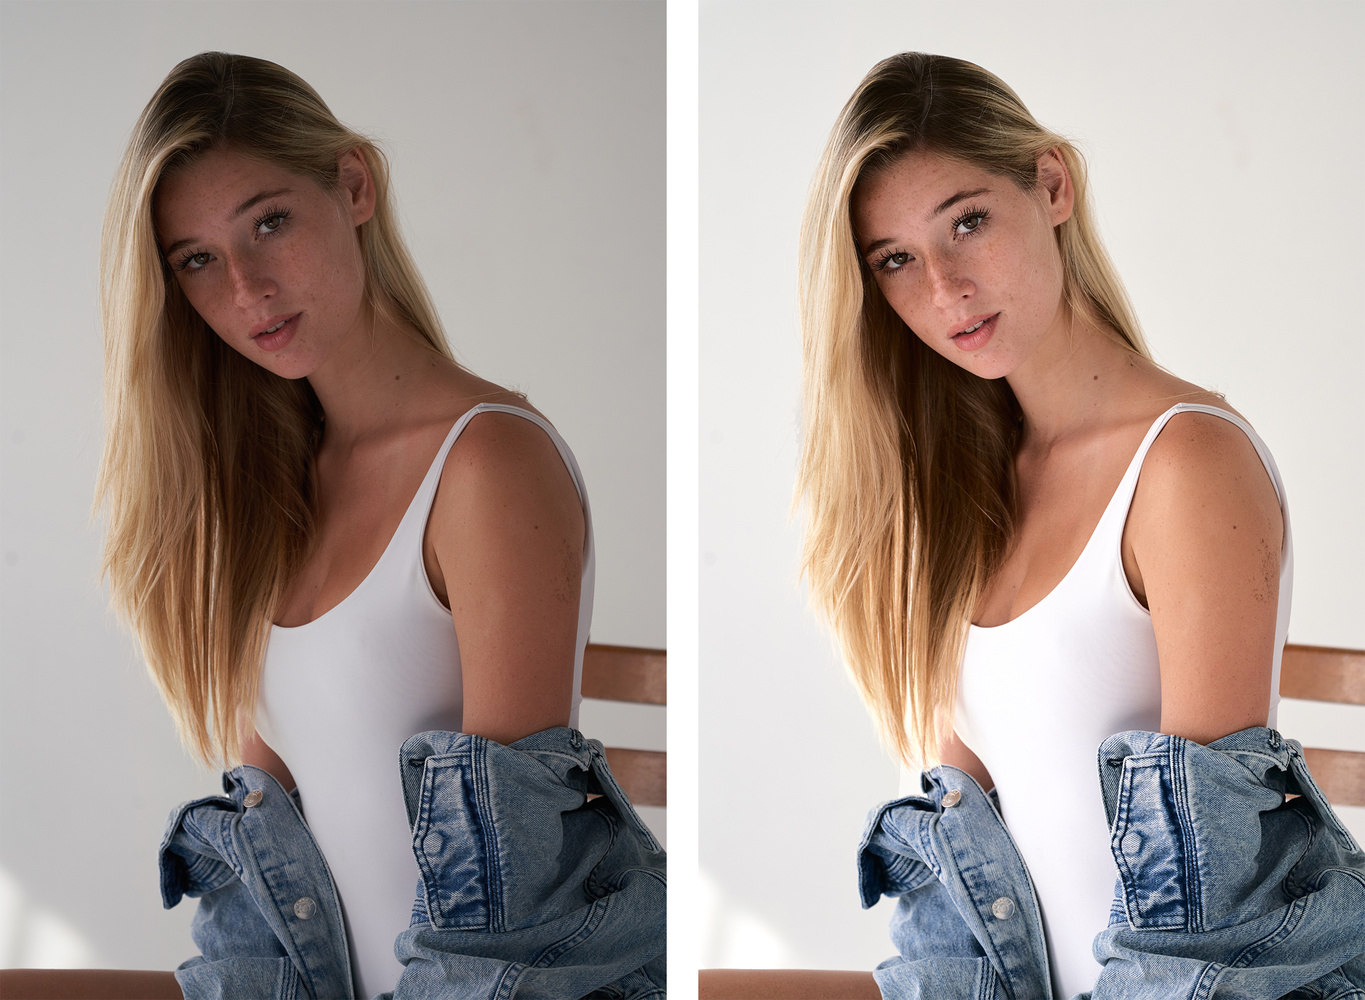
Create another new filled layer and rename it "Brights". Once again hit "Luma Range" and this time create a mask, but this time for the brighter areas. Here’s what mine looks like, followed by a before and after showing the image with the "Darks" layer adjustments applied and then the result after making adjustments (exposure, highlights, levels) within the Brights mask, which is in fact the final image.


That’s it.

Conclusion
It’s really that simple and that profound. You can see the final result below, and click here (search Luminosity Mask) to see a short video clip where David Grover demonstrates it in more detail.
Try this once and you'll be able to do the edit above in about two minutes, and really that's just the tip of the Titanic-sized iceberg of a tool that is the Luma adjustments and Capture One on a whole. It's not something that can be done in Lightroom and above that what's great about it is the ease and fluidity of its utility.
We'll be covering more to do with Luma Range and the other luminosity tools in Capture One soon, so check back often, and you can learn more in the Capture One Learning Hub, and you can download the latest version of Capture One here.
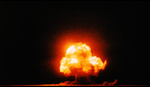
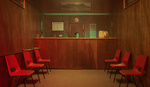
See below for some other examples of images edited primarily with Luminosity masks using Luma Range:

If you're looking for a fast and effective way to learn Capture One, check out The Complete Capture One Editing Guide. a five hour video tutorial taught by Fstoppers' own Quentin Decaillet.

Great! Since luma range appeared, I can’t stop using it :)
Couldn't agree more, Andrés Felipe Bermúdez Mesa. Long time Capture One user here (clearly), but Luma has allowed me to cut down on Photoshop use tremendously. I use it on pretty much every image.
Didn't lightroom have this feature starting in 2017?
About the photo of the kid in the train I should say that globally I prefer the "before" version. The "after" version looks so much unnatural for me, all the dimension/direction of the light has disappeared.
The main problems of the image are the highlights on the kid, and only these needed to be corrected.
I am sure that you can get a very better result using Lumenzia in Photoshop.
Or just use the Camera Raw filter and lower the highlights, maybe lighten the shadows a tad. The whole picture doesn't have to go dark.
That's certainly fair enough, as what you're discussing is personal preference - and for that, of course edit to suit you. But to be clear, adjusting highlights and shadows in the CR filter are global adjustments vs the refined tailored ones via luminosity that this tool allows for. I do like the CR filter, but it's a different ball game. Cheers Michelle
I use the filter IN Photoshop, not the one before I open the picture in PS. I can select and mask the areas I want adjusted. That keeps it from being a global adjustment.
i agree with you!
the whole image became darkened when that, (picture) left, side of the kids face could've been corrected (also in photoshop) and then the image as a whole, readjusted. and Kishore Sawh everyone was 'discussing personal preference' as the article was about this... how to save a 'bad' picture.& make is 'great' is a statement that expresses 'personal preference'
the saying if it ain't broken... well, it'S good to try something new (especially if you have time), but I have many 'bad' images and I make them great, again, with photoshop!
Yeah, ACR is all fine and good for global adjustments, just as C1’s global adjustments are. And if that gets your image where you want it, then rock on. Between the two pics of the boy, one might find one good for an illustration of a train ride, and the other an illustration of wistfulness or melancholia. That’s a personal or task preference. And global might get you what you want. But for a lot of people, global is just step 1, and rarely the last one. And it’s not like one can’t do luminosity masks with other tools, it’s simply that it’s this simple in C1. I find it easier than ALR or Luminar. It’s good to have competitive choices.
Well explained Greg, thanks.
Some of the discussion seems to have lost the plot. This is not about "what I would do instead". It's about what Luma can do, using as an example one photo and what one person did to it, with Luma. It doesn't mean that's what you have to do.
I think it's a great idea - I've been using COP far more than Adobe for the past year, and I'm looking forward to giving this one a try, too.
I can generally get far more life like images with other software than with LR or PS. But then other people will make the same claim about Adobe's. Good luck to them - and good luck to me too! If we were all the same, our photos would bore everyone else to death!