
Earlier this year, I released an in-depth tutorial on product photography with Fstoppers called "The Hero Shot: How to Light and Composite Product Photography." As I started publishing images from this tutorial on Instagram, I found it extremely interesting that the most liked image was the cordless drill. It was the most simple image that I created for the series, and I used very basic inexpensive continuous lighting to create it. So, if I were to have photographed this drill using strobes instead of continuous light, would you have been able to tell the difference? I’ll give you a hint: the answer is no, you wouldn’t have.
Learning How to Light Using Simple Tools
When I started getting into product photography many years ago, I had very little equipment. I had a camera, a kit lens, a cheap tripod, and a passion for advertising photography. When it came to lighting equipment, I didn’t have the budget for speedlights or studio strobes. At that period in time, there were very few options on the market at beginner price points, so I started with a more DIY approach to lighting. In fact, I purchased a few inexpensive work lights lights from Home Depot; you know, the ones with the built-in clamp and silver dish.
I outfitted these silver dished work light fixtures with various wattage halogen bulbs. By doing this, I gave myself different levels of light output to work with. I’d often use the brightest light as my key light. Then, I’d use the lower-powered bulbs as fill and rim lights. I experimented with different size work lights. Some had big silver dishes, while others were smaller. I'd bounce light off of my white apartment walls to create much bigger light sources and used pieces of white foam core to indirectly light my subjects. Equipped with these simple yet effective tools, over time and with practice, I began to teach myself how to modify and shape light.

The Value of Continuous Light Sources
Using continuous light sources in a controlled environment really allows you to train your eyes to see light. Continuous lighting also allows you to easily explore every facet of the product you're photographing in real time. In my early days, I spent countless hours experimenting with continuous lighting over the course of a year or two before investing in any studio strobes. In retrospect, this is probably one of the best things I could have done for myself as an aspiring photographer. Through that process, I taught myself how to see light in a completely different way, and I had a much better understanding of how light actually works. Taking the time to cultivate these skills has proved to be invaluable in my career as a professional image maker.
The Pros of Working With Continuous Light Sources
What You See Is What You Get
One of the best things about using continuous light sources is that you get a real preview of what that light is going to look like before you even fire your shutter. It’s a great way to work, as it allows you to make decisions quickly and make any necessary adjustments on set.
It Can Be Inexpensive to Get Started
Continuous lighting can be very inexpensive especially when compared to purchasing studio strobes. This type of lighting can be purchased at nearly any type of hardware or retail store. Today, there are way more options available than I had when I started. Today’s LEDs are amazing, they come in a variety of color temperatures, they’re cool to the touch, way more energy efficient, and they offer dimmable options as well. And if you really want to take things to the next level, you can buy some of those cool Phillips smart lights, giving you the ability to change the color of your lights without the need to add gels. Rest assured, you can spend as little or as much as you want on continuous lighting.
The Cons of Working With Continuous Light Sources
While working with continuous lighting provides a lot of room for cost-effective creativity, I’d be lying if I told you there weren’t any caveats to using these light sources. Here are a few things to consider:
Light Output Can Be Limited
Depending on the type of light source you purchase, your light output might be somewhat limiting. Let’s say you want to photograph a product at f/16 in order to increase depth of field and still want to maintain a reasonable shutter speed. If you don’t have enough light output from your continuous light sources, you may have to open up your aperture or raise your ISO to compensate.
Longer Exposure Times
Having to increase exposure times means that you might introduce potential for a soft or blurry image. Unless you’re using a super-stable tripod, any movement that is introduced while your shutter is open can cause unwanted softness or slight blur. Without an adequate amount of lighting in place to achieve a faster shutter speed, your shutter will remain open longer and may introduce problems.
Limited Lighting Modifiers Without the Use of DIY
That’s right, unless you’re using continuous lighting designed and manufactured by a photography brand, chances are, it’s highly likely that you’ll have to get creative in the way that you modify your light. This isn’t necessarily a problem, just something to be aware of.

Sidenote
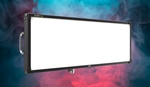
For those of you wondering what light fixtures I'm using in this behind the scenes photo, it's the Impact Single Socket Fluorescent Fixture with the Impact 4 Socket Fluorescent Adapter both from B&H. I highly recommend these fixtures, as they easily mount to a light stand and allow you to add lighting modifiers.
Next Steps and Final Thoughts
In conclusion, you can absolutely achieve pro results from using inexpensive continuous lighting. If you’re just getting started in product photography or any type of studio photography for that matter, I hope that this article has inspired you to start exploring and experimenting with continuous light sources. It’s important to keep in mind that you don’t need high-end, expensive equipment to create a great image. Being creative and having an understanding of how light works should always be your first priority. And if you’re a professional photographer who’s been doing this for a long time, I hope this article inspires you to continue exploring light in new ways.
Interested in Learning More About Product Photography?
If you're interested in learning more about product photography, be sure to check out my tutorial "The Hero Shot: How to Light and Composite Product Photography."


good article.. the title somehow seems retorical :)
Thanks for this, really good article!
You're welcome Maksims Ter-Oganesovs ! Thanks for taking time out of your day to read it :)