As you can probably tell by my work I am a huge fan of composite photography. I chose the path of the composite warrior for a couple of reasons in the beginning. One: My ideas were too big for me to afford all the locations, models, props, and costumes. Two: In the beginning, I wasn't the best photographer (shh!). I was still learning so it was easier to light one section and composite images together later and manipulate each piece in Photoshop until it looked like one cohesive image. Some of you are probably slamming your cameras down right now and screaming "cheat!" at the screen.
Learning in this way taught me how to use my camera better, eventually. But it also taught me about composition, color, light, and how to treat photography like art. Instead of taking a picture, create a picture. In this multi-part series I am going to delve into the art of composite, break it into smaller pieces and hopefully help guide you through what to do and not what to... of course this all my own opinion, others may differ.
I will walk you through the stages of pre-visual and planning, how to add a narrative, the 3 unbreakable rules, how to blend composites like a ninja, styling, and much, much more.

I'm pretty sure by now, that me even mentioning the words composite, there is an old man kicking his bridge camera across the room screaming expletives about Photoshop and how composite isn't real photography blah, blah, blah. Well sit down old man, put your slippers back on, and keep smoking that pipe. Composite has actually been around long before Adobe and Photoshop were forcing... I mean persuading people into subscription updates.
People were doctoring images as far back as the 1860s. An iconic portrait of President Lincoln was actually Abraham Lincoln's head on a southern politician's body (oh the irony). Skip forward to 1910 and portrait photographers were compositing family members together into one photo when they were shot at completely different times of the week. Adolf Hitler even got in on the photo manipulation and edited Joseph Goebbels out of a photo they were both in together. In the eighties, National Geographic manipulated a landscape scene to fit the cover. And the list goes on but I shall not bore you anymore with history.
I hope my point is clear, composite has been a part of photography since the beginning. Yes, the tools have changed and maybe the reasons why, but it has always been here and it is going nowhere. So let us get into it.

Pre-visualization and Planning
An image for me begins without a camera in sight. I am fortunate enough to teach workshops around the world. The one thing I practically beat into students' skulls is that they already have the most important tool by default: imagination! It doesn't matter what camera you have, without imagination you may as well be holding a loaf of bread in your hand, and making clicking noises with your mouth. So how do we get what is in that meat covered shiny dome, onto a screen or paper?
With lots of pre-visualizing and planning of course. Images don't just materialize out of the ether. What you do before picking up any tools is just as important as what is done afterward. The stronger the vision in your imagination, the stronger the final image should be. Not only that, a nice side effect is that the more time you spend on this, the easier the actual shoot and edit should be. Two stones with one bird and all that jazz.
There are numerous stages to pre-vis and planning so let us break it down into multiple parts.

Brainstorming
If you went to school, I'm pretty sure your teacher at some point in their coffee guzzling lives forced you to sit down and brainstorm for a project. You basically get a piece of paper and in a very non-construct way write down every random idea that comes into your head. Write down as many concepts, ideas and pieces of info you can. It doesn't matter if they don't make sense, just freestyle the crap out of it. Once the seed of a concept or image is born on this glorious ink-filled paper we move on.

The First Sketch
As best you can, draw your initial concept and idea on to paper. An idea is only an idea until you give it form. Don't worry, I am the world's worst sketcher, so don't think you have to be Van Gogh to do this, and please do not cut off your ear in frustration! (Get it? Van Gogh, ear, no? Okay). As you can see above, this is my sketch for the goat in a boat composite. Creating the first sketch will help your brain shift gears and begin to think about composition. How will this thing be put together? Once your first sketches are on paper, we now begin to build on this by delving deeper into our concept.
Mood Boards
Every favorite interior decorator and bored housewives past time...mood boarding. Again, I'm pretty sure we have all been forced to create a mood board in school, but hey now we get to mood board things we actually give a crap about! A mood board is basically a collection of images that you can use to build up the various ideas for your concept. People used to cut out pieces of magazines etc., we now use Pinterest or like me, create digital mood boards in Photoshop.
You can mood board every aspect of your concept if needs be. For example, you could create a board of images that contain a similar subject matter to what you will be creating. Or a board of photos that all have people that are lit from behind. You could even have images that all contain colors you want to use. These boards are here to inspire and guide you with your image decisions.
Narrative
If you are wanting to create images that are more than just pretty photos you should also think on narrative. You can do this by quickly writing it down in a notepad. Why? A narrative can add depth to an image. It can be literal or metaphorical. When adding the smaller details to your image later, if you have a narrative in mind, it will be so much easier to create a cohesive composite by selecting the correct details. I'm guessing this is where you may be thinking, "who does this guy think he is, Steven bloody Spielberg?". I wish I would love to have a burger named after me (#Spielburger). But I truly believe if you have your narrative worked out beforehand, your image will be so much stronger. The story will be in the back of your mind whilst directing models and moving lights. Pretty much anytime you need to make a decision your narrative will guide you.
Sketch Version 2.0
By this point, we have put in a fair amount of pre-vis, so it's time to dust off our quills and re-sketch our concept and flesh it out even more! The whole idea should be pretty meaty now, so do this as many times as you need to. It will help you get a solid idea of composition and any specifics (labeled if needed) until you are happy.

Reference Images
So here we are. We made it to the final part of our pre-vis and planning; it's been emotional.
So our final stage is creating reference images. Now we have a solid sketch, narrative, and multiple mood boards. We should have a very well-rounded idea of the image and all the elements that will be included. So our final step is to gather reference images. Reference images are different from mood boards in the respect that they are used as a tool to create in real time, rather than inspiration and idea building. They will help bring realism to certain elements in your image and guide you when creating the more difficult aspects of your image. This is a technique I stole — or should I say borrowed — from the art world. Painters use this technique when creating art.
For example, if your image/concept is set at night in the snow, and your model is stood under a lamp, how are you going to create that in Photoshop? How does it look? You don't want to simply guess what that would actually look like. What you do is type into Google "Lamp in the snow at night" and through the magic of the internet, thousands of images showing lamps in the snow at night will pop up. Instead of guessing what that looked like, you now have real photos to reference when you are creating snow over a lamp at night. With your own eyes, you can see that the closer the snowflakes are to the lamp the brighter they are and it fades off in a circular motion. All you have to do in Photoshop now is mimic real life. How cool is that!? You can do this for everything; how does mist react with window light? Google it, reference it, and use it. Remember in the world of composite we are trying to sell the fake. If you can add realism to even the smallest details, we can sell that this guy is hiking through a jungle with a tiger in pursuit as butterflies waft away in the foreground.

So there we go, you made it through part one alive! Let me know your thoughts. Do you shoot composite? How do you pre-vis and plan?
See you next week for part two.


very cool post
Thanks Joss
Interesting... I've never done any pre vis or planning at all. I have a vague concept in my head and then stick it together. I guess I have to work that way because I'm never really working on just one image. Rather than pleasing one big client I'm instead servicing a myriad of small ones. So never taking more than an hour or two on an image is my rule because if I have stuff in my portfolio that I spent all day on then clients are going to expect that level and I just don't have that kind of time. It does look like fun though. Maybe one day I should try to make a move into the space where I can take that kind of time.
Maybe it is the pricing? If the client is paying the correct price the amount of money should cover the amount of time it takes? Most composite photographers charge too little or don't educate the client in exactly how much time is needed etc
Yes, that's exactly what I meant. At the moment the amount I charge is only compatible with quick work. Lots of small jobs rather than one big one. It works for me at the moment but working out how to find those big clients so I can work for longer on a job should probably be a longer term goal.
Agree. The only way to make a comfortable living in this industry is working with bigger clients. Quick lowered paid jobs do not usually lead to long term sustainability. Put your energy into learning sales and marketing.
nice!
Thanks Pete
Great info - I love compositing but still have a lot to learn. love your stuff - it’s a great process. Glad I got to look at how you do everything. Keep up the excellent content!
Thanks, Gina :)
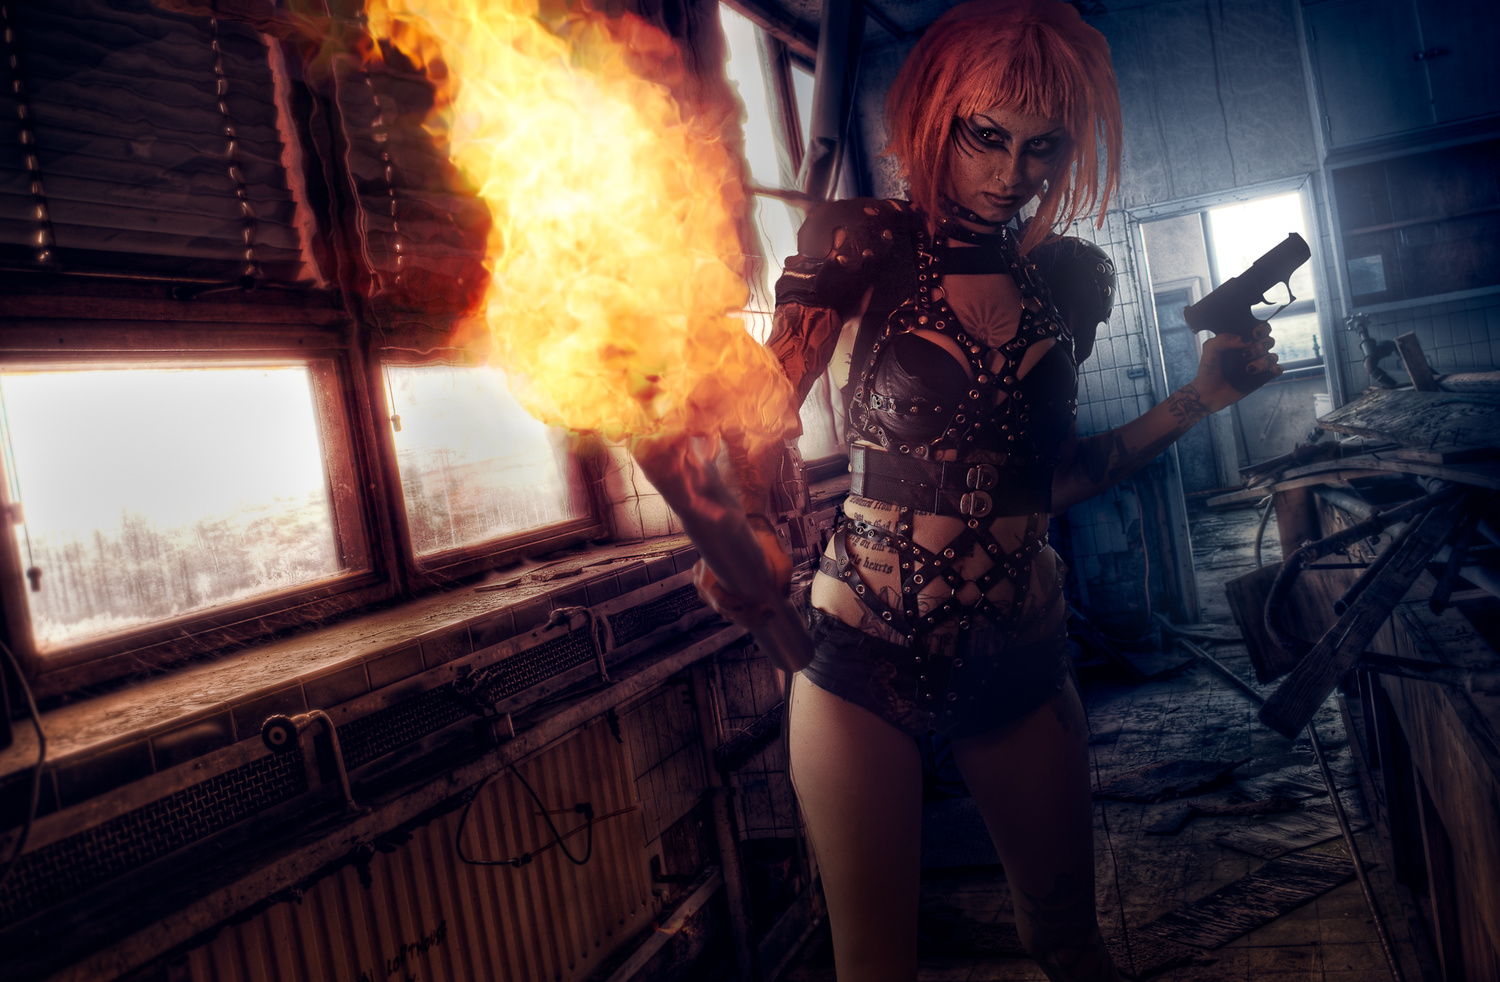
My biggest pet peeve is when every thing in the image no matter the distance is in focus. Not including depth just screams bad Photoshop. Not blurring the cut outs around the edges. Fire looking like a cut and paste. The trick to compositing is blending color tones, creating depth and and using motion blur to give images life. The problem with slapping something cut out on a random stock image is your image might be in raw where the stock is already developed. Or the lighting not matching. I shoot my own stock images so everything comes from my camera so it helps. The biggest advice, see the image in your head and don't stop working on it until it matches what you see.
Hey David. Great work. I follow you on facebook. Completely agree. Composite is all about blending and hiding. A lot of times it's about what you don't see, more than what you do.
I'm actually working on a series of images where everything needs to be in focus. They are based on Victorian era paintings of fairies, and paintings made before photography have no DOF. Different techniques are used to create depth and distance in old paontings.
Sounds great. Please share them once you are done :)
Agree. Thanks for commenting.