
The weather. Of the many things I wish I could control, this is certainly one of them. Recently, my home of Seoul has had some of the clearest skies and nicest puffy clouds that I’ve seen in my 11 years of living here, but typically this is not so. On the few days of the year we get nice clouds, fisty-cuffs determine your tripod’s resting place at the popular photo spots, and the Internet is afire with the chatter of excited shutterbugs. However, there are so many days of the year where the haze is too thick or a monotone blanket of clouds covers the sky. I have come up with a quick and dirty method of dropping in skies from my library that I use when the job calls for it. I’d like to share that with you today.
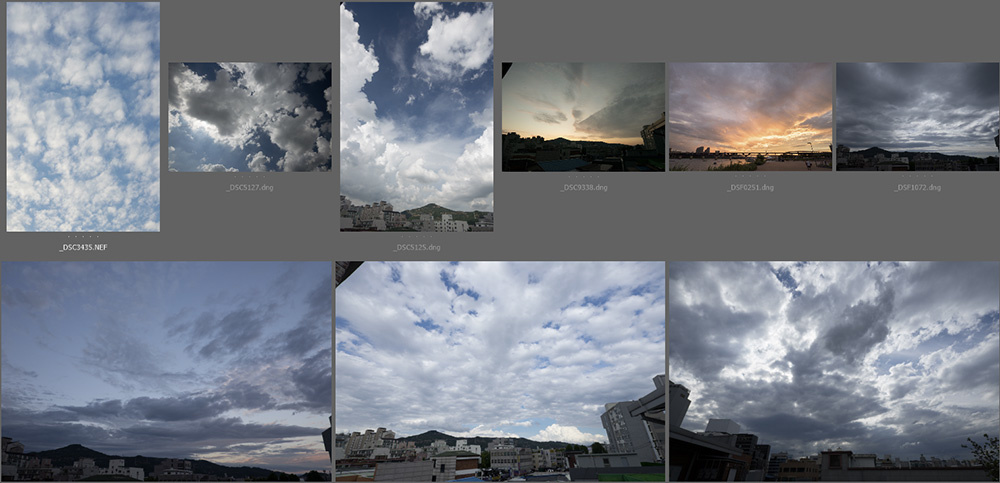
Step 1: Collect Skies
Every time I see a nice sky, at any time of day, I will grab a quick photograph of it. I like to do this with my “real” camera as it gives me a raw file that can be manipulated later on to match the target scene, but I will use my phone in a pinch as well. I collect skies at all times of day so I know that I can replace them for any shoot I do; some are extremely dramatic sunsets and others are simply puffy white clouds at midday.
Step 2: Analyze Your Target Image
The biggest mistake I see people make when they try to replace a sky is trying to force the sky they want to use onto an image it simply doesn’t fit with. More often than not, this is to do with the color and direction of light in their original image. You cannot fit a fiery sunset into a scene that was shot in harsh midday sun.

Step 3: Bring in the Sky
Once you’ve selected the sky you will use, you’ll need to drag it in on top of the target image. The very first thing we’re going to do, before even resizing or moving it, is to switch the blending mode of the sky layer to Multiply. Now that we can see through to the layer underneath, it will be easier to position and blend. This, I have also found to be the blending mode that gives the most seamless final result.


Step 4: Blend
This is where it gets a little tougher. There are several techniques that I like to use and once you get a little practice in, these shouldn’t take you more than a minute or two.
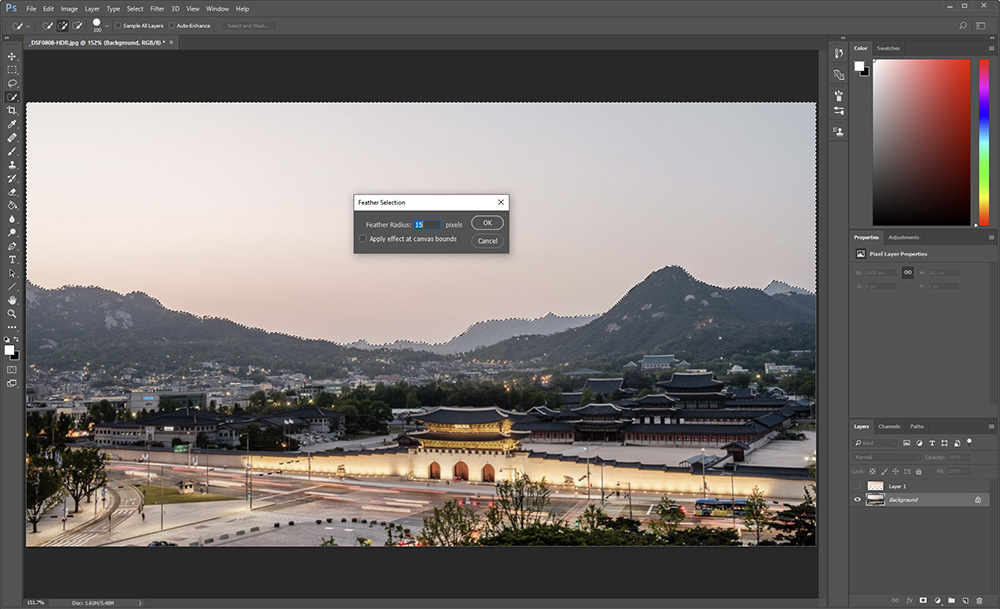
Select and Feather
This is perhaps the simplest technique, and it can work on many images. We need to make a selection of the original sky using your favorite tool. This could be the Select Color tool, the Quick Select tool, or the simple Lasso tool.
Once you have selected the whole sky, we’re going to feather (Selection>Feather) it a little so that we don’t get an obvious transition between the original image and our new sky. The amount of feather will depend on the type of edge between the background and the sky, and also the resolution of your image. For buildings jutting into the sky, a small feather may be needed, whereas out of focus trees and mountains may require more feather for a subtle transition.
Blend If
The second technique is Blend If (double click layer outside of layer name). We can use this tool to all-but-automatically stop the new sky from encroaching on our foreground. It works simply because generally speaking, your sky will be brighter than the rest of your scene. The feathered blend within the Blend If dialog will give you control enough to get your sky blended using just one tool.

The Paint Brush
Of course, you can opt to use the simple paint brush tool as well. Create yourself a layer mask on the sky layer, and use a 5 or 10% opacity brush to bring in parts of the sky that you want in your final image. You can also use this technique to fine-tune the previous two techniques if there are areas that don’t look good. This is particularly useful around complex edges like foliage, etc.
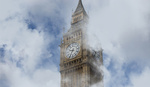
Step 5: Match the Density and Focus of the Original Image
Finally, it’s time to get the sky to match perfectly. You can do this by first reducing the opacity of the sky layer to more closely match the density of the sky in your original image. This simple technique can significantly help to blend your new sky realistically.
One final thing to note is the focus of your original image. If you are bringing an in focus sky into a portrait shot at f/1.4, the original image is likely to have a very blurry sky. You’ll need to match this level of blur as well using Photoshop’s Gaussian Blur or Lens Blur tools.

In Conclusion
As with anything in Photoshop, the number of ways to do anything are only limited by your imagination. This is one easy way I use to begin blending in skies when I need them. I would love to hear your techniques below in the comments.


Was thinking last night that I should try and mess with replacing some skys. Ill try this. Thanks
I think the result is quite convincing. For a 'quick select' it did a good job, but your choice of sky makes it really look like it could have been there, which is truly what makes or breaks a composite.
Perfect tutorial for sky replacement! Thanks for sharing. I need to start collecting more skies ;)
I made a tutorial just like this on my blog, but in video format. Check it out!
https://howtostartphotography.com/blogs/photographer-overnight/how-to-ad...
Nice work! (Btw, it's 'fisticuffs', unless you are talking about the rapper, "Fisty Cuffs") :)
Ha! Cheers. Too much time listening to rap. ;)
That's why i get an urban feel to the photos then ;)
As long as you don't call that "photography"...
Well, no. This is post-processing. If a nice subject is looking bad in a photo just because of a bad sky, it is perfectly justified.