
Gear. Batteries. Cables. Chargers. Hubs. Do you ever feel like you spend more time managing things around creating instead of actually creating? Is your gear a chaotic mess when it comes to charging the plethora of batteries you have for your digital lineup? Is charging after you are out shooting something you don't keep up with right away? Wouldn't you rather grab a beer and download your digital assets after a shoot and skip charging? If you are anything like me and love getting more out of the gear you already have, here’s a sweet and rewarding DIY solution to make life a little easier. You can build a similar charging station for less than $50 using a few tools and simple supplies that you or a friend might already have.
When I started looking into ideas for this project, I knew I wanted a simple yet portable charging solution that could go from the studio on location on a regular basis. I didn’t want to see cables, have a lot of chargers to constantly dig out of a case, or even plug anything in ever time a device needs to be charged. Chargers can get mad expensive, so having two of every charger, while that’s a great idea for redundancy, isn’t always realistic. Having a charging station that could be reconfigured for future equipment changes, and to dismantle quickly and easily for travel, is realistic. Using VELCRO® Brand hook and loop would be an immediate necessity, so finding a compact case with drawers became the next challenge. I also didn’t want to spend a ton of money on it but wanted something durable and well made.
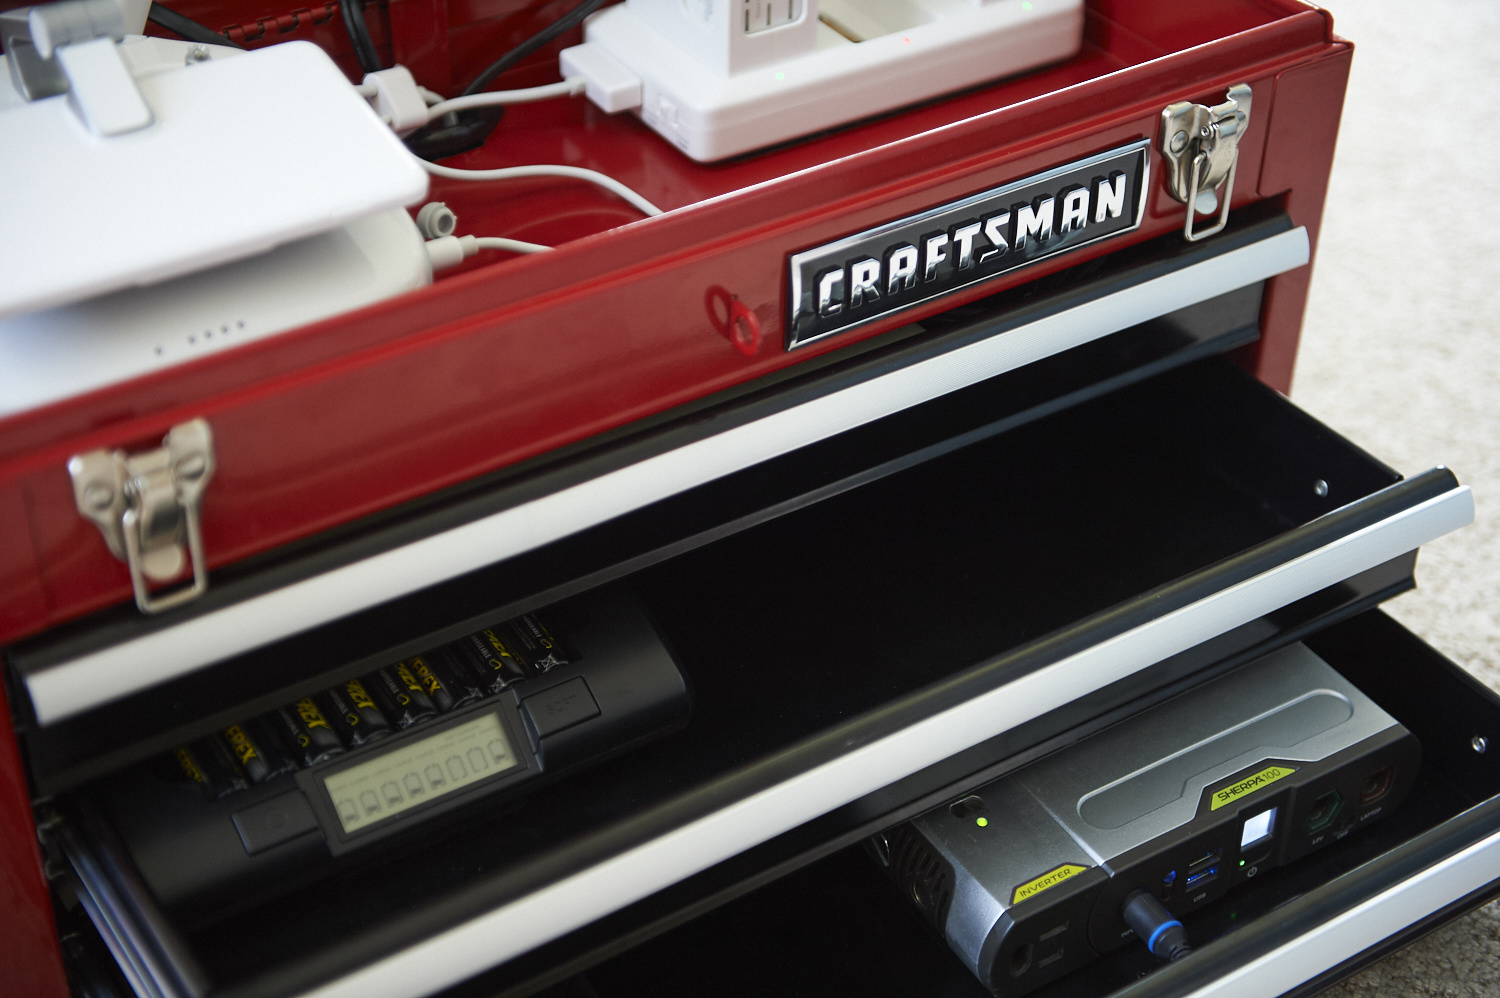
As often is the case at the onset of a new idea, I headed to the hardware store. I found a Craftsman Three-Drawer Portable Tool Box at Sears for $34.99 using a $5 coupon. It weighs 18.8 pounds empty and Craftsman also makes a lighter plastic version. The metal toolbox looks super clean and is more durable so I went that route. I picked up a roll of VELCRO® Brand’ hook and loop tape for $6 and finished off another roll left over from cable managing my studio stand. My suggestion would be to buy two or three rolls right off the bat so you’re not looking for extra pieces as you near completion. I had a spare surge protector with six outlets and a thin profile but they can be purchased for $4–10 from a variety of sources. To recap, your shopping list will look like this:
Buy This Stuff
- Craftsman Three-Drawer Portable Tool Box or similar.
- 2–3 rolls of VELCRO® Brand hook and loop tape.
- Surge Protector. Remember to consider the number of chargers you’ll be plugging in and that it needs to fit in the drawer with cables connected.
- Rubber grommets.
- Spray paint (optional).
Use These Tools
- Permanent marker
- Dremel Rotary Tool with cut off wheels and a grinder attachment to smooth metal edges.
- Scissors
- Safety glasses
Position All of Your Chargers
With the gear currently in my case, there’s not a lot of overlap in chargers. I use three different DSLRs requiring three different chargers, which made building a charging station more appealing. Placing chargers with cables and batteries connected throughout the box took up a bit more space than I originally anticipated. Before attaching hook and loop tape and cutting the toolbox, this is really your first step. My chargers included the following:
- Three different Nikon DSLR chargers.
- PowerEx AA/AAA charger. Eventually I’d like to add a second, which will require adding a larger power strip.
- DJI charging hub for batteries and the controller.
- Goal Zero Sherpa 100 with an extra AC adapter and two USB ports. You could easily include a USB powered hub, which I definitely would have installed if I didn't have the Sherpa.


Measure Twice
I chose the top drawer for housing the power strip and power bricks/cables as it provided the least interference with other drawers. It also provided a shorter distance to get to the chargers at the top. The hook and loop was taped to the bottom of the power strip, each charger, and all power bricks to hold them in place. I outlined cuts for the cables to move freely with a marker. Cables take up room and it’s ideal to not put much stress on them at connecting points especially so keep that in mind when measuring.
Cut Once
It goes without saying that safety glasses are a necessity here. For my build with a metal toolbox, using a Dremel was critical. Cut off wheels made clean cuts and the grinder helped smooth over the metal edges. If you don’t have access to many tools for cutting metal, a plastic tool box could potentially be cut with a utility knife, again using caution and safety measures. Cuts needed to be made for the power cord at the back of the tool box, at drawer backs, and the top center of select drawers for cables to move freely as drawers open and close.
After cutting and making sure the widest cable end would fit through each corresponding opening, and cables could freely move as the drawers opened and closed, it was time for cleanup. I used a magnet wrapped in a paper towel to pick up most of the metal dust, then wiped everything down with Simple Green. I already had cans of black and red spray paint so as an afterthought I touched up some of the edges to prevent rust. A friend brilliantly suggested using grommets to insulate the cables around the newly cut out openings; it looks clean and adds a level of protection. Some cables internally would end up being taped to prevent getting pinched between sliding drawers.

Let There Be Light
I had a couple of LED puck lights sitting on a shelf from a hardware store that were something like $3 each and attached those for lighting in a dark location. I might not ever need them but this whole project is about sheer convenience. There's still quite a bit of room so I may add trays for charged and depleted batteries, and a grounded 12-foot extension cord was added in the bottom drawer to ensure the station can find an outlet.

Closing Thoughts
I may be anomalous in that I'm largely right brained and completely abhorrent to clutter, but surely I can’t be alone. With every addition of battery-powered gear to my creative arsenal, I’ve ended up with more cables and hubs than I care to unpack day in and day out. What would you add or modify to improve this setup? How many different chargers are you using on a regular basis and do you have a consolidated charging solution? Let us know in the comments below.


That's pretty cool. Well done. I'll keep it in mind when I design my own charging station, so thanks for sharing!
Awesome, glad you enjoyed it! I would love to see what you come up with down the road!
Very impressive! Just need a solar option :)
Thanks! Hey that is a great next step! I have a few Goal Zero Nomad solar panels that pair up to the Sherpa 100 in the bottom drawer... <gears are turning>.
Great idea! Thanks.
I'm not sure what to think. This was beautifully executed and I'm impressed how well thought out this is. I think this deserves a follow-up, I have a few questions. Did this toolbox take up a lot of space compared to what's inside? Are rolling drawers worth the extra and weight? What would you have changed now it's you have for a while.
Thanks for reading and great questions David. While the charging station occupies more space and definitely adds weight, separating out chargers freed up space inside a number of hard cases I use at every shoot. That has already saved me from needing additional/larger and more expensive cases. The station has become a cornerstone of what I bring to shoots and I don't fear leaving chargers behind like I did at first. If I really want, any charger can still be removed from the station.
It is extremely convenient having every charger ready to go with one power cord when moving on site. It's awesome setting up at an outlet not having to worry about someone tripping over a power strip or pile of chargers. Clients love the creativity and my reduced footprint helps stay out of their way.
To do it over again, I wouldn't be as quick to rule out the plastic toolbox because this configuration is heavy. A longer strip would be helpful for a second Powerex charger, or another outlet to power a MacBook Pro. I'd really like to have a dedicated outlet to power notebooks on the outside of the toolbox.
If you build your own charging station, what would you need it to do? I hope these answers help!