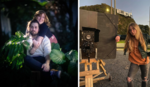
Creating high-quality work doesn’t have be expensive. Outside of talent, the ability to execute creative ideas cheaply can be the single best quality in a photographer or videographer. While there is some very excellent equipment out there that can make your job super easy, it is very important to consider the items we have around us, reusing resources and thinking divergently. A huge value to any company or agency is the ability to save money whenever possible.
Budget talks are always frustrating. Of course, if you had endless resources, you could create epic work; but this isn’t always the case (or really ever the case). It is safe to say companies do not be come successful by dumping huge sums of money into everything they do, and neither should you. A simple setup — camera, tripod, a couple c-stands, and a couple lights with soft boxes — can go a very long way. The rest of your ideas can be filled with a little ingenuity and inspiration.

Creating quality work like this is fairly straightforward. Some rules to consider: (1) get everything as clean and sharp as you can the first time, this will save you time in post; (2) Have a clear idea of your finished product, if you know what the endpoint looks like, you’ll just need to connect the dots; (3) Enjoy the experience, and don’t take it too seriously. If it isn’t fun, you’re in the wrong biz; (4) When working with new concepts you’re going to make mistakes, allow time to work backwards and don’t be afraid to admit you’ve bit off more than you can chew. However, if you do get stuck, don’t underestimate the power of a Google search to right your course. I literally learned more than half of what I know from Fstoppers and Google searches.

Things You'll Need
- DSLR with 60mm macro
- Fluorescent light kit with soft boxes
- Turntable (record player)
- White cardboard and foam core
- Scissors
- Stock video of ink in water
If you're shooting this sort of thing, then you probably have the first three items on the list. If not, a decent set of lights can be purchased around $150. Surely you can use any camera, our assets are meant for web, so we used a DSLR (specifically the Canon 7D).
Step 1
Using the turntable as a base, create a cardboard platform for your product to sit on. You may have to shim a few pieces. The top layer should be white or black. We chose white for consistent lighting. Black will help with rogue reflections, but you will also create shadows. Be sure to pay attention to random elements that show up in the video (e.g., dust, scratches, damage, or reflections). The more time you take to remove these elements in real life, the less time you'll have to spend removing them in post. Taking an extra 20 minutes on overall spot checking can save you hours in the long term.
Step 2
You'll need a good-sized space if you want to keep your sanity. We used a two-light setup of two fluorescent lights with soft boxes. If you can get some long boxes your results will be optimal. You can use as many lights as you want. However, if you are shooting wine bottles or glass objects, consider that every light will create a reflection and sometimes less is more. For more information on lighting glass bottles see this article from Lee Morris about how to easily light a beer bottle. We positioned one light directly over the turntable and one just off camera right. Then we propped up three white foam cores in a three-walled box around the turntable. Pay close attention to the reflections of the foam core on the bottle, any rogue objects reflected back will make the product look sloppy.
Step 3
Make sure everything is plugged in and you’re ready to roll. A record player moves pretty fast, at least faster than you'll want to film. You'll have to drag your finger along the edge of the turntable to slow the spin, being careful to keep the turn fluid and consistent. For your information, this isn't good for the turntable motor, so it might be preferable to use a cheap record player from Walmart rather than the family setup. We captured our clips at 30fps, f/5.6, at 1/60s and positioned the camera to create angled macros of the bottle. With the lighting even and consistent, we would create about a dozen cleanly lit clips. Make sure to get some long clips, you'll need the time on either end if you intend to speed ramp or create dramatic movement. In a perfect world, camera pans and tilts could have made the clips really dynamic. We went for stationary shots, any bottle movements were key framed in Premiere CC.

Step 4
Now that you have your clips you'll want to open up Adobe Premiere CC and create a new project. We used the built-in sequence settings for 24fps 1080p. Then we interpreted all our clips to 24fps. This slows down the clip slightly (if you don't want to slow them down then your shoot settings should be 24fps, 1/50s). To interpret footage, right click the intended clips and choose Modify > Interpret, then change the interpreted footage to 24fps.
Step 5
Download your stock video clips. We used some clips we downloaded from Envato. We were able to find 20 ink scatters for $20. You can go to any stock video site and search "black ink," or whatever effect your desire. Our goal was to find something that was monochromatic. The more black and white you can find, the more successful you'll be when creating your layering effect. Import the stock video to your project once you have purchased them.
Step 6
This is where it gets tricky. As previously mentioned, it helps to have a pretty good idea of how you want your finished product to look. The general goal is clean transitions and fluidity. Multiplied layers and screen layers can get really convoluted quickly, it is important to keep track of your layers in a way that makes sense to you, so you don't get lost in your own process. It's not really rocket science; Toggle the blend modes and invert your ink layers until you get the effect you want. If you’ve shot your bottle correctly the only adjustments you’ll be doing is to the stock images.
Minimalism is a consistent goal. This project took only a few hours from start to finish and utilized items we had sitting around. If you don't have any of these items, I encourage you to find other items that can help accomplish your final goals. The best thing you can do for yourself is create a clear and concise final goal. If you have an end product in sight you will have greater success staying on task. It is a hugely healthy trait to always work minimally. I used to think “if I only had the next new piece of gear, then I’d have all the stuff I need to be pro.” While it still remains that I drool over new gear, the truth is most things can be accomplished with some pretty basic fundamentals. If you rush past the important lessons of fundamentality, then you’re missing out on the whole process completely. What are some creative solutions you've used to solve problems in your workflow?


Great end result!