
It is advised to shoot raw, always. Although many think that is a wise thing to do, a lot of photographers still shoot JPEG only. For those group of photographers I have 10 tips for better photos, and it has nothing to do with raw.
Since the moment I used raw files, I never wanted to go back. It has a lot of benefits, like the increased dynamic range, flexibility, and you can recover exposure mistakes up to a certain point. Still, despite the benefits, there is a large group of photographers that don’t use raw at all. They chose to shoot in JPEG only, for their own reasons. And I respect that.

What do you use? Are you shooting JPEG or RAW files? Or perhaps both?
I don’t want to try to change their minds with this article. If you want to shoot JPEG only, be my guest. And yes, it can and will produce good results if great care is taken. I have gathered 10 tips for the JPEG shooter, things that can help to produce the results that are wanted. It will allow you to control the results up to a certain level.
1. Use In-Camera HDR or Filters

As a JEPG shooter there is a possibility for shooting in-camera HDR. Or you can use neutral density gradient filters.
Because a scenery can have a larger dynamic range than a JPEG image can capture, something has to be done to prevent the feared blown out highlights or blacks. There are two options a JPEG shooter can choose from. Well, three in reality, if you are willing to accept pure white or black in the image.
The first option is the build-in HDR capabilities of the camera. By turning on this option, the camera will produce a HDR image from three different exposures. It allows you to capture a larger dynamic range without the need of software on your computer.
The second option is the use of gradient neutral density filters. This will reduce the dynamic range of the scenery, as we all know. With a bit of luck, and the right gradient filter, you can prevent those white or black parts in the image.
2. Set Your White Balance Manually

Auto White Balance might be the right choice when shooting JPEG. But sometimes it is advisable to use a custom color temperature.
Although the white balance can be set on auto, sometimes a custom white balance can be the right choice. I remember a participant of my masterclass, trying to photograph a violet flower. It kept on showing blue because his camera was set to auto white balance.
I advised him to use a custom white balance, to turn it to a lower color temperature. Suddenly the colors in the photo became much more realistic. The auto white balance can easily be fooled by the colors and light situation. By changing the color temperature of the camera, you can manipulate the outcome exactly to your own needs.
3. Make Changes to Contrast, Saturation, and Color

Change the looks of your JPEG image by adjusting the contrast, color, and brightness.
You can change the contrast, saturation, and color in your camera. Did you know? This way you can manipulate how an image will look. Of course you have to set these things before you take the photo.
By changing these settings to your liking, together with the white balance as mentioned in point 2, a lot of possibilities emerge for turning your JPEG photo into something very personal and unique.
4. Make Your Own Custom Setting

Pictures styles can give a lot of different looks to your image. And you can customize these also, if you like.
Yes, we all know the camera presets like landscape, portrait, neutral, and vivid. Or unique settings like Astia, Velvet, and Classic Chrome. These presets will give the image a certain look.
Use these settings if you find one of them very beautiful. Perhaps it is possible to use these settings as a starting point, and fine tune the setting to make it year very personal setting. Perhaps more than one setting can be used, depending on the situation or type of photo you want.
5. Don’t Use Exposure to the Right

Using the histogram is advisable. But don't use exposure to the right when shooting JPEG
For raw photography it is wise to expose to the right. It gives you the maximum amount of image information to work with in post-processing. But if you are a JPEG shooter, don’t use exposure to the right. It will harm your image, making it bright, perhaps even washed out.
JPEG shooters should try to keep the histogram within its boundaries. Learn how the histogram looks like for the different type of images, like large contrast, low contrast, low key, and high key. It will help to get the right exposure for your JPEG image.
6. Use the Enlarged Dynamic Range Setting of Your Camera
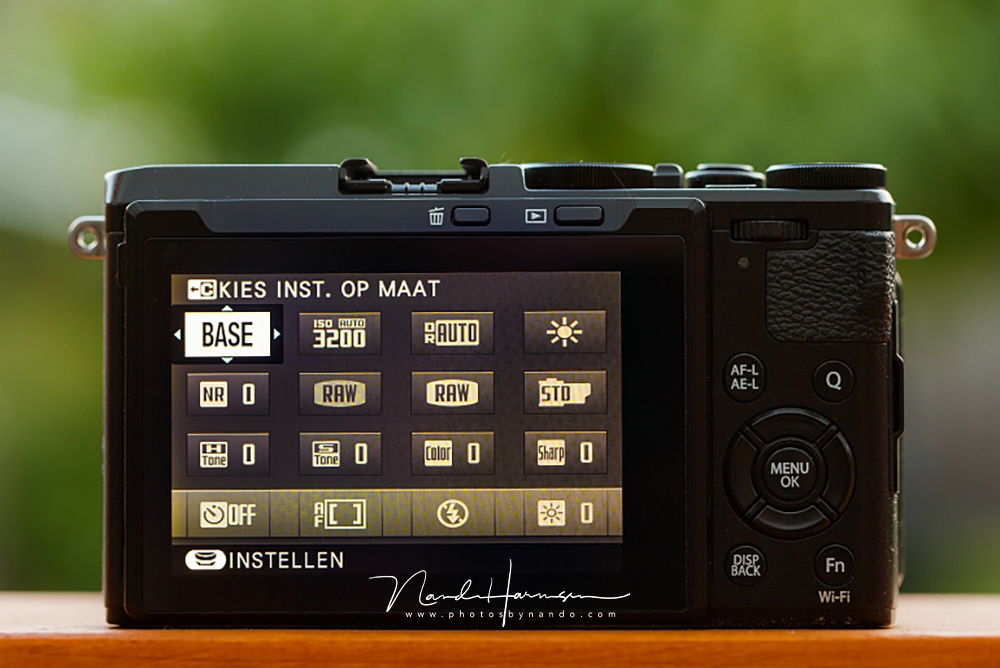
The dynamic range of the Fujifilm cameras be increased. Or you can leave it up to the camera software itself by the DR-auto setting
Every modern camera has a special setting to maximize the dynamic range. This option is especially for JPEG shooter. I know it is called DR100, DR200, and DR 400 for Fujifilm cameras, or Bright Tone Priority for Canon. This function will prevent over exposed parts in the image as much as possible.
The use of these settings comes with a small prize. Because the camera is using the ISO levels for this goal, you may not be able to shoot at ISO 100 anymore. Often this won’t be a problem at all.
7. Use the Build-In Lens Correction

The build-in lens correction option can be used to correct lens-errors. But be carefull when using third party lenses. It can produce strange results.
Most lenses have small optical defects. This is very normal, and often this can be corrected in post-processing. With most modern cameras there is a build in lens correction function, that will correct any optical defects. This is very handy for JPEG shooters.
The option often corrects distortions, vignette, and certain chromatic aberrations. But always be careful when using third party lenses. I know of an example with a Sigma ART 85mm f/1.4 lens on a Canon EOS 5D mark III. In-camera lens correction would produce large optical circles, making the lens correction function useless.
8. Use the sRGB Mode and Not Adobe RGB
If you are shooting JPEG, set your camera to sRGB. That is the best option, especially for use on the internet
JPEG images are often used for prints and the internet. For this the sRGB color profile is the best choice, even though it has a slightly smaller amount of available colors.
If you would choose Adobe RGB, the images can have strange colors on social media, in prints, and on the computer of friends and family. With the sRGB there is no problem at all.
9. Use the Fine JPEG Quality

Use the best quality JPEG setting. You won't regret it.
This may be obvious, but always choose the Fine JPEG quality. JPEG files are always compressed. It means you will lose detail. The Fine JPEG Quality will have the best quality.
You may be tempted to choose a lower quality, because you can fit more images onto a memory card. But since memory cards are very cheap, and available in amazing sizes, it shouldn’t be any problem if you use Fine JPEG.
10. Prepare Settings When Speed is Necessary

Be prepared for the action when shooting JPEG. Make sure your settings are correct because you might not be able to correct it later.
If you love to shoot in situations when speed is important, you need to make some test shots before the action is there. By preparing exposure, white balance, and other settings, you are ready for the action. This will minimize the risk of wrong exposures, or the wrong custom settings. This way you can have a nice custom JPEG look, and still shoot action.
In-Camera Post-Processing
Every camera sensor will produce raw image data that has to be processed. If you are a JPEG shooter, you will leave the processing of this data to the computer inside the camera. As a matter of fact, as a JPEG shooter you will post-process your image in the camera itself by choosing the settings on you camera. These settings are often very limited, and you have to make the settings before you take the image. By saving the raw image data as a raw file, you can perform the same post-processing afterwards, on a laptop or personal computer. It even gives you more possibilities.
This article isn’t about trying to change your decision to shoot JPEG. I respect everyone who makes this choice, although I don’t always understand the reason why. With this article you have ten options to manipulate the way your image looks, without the need for post-processing at home.
Are you a JPEG photographer? If so, could you tell me why in the comments below? I would love to read and understand the reason why. Please add more tips for JPEG shooters if you know any.


I shoot both, but if I'm honest 95% of the time I only use the jpg, using the raw more as backup if I really missed the shot or if I change my mind regarding the look later (or discover I shot a sunset in BW - it happened).
Shooting Fuji I have presets that include different 'recipes' with film simulation, color, NR, sharpness and WB shifts based on the look I'm trying to achieve (search Kodachrome Fuji recipe, for ex). This makes shooting digital a very close experience to shooting film, especially with the back screen turned off.
The BIGGEST problem I run into is when importing raw files into either LR or C1 those settings disappear, leaving just a standard raw conversion file, meaning that getting it back to what I actually shot is a PITA. Yes, I have recreated those recipes in LR and C1, but still wonder why they can't simply read the settings it was shot at and apply them to the raw file when loading it.
As I'm trying to minimize the time at a computer (already do so 9+ h/day, why spend more) and maximize the time I spend actually taking pictures, I find that getting it right in camera becomes more-and-more the ultimate goal for me.
I recognize the problems with Lightroom. But there is a simple sollution to this problem. In Lightroom preferences you can automatically assign the camera profile to imported photos. It prevents Lightroom from adding the Adobe standard profile. Ligthroom has the similar profiles available, that resemble the Fujifilm file formats.
That should do the trick with raw files. :)
Thanks for this article!
I shoot jpeg because I'm not a professional plus, raw takes up so much memory. (I know, memory is cheap. Sorry, I'm on a budget.)
I guess I should shoot raw when presented with what I know will be a great shot.
An understandable descision
Honestly i only shoot raw if I'm planning on putting a lot of work into an image. I shoot jpeg when I don't care or don't want to edit. My images are more likely to sit on my camera or pc for months before i even look at them if i shoot everything in raw. Plus it takes loads less space on the hard drives when shooting jpeg.
In those situations, I shoot RAW + Jpeg, just in case. It's easy to delete the RAW files if you don't need them.
Good solution
Just like Deleted User mentions, why nog use both JPEG and RAW. You can throw away the RAW files easily. Because you never know on forehand if you need to put a lot of work into an image.
I'm a JPEG shooter for a couple of reasons. 1) My Sony camera will support extra Zoom if I shoot JPEG (Clear Image Zoom) which I can always use for wildlife photos (if needed) and 2) I've taken both JPEG and RAW and then edited the RAW to find it no better than the JPEG (and it takes me much longer to edit).
I find the JPEGs are still very much editable. Yeah - you may not be able to push the boundaries as much with a JPEG but I normally do light edits and try to capture the best shot in camera to eliminate as much editing as I can later.
You can also digitally zoom with software, you don't have to rely on the camera for that. I agree, for light edits JPEG will do nicely.
I totally agree with capturing the best shot in camera, regardless which file format you use.
Sitting in front of a computer for 8-12 hours a day, I have been getting more and more drained with post-processing. It took me a few years to realize, but Lightroom isn't the reason I first got into photography. So, I recently decided to buy a super cheap Fuji X-E1 (for film simulations and form-factor) and a dirt-cheap manual lens to shoot JPEGs. It's very enjoyable to shoot with, but does require more time and thought. That's a tradeoff I'm willing to make.
Of course I'm keeping my Olympus and weather-sealed kit for landscapes and travel, but for 90% of my photography I can now just throw the images on my iPad/iPhone, tweak things a touch, and share.
My dude! If you like the XE-1 and feel like an upgrade the XT-1 is a worthy option! It's much more responsive and has a much better EVF! I think I paid $275 for mine when I upgraded from my XE-1 and I can't put it down! :D
"I can't put it down!" Eating must be complicated. :-D
I have so many images of my food with vintage film simulations applied it's insane lol.
I understand. Nevertheles, Lightroom can be seen as the alternative, or replacement of the darkroom. You don't have to inhale those fumes anymore, but drink a coffee (or beer, or wine) while developing images.
:)
But I agree, we spend way too much time in front of the computer. Shooting JPEG can be a good solution indeed.
Absolutely! I did not have the pleasure (or not so much for many haha) of learning to edit in a darkroom, though I have tried my hand and found I did not have the patience. Lightroom and the like plus RAW files are absolutely lovely and often necessary for paid work or those shots where JPEG just won't cut it, and make extensive edits a breeze. That's just not where I've found my enjoyment in the medium.
Also, I'll take the coffee, then the wine ;)
Agreed. Having spent decades shooting transparency film (no real 'corrections' possible) my philosophy is to grab the moment in the camera, that's where the fun is. Get it right the first time. No desire to mess around with post processing.
"Unless of course 'getting it right first time' only requires 'getting it nearly right.'"
I think you are misinterpreting what jay meant by getting it right. I do not think that he, or I, are attempting to get "a camera to record what we perceive" at all. We're attempting to make a compelling image and enjoy the process. If the photographer doesn't like the image they created then they surely didn't get it right at all, did they? Whether or not that image is correctly exposed–mind you jay never mentioned exposure in his comment–has little to do with its success. And of course that opens up the debate about what correct exposure even means. Is the histogram the end-all-be-all? That sounds like a dreadfully boring way to go about creating images.
Of course, if there is a client involved, then I would hope that any of us would use the tools necessary to create a quality product for that client, and shooting RAW is almost certainly going to be one of those tools.
I'd add another tip, shoot in fully auto mode first, to establish whether the image taken is acceptable, then play with apperture, iso and shutter speed to actually see what effect they have and if you can improve it.
That way you'll learn enough about your camera system to progress.
This tip is especially important to jpeg shooters who are attempting to get it right in camera compared to raw shooters who are happy to spend countless hours or days correcting their balls ups, or are using photoshop or other software to create an artistic work of their imaginings.
A good tip, one that I also advise for RAW shooters: Make the photo, no matter what composition, and automatic settings, and than concentrate on the better picture. For JPEG this is also a good tip indeed. Thanks for adding.
But I don't agree with you on the idea RAW shooters are only spending hours on correcting photos. I also want to get the picture perfect in camera.
If you have latest modern camera you don't have to chose. On my my Sony A7R IV I record extra fine jpeg on first card and RAW on a second. RAW becomes a "negative" in case I need to modify something on jpeg image. Absolute majority of jpegs come out just fine, every once in a while I get RAW from the second card to make adjustments.Also nice to be able to "chimp" on full resolution jpeg image while you shooting.
This is something that is possible since the first DSLR I used back in 2005. You can always shoot JPEG and RAW at the same time. It is not only with modern cameras. Even cameras with a single card slot can record both file formats at the same time.
https://fstoppers.com
I usually shoot both but somehow prefer shooting RAW more because it gives you more editing freedom. Like when the faces become greenish, it's much уффышук to fix them in photoworks' RAW processor than try to change it in jpg. I know people who shoot only jpg, though, and they seem to be quite fine with it.
It is a personal choice indeed.
"Every modern camera has a special setting to maximize the dynamic range." Ummm... No.
A well, I guess you're right. But every modern camera I used and reviewd, had that possibilty, ranging from Leica to Sony, from Canon to Nikon, from Panasonic to Fujifilm. I do believe the HAsselblad didn't had a possibility to do that, but with 14+ stops DR you have a lot of light to play with ;)
To be fair, perhaps it depends on one's definition of "modern camera".
Indeed. That is true
Thanks so much for these tips :) jpg shooter here :)
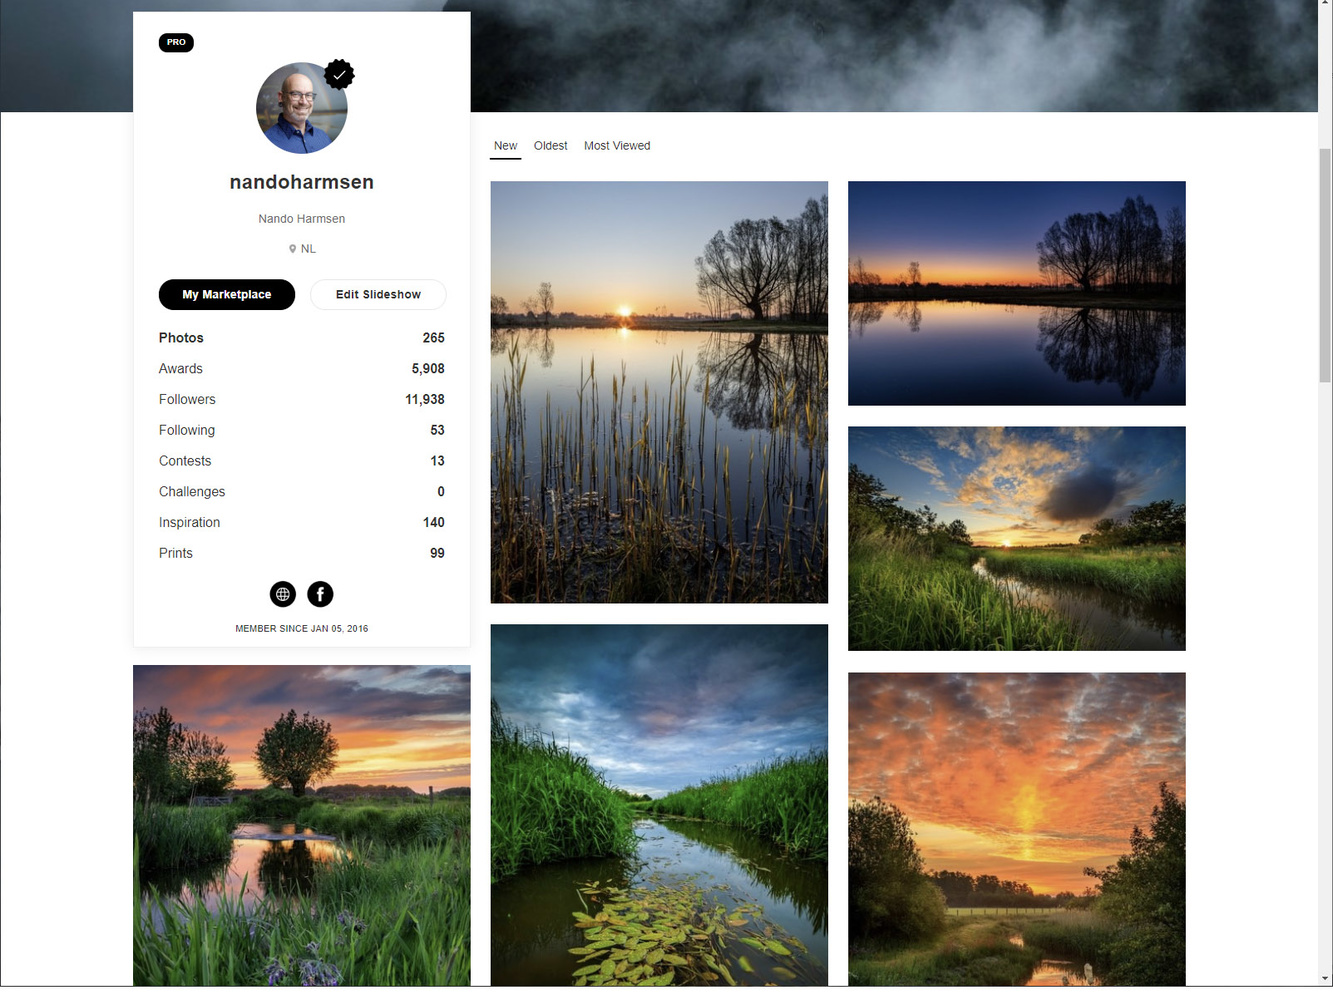
I shoot JPEG. I even wrote a book about it :) That's one of the pictures in the book
Nice one.
Ooohh nice. It reminds me of the intro scene to 2001 A Space Odyssey
Great article, it is important to have present such settings even when someone never shoots in jpg. We never know when we could use that!
Thank you
I shoot JPEG and RAW, with the RAW as backup for when I decide afterwards that I want to do something different with the photo than I originally intended. Why I mostly use the JPEGs? Speed and convenience.