
The tone curve in Lightroom and Adobe Camera Raw (ACR) is a powerful tool. Subtle changes to the tone curve can make a big difference in the look and feel of your image. Here are a few tips and tricks that will make your tone curve adjustments easier and more precise.
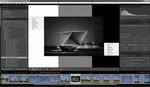
First, let's familiarize ourselves with the tone curve panel in Lightroom. Below is the tone curve panel in the point editing mode:

Tip 1: You Can Use Two Tone Curves at the Same Time
The default configuration for Lightroom and ACR is that the tone curve is in the parametric curve editing mode. Clicking the icon in the lower right corner of the tone curve panel will switch to point curve editing mode, which is the preferred mode for most people. However, when you switch to the point curve editing mode, the changes in the parametric curve mode are still applied, but they don't show in the tone curve in the point curve editing mode.
This essentially gives you two separate tone curves being applied to the image. I don't recommend using both of these at the same time; I just mention this as a warning that when you switch modes, you're not undoing the changes applied to the tone curve using the previous mode. If you decide to switch from the parametric curve editing mode to the more advanced point curve editing mode, you may want to reset the tone curve to linear before doing so.
The point curve editing mode also exposes the Channel control that enables you to edit a curve for selected colors (RGB, Red, Green, and Blue).
Tip 2: Slow Down Adjustment Point Speed
If you've used the tone curve, there's no doubt you've moved an adjustment point way too far, way too fast, and then had to adjust it back to where it was very carefully. Clicking and dragging a tone curve adjustment point to make small changes can sometimes be a challenge, especially with a touchpad.
Holding down the Alt key (Option on the Mac) while dragging an adjustment point will slow down how much it moves in relation to your mouse movement, making it easier to make fine adjustments.
Tip 3: Dropping an Adjustment Point at a Specific Position
Often, you'll want to add an adjustment point to your tone curve, but just clicking will drop an adjustment point at the mouse location, which may be above or below your tone curve, causing the tone curve to change. Holding down the Alt key (Option on the Mac) while clicking will drop the adjustment point at the horizontal position of the mouse, but the vertical position will be on the current tone curve line.
This is very handy for quickly dropping adjustment points across the tone curve before making any changes to the actual curve shape. Holding down the Alt/Option key will also allow you to move an adjustment point that is above or below the mouse pointer without actually having to click on the point itself.
Tip 4: Limit Movement to the Vertical Position
Moving an adjustment point vertically but not horizontally is virtually impossible without this trick. Holding down the Shift key while dragging an adjustment point will limit the movement to only the vertical direction. Left to right movement of the mouse won't make the adjustment point move up or down (left or right) on the tone curve.
Tip 5: Limit Movement to the Vertical Position and Adjust Slowly
You can combine the Shift key trick with the Alt key trick (Shift+Alt) and limit the movement to vertical while also slowing down the amount of adjustment.
Tip 6: You Can Save Point Curve Presets
If you're new to Lightroom or ACR, you might notice that that are only three presets in the Point Curve dropdown list (Linear, Medium Contrast, and Strong Contrast). What is not immediately apparent is that once you make a change to the tone curve, additional items are added to that dropdown list. The word "Custom" will appear, indicating that changes have been made, and a "Save..." item will appear in the dropdown list. This "Save" item allows you to save your own named preset for the tone curve, making future edits in other images easier if you wish to reuse that tone curve.
Tip 7: Use the Tone Curve to Find Dust Spots
The default Visualize Spots option during the Lightroom spot removal is usually sufficient for most spot removal tasks, but there are times when it doesn't show enough of the areas that need attention.
If you create a tone curve with nine points (plus the two end points), placing the points at 10%, 20%, 30%, etc. and alternate each one at maximum brightness and maximum darkness as shown in the image below, you'll get what many call a "Dust Correction Curve."

The dust correction curve is used for highlighting dust areas in the image and when you want to see various small changes in tones in an image. It works by making subtle changes in the tones appear as extreme color changes.
I've saved my dust correction curve as a development preset. This enables me to see the effects of the dust correction curve by simply hovering my mouse over the preset. I don't have to apply the preset if I don't want to. I primarily use it to find spots, but it occasionally comes in handy for other things as well.
In the images below, you can see the difference between a dust correction curve and the visual spots feature of the Lightroom spot removal tool. Notice how the fingerprint on the screen shows up much better with the dust correction tone curve.


The dust correction tone curve can also be used for other purposes. The drastic color shifts between the various tones in the image also help your eye to see things that you might overlook in a standard color version of the image. For example, I had one photo in which the edge of the horizon was very hard to see. The dust correction tone curve made that edge much easier to see and thus much easier to level.
Conclusion
I hope these tips help make your editing in Lightroom and ACR easier. I know they helped me when I learned them. Do you have any tone curve tricks you would like to share? Let me know in the comments!


Thanks for this! I always wondered if there was a way to make that tone curve easier to work with especially with a tablet. I wonder if these same tips would work in PS. Can't wait to try these!
No kidding! The Tone Curve window always seemed too small to allow fine adjustments, and I can see how these tips can make a big difference in usability. Thank you for sharing these, Mike!
I don’t think, that is two different Tone Curve. With the sliders in the parametric mode you can fine tune the curve. And also, you can change the value of shadows-highlights etc with those vertical lines, which is very useful!
That’s the same Curve, only you can’t move the end points (no fading), and it behaves a bit differently.
Great info! Does it work with the Curves Adjustment Tool in PS? Yes, I’m lazy!! I’m also sitting at the dinner table with 3 y.o and 1 y.o daughters jumping on me :)
I can confirm for people asking; it doesn't work on Photoshop. However, if you want some more control of the curves layer, hold 'option' and click 'auto' on the curves (for Mac and I guess 'alt' for Windows).