
When I was new to studio portrait photography, for some reason, I found the beauty dish to be one of the more intimidating modifiers to master. Perhaps it had to do with the unique shape and setup, but for whatever reason, I avoided trying one out for a long time. In reality, using a beauty dish is not as challenging as it may seem, and in this article, I will detail three basic ways to use one as well as provide sample images.
Three in One
In this article, I discuss three basic ways to use a beauty dish. First, it can be used without any diffusion material (other than the internal reflector). This is one of my preferred ways to use a beauty dish because it provides a harder light and more contrast than the second way, which is to use it with the diffusion sock. The sock is an elastic diffusion material that can be quickly placed over the front of the dish and softens the light considerably. The final way to use a beauty dish is my favorite way, namely, with a grid attached to the front. I highly recommend experimenting with each of these variations, as this is the only way you will begin to discover the look you like the best.
Positioning Your Dish
The basic placement of a beauty dish is directly in front of your subject, above their head and angled down towards them so that the center of the dish is pointed at their face. The dish should also be fairly close to your subject. I usually have my dish around two feet from my subject, but I will sometimes move it farther back if I want harder light. As with everything in the studio, the key is to experiment with placement and angles, since small changes in angle and position will make drastic differences in your images. For some of the images in this article, I have the dish placed slightly off center, although I recommend placing it directly in front of your subject as a starting point.
Setup One: Bare Beauty Dish
My second favorite way to use the beauty dish is without any modifier (remember that the small reflector is still inside of the dish). Using the dish in this manner results in deep shadows and lots of contrast. In the sample image of Jenique below, you can see that the shadows under her nose and chin are quite dark, as well on the right-hand side of her face, as I had the dish positioned slightly camera left. There is not much skin tone to be seen in the shadow areas, and the shadow cast from the dish spills into her hair as well. I often use a setup like this when working with models or actors for the dramatic results it provides, although I would avoid it with some clients because the hard light, although it brings out the jaw line, also magnifies any imperfections in the skin. This is also not the best choice for corporate clients, so think of using the beauty dish, in general, as best for actors, models, and fashion shoots. In this particular image, I added a Westcott Optical Spot by Lindsay Adler to create the simple circle of light in the background. As I said, this is my second favorite way to use the dish, because the light spills quite a bit and I prefer it to be concentrated around the face. More on that in the third setup.

Jenique photographed with a bare beauty dish.
Setup Two: Beauty Dish With Diffusion Sock
My least favorite way to use a beauty dish is with the diffusion sock. There is absolutely nothing wrong with using the dish with the sock, as you can see in the image of Jenique below. It creates pleasing results and is a great option to have in your lighting tookkit, but I find that the images lack the contrast and drama I look for when choosing to use a beauty dish in the first place. For me, the results are a bit too flat, and as I have a number of other modifiers that can make similar results, this is not my go-to setup for the beauty dish. Of course, this is a matter of taste, so as I mentioned above, I recommend experimenting to see what setups speak strongly to your creative eye. In the image of Jenique below, the shadows below her chin are still quite visible, but much more subtle, and there is no loss to the skin tones. I also had Jenique leaning on a white v-flat for this particular image, which filled in the shadows a touch more, and once again used the optical spot to add some background texture.

Jenique photographed with a beauty dish and diffusion sock.
Setup Three: Beauty Dish With Grid
My absolute favorite way to use a beauty dish is with a grid (in all of these images, I used a 15-degree grid). Attaching a grid to the beauty dish drastically changes light falloff and concentrates it on the subject, with very little spill. For me, this is the most dramatic way to utilize a beauty dish, and as I love rich color tones and moody portraits, it works best for my particular portrait style. In this image of Jenique, you can see that the dish creates a well-defined circle of light around her head and arms, isolating her from the background, which receives almost no light at all. I had her leaning on a white v-flat from V-Flat World, which served as a table. I also color-graded the photo in post, something I enjoy doing with my portrait work.

Jenique photographed with a beauty dish and 15 degree grid.
In the image below of musician Jesse, I again used a gridded beauty dish, but this time with a large octa for fill (mainly to aid in color grading). The fill light was placed directly behind me and set to a low power. Again, the light is concentrated on his face, with little spill and dramatic falloff. As with the image before, I do this in part to concentrate all of the attention on my subject's face, while eliminating any distractions. I also color graded this image in post, opting for cool tones. Finally, having the subject's face turned away from the camera gives a very different look. Remember that something as simple as turning your subject's head can drastically change the light and give varied results with the same lighting setup.

Finally, in the image of Ashley below, I also used the beauty dish with a grid (I told you it was my favorite way of using it). In this image, I placed the dish above her and slightly to the camera left side and also had her turn her head away from the dish, which was aimed more or less at her face. In this particular image, it's plain to see how the grid concentrates the light into a circular pattern around the subject, isolating her from the background. She was also placed very close to the backdrop, which intensified the shape of the light.

Ashley lit with a gridded beauty dish.
Practice, Practice, Practice!
As always, my advice when learning to use a new modifier is to practice with it as much as possible. Although I now feel comfortable using a beauty dish in a number of ways, it's important to remember that the options with lighting and modifiers are almost endless, so continual practice is the key to success! Small movements in the distance of a modifier as well as the angle really will make huge differences in your image. In addition, once you find a look that you love, you can make it one of your go-to moves in the studio, and you will be able to envision the results before using the setup.


I don't have a ton of experience with the BD but I used to work with a guy who did, and his trick was to use the unique penumbra that the Mola BDs have, putting the dish very very close to the model with the dish angled to light the model in the area of the fall of the light. It gave it an extra depth or shadowing look when the right model hit the right spot of the light. Tricky to use to make it look like something more than big reflector. Hard to describe though...
Sounds pretty awesome. It's amazing what moving the modifier a few inches closer or further can do!
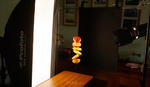
This article needs a diagram, illustration or BTS photo/video.
Thanks David, here you go! I completely forgot to put these in the article.
Great article. Answered a few questions for me.
Glad it was helpful, Denis!