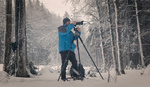
Thomas Heaton breaks down an essential woodland editing technique, known as the Orton effect. He recommends using it when shooting natural, woodland scenes. It provides just the right amount of pleasing glow and softness to take down the artificial and overly contrasty look that can sometimes crop up with photos of trees.
The Orton effect is simple to apply in Photoshop and even lends itself well to creating actions based on it for frequent use. If you’re going to build an action based on it, keep in mind that the blur radius on the Gaussian layer is tied to the size of your image. If you are editing a 50-megapixel image, your blur radius will probably need to be bigger than a 12-megapixel crop. Any actions should then be based around what size image you commonly shoot.
He mentions one of the key ideas when applying a strong post-processing technique like this is to take a quick break and look at something else for a few minutes, then come back and raise the opacity of the layer slowly until you get to the desired amount. I think that is an undervalued practice when doing intensive edits. Stepping away from an image and coming back with fresh eyes can really reveal what an image needs or more often, doesn’t need.


Making a cup of tea and coming back to look again later is always good advice.
There are way better ways to do this and much quicker as well.
I think this version is much simpler/quicker. The last time I read something online teaching the steps how to do the Orton effect, it was so complicated.
I was actually surprised when Thomas' said in his video that he was already done.
Do tell. lets hear it then ..