
Being a long time Lightroom user has helped me have a well polished workflow for my photography projects. So why should I bother trying Capture One Pro?
My Current Lightroom Workflow
It's like a comfortable old pair of slippers. New ones do not feel right, so you frequently wear the old, stinky ones. Lightroom is the first software I've used for organizing my images and working with my raw files. I've also used it for clients to select their desired images, to tag images with keywords, for exporting, watermarking, and what not. It has shaped my workflow based on its user interface and functionality. I do not wonder if I need the same tools or functionality when I work with a different software. It's natural. Here is a typical photoshoot of mine:
- I tether to Lightroom via a USB cable (will come to this one in details further). Images are stored both on my laptop's hard drive and on the memory card in the camera.
- I shoot a frame with the ColorChecker Passport I'd use for color correction later.
- After the photoshoot the client is allowed to select the images they want to buy. The selection is made using the built-in rating system in Lightroom.
- When I get back to my work desk, I copy the folder with images to a NAS device (a.k.a. backup file server).
- Then I use the ColorChecker Passport image to create a DNG profile which I use to color correct my images. I also use the white balance tool on the same file to set the correct white balance for all images in the session.
- I copy the image settings from the ColorChecker image and paste them on all images from that setup.
- I filter by the highest rated images and start retouching them one by one in Photoshop. When I save them in Photoshop Lightroom automatically stacks the newly created TIFF/PSD file with the original. This way I know this file is completed. I flag it with a "Pick" flag and I'm off to the next image until there are no unflagged highest-rated images left. This way I can't miss a file.
- I export the retouched files for the client and for my portfolio. Those for my portfolio have a watermark. This watermark I configured into the export preset.

With Lightroom I don't bother to work on a catalog that refers to files from the NAS device. The slowdown is only when I open and save the files in Photoshop.
That's it. Lightroom helped me to organize my images, easily filter those that I've already retouched and export the final files for the client. It's a very nice piece of software indeed.
Why Capture One Pro?
Main reason: Tethering. It's what annoys me many times using Lightroom with any client, especially a high profile one. I photograph them and at a certain moment they say, "The images are not changing on the computer screen." The reasons are various: faulty USB cable, or I'v unplugged the USB cable from the camera without noticing, or the camera went to stand by while I'm waiting for the client to change outfit or make up. When this happens Lightroom says it can't detect a camera, so I'm trying different remedies. Sometimes they work, sometimes they don't. Unplugging the USB cable from the computer or camera, the plugging it back in, restarting the tethering session in Lightroom, restarting Lightroom, restarting the camera. I even restarted the laptop several times (and sometimes it worked). When it's not working I simply continue shooting without being tethered. I'm using Lightroom 5, by the way.

Having painfully patiently worked like that, I've decided to give Capture One Pro a try. I downloaded the latest one (9.3) and tried it for 30 days working on several commercial projects. Here's what I think about it.
Catalogs vs. Sessions vs. Collections
I don't know why it needs to be so fragmented, but Capture One Pro has all those. A catalog is like a group. I have a "Tethered" catalog where I shoot all my tethered sessions into. I create a new session for each client and store it in that catalog. The session has a folder structure like the following:
[Project folder]
[session file]
Captured/ - all captured files are here
Selects/ - I don't use this one
Output/ - where the output files and folders are placed
Trash/ - the heaven for less important files
When I archive the project I simply grab the [Project folder] and copy it to my backup storage device.

In Lightroom I have a catalog for each year or for each quarter. For example I had a "2016-Q4" catalog. There I keep all archived projects for Q4 (so far) and if I want, I can go back and work on the projects' files.
In Capture One Pro, the only similar functionality I found is to create a catalog ("2016-Q4") an in there to import existing sessions (importing the session file for each project). It creates a "Collection" which is something like a folder and you can browse your images, search by keywords, filter by rating, etc. However, when your files are not on the local computer, it is quite painful to work with the archives. If you want to use Capture One for your archives, you have to have a fast network connection to your backup devices. Otherwise the interface freezes quite often as it (probably) reads those big TIFF/PSD files which over network means it transfers every single byte from them as you click.
Tethering
It simply works. I don't need to start or stop a tethering session. It automatically starts when a camera is plugged in. It recovers much easily when you happen to unplug your cable and plug it back in. It is way faster and more stable than Lightroom's tethering.
I have to mention an important note here: USB cable quality is a very very important thing. I thought USB cables are all the same, but they aren't. I'm not a cable guru, but I've seen "thin" and "thick" ones, so to say. The thicker ones have an extra screening around the cable. They work better for me. For those DIY-ers, here's the hack I did to keep my cable steady when shooting:

DIY preventing a USB cable from accidental unplugging
If you want to look more professional you can always buy the real one.
There were several cases when I had tethering problems with Capture One but I also found the solutions. One of them is you have to go in the settings and uncheck the Canon, Nikon, and Sony from the list of camera providers under the Capture tab. This is valid only if you use a DSLR. Sometimes the USB cable gets unplugged and plugging it in doesn't make the tethering work. I found that restarting Capture One with your USB cable unplugged and then plugging it back after the software loads fixes the issue. But compared to the experience I had with Lightroom tethering in Capture One works much smoothly and quickly.
Live View
I can't praise this functionality enough. It's a lifesaver when it comes to shooting from angles where you can't check your composition, especially when you shoot products straight down having your camera on a tripod. That's the second feature that made me like Capture One more.
Backup When Shooting
While Lightroom is able to store images both on camera's memory card and on the local hard drive, Capture One Pro can't do that. The reason behind this is Lightroom uses a hack to do so. In general, camera manufacturers provide means to store the files only on your hard drive when shooting tethered. Capture One works with the standard functionality, so this is the reason why files are stored only on your computer. If you need to have a live backup during the shoot you have to find your own solution. I am attaching an external hard drive and I run a small piece of software that copies the new files.
Image Adjustments While Shooting Tethered

Auto adjust image on next capture (yes, I'm low on disk space)
Rating the Images
As I said I am trying to align Capture One Pro to my current Lightroom workflow, because this is what I'm used to. The next thing is to see if the client can go through the images and rate the ones they want to buy. This worked fine, although clients were frustrated when they rated an image and it disappeared.
In Lightroom, your filters are like "show me all images with rating > 2 stars." When you have a 3 star image, and you mark it with 4 stars it stays there. However, in Capture One you have a filter "show me images with exactly 3 stars." That's why when you rate an image with 4 stars it disappears from the filtered results. Anyway, my clients I can get along with that.

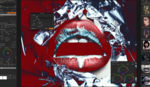
It's not about focus here. It's about colors :)
Color Correction
This is an issue for me. While Capture One Pro provides lots of great tools for color correcting and color grading your images, it doesn't support DNG profiles but only ICC profiles. ColorChecker Passport comes with a software that creates DNG profiles. This means with Capture One Pro, I can only use my pricey Color Checker Passport for picking white balance. There are tools to create ICC profiles but they come with other pieces of hardware. ColorChecker Password is not one of them. The reason Capture One uses only ICC profiles is (quoting their customer support) "The vast majority of our professional customers and institutions prefer our option." Currently I use the provided ICC profiles that come with Capture One Pro.

Applying Adjustments Over Multiple Images
You may want to set the same adjustments to all images in a given set. By copying the adjustments of one image (Shift + Ctrl/Command + C) and pasting onto a list of selected images (Shift + Ctrl/Command + V) you copy all adjustments. If you need to copy only some of them you can go to the "Paste" panel and mark only those you need. This is similar to what I had in Lightroom.
See the icon I marked in red? When it's on you can apply adjustments and rating over multiple images. In the beginning it had me wondering why I could not apply rating changes to multiple images. So, you better have it on.
Retouching
The client has selected several images for retouching. I need a way to differentiate between files that have been retouched from the non-retouched ones. The retouched files are in TIFF/PSD format. The presence of such file may assure me the image has been retouched. In Lightroom, it can group the raw and the retouched file together into a "stack." I can't find stacking in Capture One Pro. If I store the retouched file in the same folder where all raw files reside, I can easily miss to retouch some because I have to always check if every selected raw file has a double with a TIFF/PSD extension.

The best recipe how to easily miss files that need retouching
Too complex, too error prone, too lazy to do that. Any solution that visually keeps the retouched file and the original ones as different files in the same folder is too risky for me. Here's a better way:
- I list all highest rated images that have been color corrected.
- I select them all (Ctrl + A or Command + A), right click to choose "Export > Variants." It exports the selected files as TIFF files (in my case) and places them into the Output folder. All exported (now TIFF) files have no rating.
- I retouch the files and rate them with 5 stars one at a time.
- I continue retouching until no unrated TIFF files remain in the Output folder. You can easily check that by filtering by "None" rating and if your view becomes empty, all files have been processed. Simple and fool proof.

I can easily filter the 5 star files out. They are the retouched ones. I repeat 5-staring until all images are retouched.
I miss a shortcut for editing a file in a default application. In Lightroom I press Ctrl/Command + E and it opens it in Photoshop. In Capture One I have to use right click and choose Edit > Open With > Photoshop (take notes, Phase One).
Again, I miss the Lightroom stacking functionality (*cough*, Phase One).
Presets / Recipes
As in Lightroom, Capture One Pro allows you to create presets for exporting. They call them "recipes" where you configure the output file type, output location, watermarking, and metadata. The cool thing is you can run several recipes at once while in Lightroom you could run one preset at a time.

When I first run several recipes on retouched files I got the following error:

When Capture One doesn't want you to export a file
After some wandering around I found I had to "Regenerate the previews" (*cough cough*). You can regenerate the previews of a single image by right clicking and choosing "Regenerate previews." However, when you select several images and use the right click again, it won't re-create the previews for all of them but only for the one you've right clicked over. Not very intuitive. You have to choose File > Regenerate Previews instead. After that's ready you can successfully export your files.
Watermarking
I watermark the images in my portfolio. In Capture One Pro, I found you can watermark your images with a text or an image but the controls are far less than Lightroom offered. When watermarking with text you should be aware if the image is dark or light and if the text will be visible or not. In Lightroom, I had an option for text shadows. I used a lighter text with darker shadows. In Capture One Pro I don't have that, so I had to use an image instead. And, yes, I'm too lazy to watermark my images in Photoshop. Why? Because commercial clients don't want watermarks while I use them for my portfolio. It's much easier to put watermarks during image export than applying it manually in Photoshop.
Conclusion
I can do my job both with Capture One Pro and Lightroom. I can use them interchangeably but I feel better if I use only one application. The biggest issue for me using Capture One Pro is browsing files that are over network (e.g. NAS device). Apart from that it's a great piece of software that can surely replace my Lightroom workflow. Old slippers are still more comfortable but I decided to get a new pair too.


Were you using the latest version Capture Pro 10 ?
By the time of this article I used Capture One 9. A week or two after it version 10 came out. I tried it but I had the same issues. It's faster when working with higher resolution files but the multi-layered TIFF freeze issue, as well as the need to regenerate the previews before export, remain.
This is a very helpful article. Thank you. I have never used Capture1 but learning it now because of the tethering issues with lightroom. However, over the years I created presets in Lightroom and I like using them to maintain a consistent style. I was wondering if you can transfer presets from lightroom to capture one. Some of the presets are build on Vsco filters and if possible I'd like to eliminate the double work.
Thank you for your time.
I also had presets I built myself in Lightroom but I don't have an idea how to transfer them to Capture One. I have created new ones in Capture One. The presets there are called "Recipes" and in my opinion are better than those in Lightroom.
Can I write the same article as an avid and dedicated Aperture user? My issue isn't tethering.. its speed and brushes workflow. I think it would be eye opening for a lot of readers.
You can write it in your blog and send the link as a suggested article if you want and if any of us finds it interesting for the readers, it may be published.
But first check if there isn't such an article on the website. I remember a fellow writer posted several articles on CaptureOne in the last 6 months.
Thanks, Ive been digging deep on the issue and haven't found one specific to Aperture users or issues still present in CP1 or LR.
I don't like Lightroom for one simple reason: their requirement you use their cataloging system. I work in sessions using Bridge to organize just like I did when I shot film. Of course i use Capture One since I have a Phase One digital back but even if I didn't I'd use C1 as long as they supported my camera