There are plenty of reasons you may want to blend natural light with flash. I know I rarely shoot with more than one strobe on location so the ambient light often acts as a fill light or rim light. Regardless of your reason to do so, knowing how to easily achieve this is extremely important. Check out this video where I explain my process for balancing strobes with natural light on location.
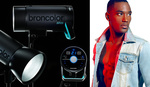
Over the past few months I have had the privilege of creating some educational content for Paul C. Buff. If you aren’t familiar with this brand, be sure to check them out for some really high quality lights and accessories that aren't going to break the bank. I’m excited for the future of the “Buff Basics” program and in the first episode I talk about my method for balancing natural light with strobes on location. One thing that I really love about the Buff lights is that they are extremely compact and you can use them just as easily on location as you can in studio.
In order for me to power my strobes on location, where there wasn't any power outlets, I used a nifty little accessory called a Vagabond Mini which is the smallest and most compact power inverter in a small line that Paul C. Buff produces. I personally don't need anything bigger than the Vagabond Mini because I only ever shoot with one or two lights while on location.

Vagabond Mini Lithium Battery Pack
Now that I've got my strobes out on location, it’s time to get shooting. One thing to remember when shooting with strobes outdoors is that you’re actually shooting with two separate exposures. The first being the ambient light, and the second is the flash. You always want to set the exposure for the background first. This will set the mood for the scene. The camera I was shooting with was a Sony a7 II which has a flash sync speed of 1/200s so I set my shutter speed there and didn't mess with that anymore. I had my ISO at 100 and I adjusted my aperture to get a desirable exposure for my background.
Once I set my background exposure, I brought in my flash. To get the correct flash output, you can either use a light meter or you can just set your flash to a power that you think will be appropriate, take a test shot, and adjust your flash up or down from there. In my case, I did the latter and was able to quickly adjust my flash to get the correct exposure either on the next frame or the one following that. In my opinion, there’s nothing wrong with taking a few test shots to make sure you get the shot perfect, just be sure not to get into the habit of looking at the back of the camera after every shot.
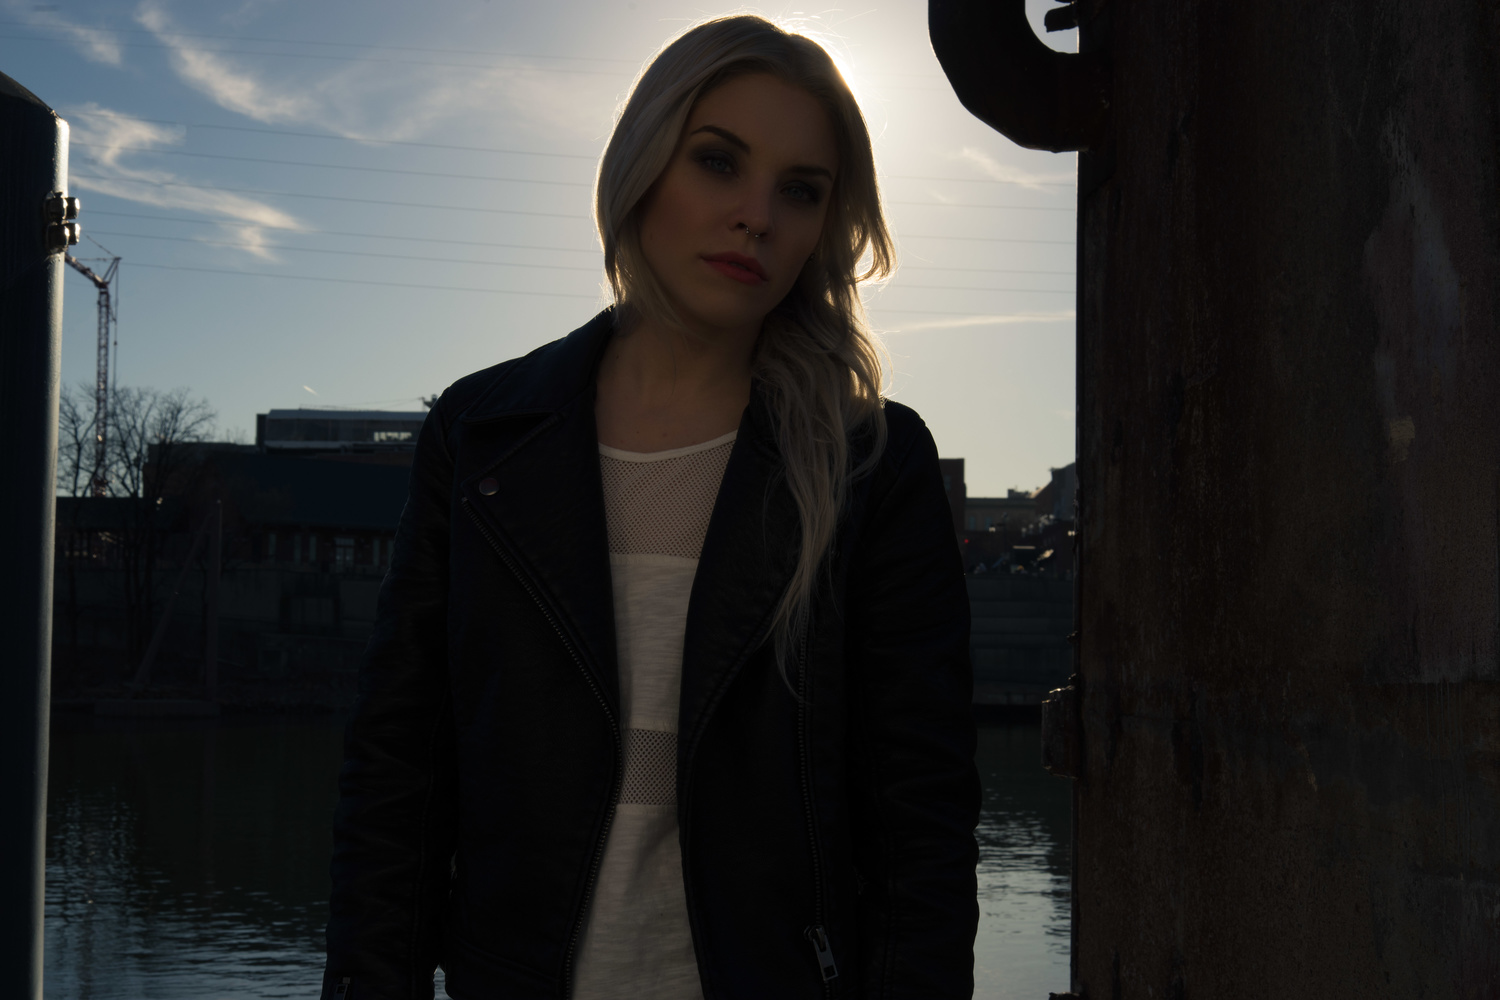
Take a look at the images below to see the shots with and without flash, and the camera setting I used for each image.

50mm, 1/200s @ f/5.6, ISO 100, No flash
50mm, 1/200s @ f/5.6, ISO 100, Flash used

50mm, 1/200s @ f/5, ISO 100, No flash

50mm, 1/200s @ f/5, ISO 100, Flash used
50mm, 1/200s @ f/11, ISO 100, No flash

50mm, 1/200s @ f/11, ISO 100, Flash used
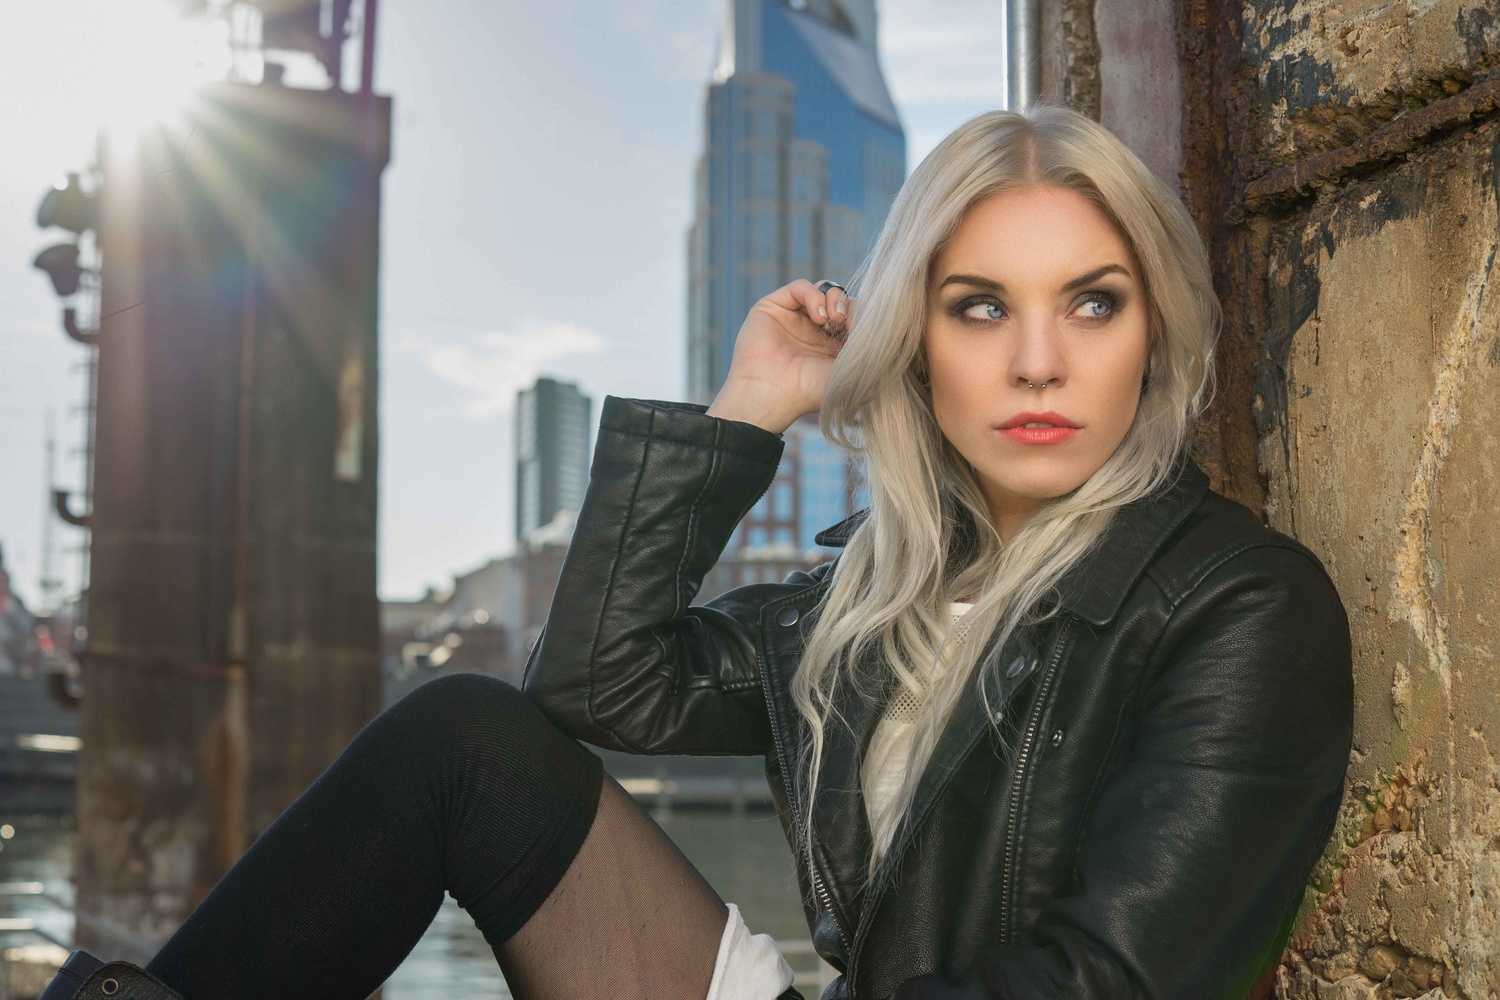
One thing to keep in mind with the Paul C. Buff strobes is that they do not support HSS (high-speed sync). However that doesn't mean that you can't shoot shoot with an open aperture. You'll just need to invest in a good ND filter to cut down the ambient light and allow your camera to stay at or under sync speed, without overexposing your image. Below is an image where I shot wide open at f/1.4 and was still able to keep my shutter speed at 1/200s.

50mm, 1/200s @ f/1.4, ISO 100, Flash used, 8-stop ND filter used
After reading this, you probably noticed that I didn't include the flash power settings for any of the example images. The reason I left that information out is because there are a ton of different variables that can affect the flash exposure, such as distance to your subject, the amount of diffusion material on your modifier, and whether or not your shooting through a modifier, or bouncing the light off the inside of your modifier. Point being, your image should look how you want it to look, so there's no reason for me to put something as arbitrary as flash power in the description of each image.
Gear List
- Paul C. Buff DigiBee 400
- Paul C. Buff Vagabond Mini Lithium
- Paul C. Buff 35" Octabox
- Paul C. Buff 10' Air Cushioned Stand
- Paul C. Buff CyberSync™ Trigger Transmitter 2
- Paul C. Buff CyberSync™ Transceiver
- Sony a7 II
- Rokinon AF 50mm f/1.4
Model: Lindsay Carver


Great article and video Jeff ! I especially like the lens flare in the sixth photo. The wide open shot with the 8 stop ND filter, makes Lindsay look "Angelic" with that depth of field...Not that she doesn't always look like an angel.
I'll be on the lookout for more of your Buff Basics videos, it was long enough to be informative yet short enough to maintain focus.
Thanks for checking it out!
Great vid Jeff. Paul Buff product designers take note! Even Jeff doesn't use the bracket included with the Vagabond to attach it to a stand! I've been saying for years the the Vagabond just needs to have some slits in the body of the Vagabond that you can loop velcro or zip ties through to attach the unit to the base of your stand! Most of us are hanging it on the knobs just like you!
I used the provided clip a total of once before it almost fell off the stand. I quickly learned the safest way to use it was to hang it on the stand. I did recently get the heavy duty clamp, and I'm trying it out on a shoot tonight. I'll have to let yo know how it works. It definitely feels a lot more sturdy.
FYI the super clamp attachment is worth it! definitely check it out!
This bracket was pricey and a few years back he was thinking about not making them anymore, but I love how this bracket holds the lithium battery. I'll throw my light stand over my should and the battery doesn't budge. http://vagabondbrackets.com
That looks sturdy! this is the one that I have now that Buff makes. It's compatible with any superclamp https://paulcbuff.com/vminibrkt.php
Good video Jeff.
One correction in the though... the A7 II has a sync speed of 1/250s. In my experience, it's the trigger used that limits the sync to 1/200s. Some triggers (ex. Godox XT1's) will sync at the native 1/250 max.
Just saying ;-)
Thanks for that, I honestly never realized that the sync speed might be different with different triggers. Although I will say, my sync speed with these triggers and my Nikon d800e is 1/320. I'll have to read into this a little more. Thanks for bringing that to my attention!
Nicely done, Jeff, and thanks for sharing your knowledge. I see the model is a tad warmer than the background, which begs the question whether the strobe was gelled or not? Thanks again!
The strobe wasn't gelled, I did a little split toning in post which may have made the subject a little warmer than the rest of the image. Thanks so much for checking out the video though!
Keep up the great work William! This shot is spectacular, and I definitely have to agree that Buff lights are easily the best bargain for your money!
I'm a Buff shooter in the studio. I have a bunch of Einsteins and even some White Lightenings. I would LOVE to use them in the field like this (I have a Vagabond mini) but the lack of hyper sync or high speed sync is a BIG deterrent to using Buff lights in the field. I have NO idea how you shot these full sun shots at 1/200th. Were you using ND filters or were you stopping way down? If stopping way down, how did you get the bokeh on some of the shots? You were using an f1.4 lens too... the only answer I can come up with again is ND filters. Inquiring minds want to know! :)
When is Buff going to get into the HSS game? I'm ready to buy new lights and/or triggers to be able to use Buff outdoors.
Agreed, the lack of internal battery is preferable in my opinion because you can use it to power other stuff... Like a cell phone for instance, and the weight of 2 digibees and a vagabond mini is still less than a lot of single mono lights with internal batteries.
Hey Michael, for all the shots in their article I just stopped my aperture down, except for the last image. For that I used a Tiffen Variable ND filter and had it set to the 8 stop mark. I'm hoping Buff comes out with something that has HSS in the near future, but in the meantime I can live with an ND filter. If you scroll through the article, all the metadata should be at the bottom of each picture so you can see what my camera settings were.
Thank you Jeff. I saw that after posting my comment. I'm rarely in a situation where I can stop down enough to overcome strong sun. I have a variable ND filter, but I'll have to look into a 10-stop. C'mon Buff! HSS soon! :)
Hopefully very soon!
Thanks for the video. Don't take this the wrong way, but challenge yourself to break the habit of starting so many sentences with 'So".
Thanks for checking it out, and I will definitely take that not to heart! The habit had to break before was not saying "UMM" so much but I will defiantly keep this in mind as well!
Strobepro has very much the same gear, but with HSS capabilities in a lithium powered strobe, also with TTL, and for very reasonable prices. The one strobe even has remote head capabilities, works with the built in lithium batter, can adapt to AC power, shoot as much as 11 frames per second and has a reasonably bright LED modelling lamp.
And it's a Canadian company, so the dollar difference would benefit Americans a great deal right now. I just used these (X600ii's) on a complicated shoot and fell in love with them as the tech barriers mentioned in this article disappeared.
Great video Jeff. Did you use sandbags on your light stands or was the battery pack heavy enough to stop the lights blowing over in the wind?
Thanks you! I did have a sand bag on my light stand the Vagabond Mini is actually super light so it wouldn't be able to prevent the wind from blowing my strobe over. the bag I was using was a 16lb Versa-Flex bag.