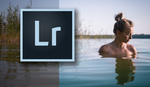
The local adjustment brush is one of the most convenient and efficient ways to make edits in Lightroom, but with a bit of work, it can be even more useful. This helpful video will show you a great trick for getting more out of the local adjustment brush in Lightroom.
Coming to you from Unmesh Dinda with PiXimperfect, this great video will show you a helpful trick for getting more out of the local adjustment brush in Lightroom. One of the great features of the brush is that you can save presets, making it easy to recall and apply complex and nuanced adjustments across multiple photos. Nonetheless, you might wish to apply your saved presets at varying intensities depending on the photo you're applying them to. Rather than trying to adjust multiple sliders by hand and trying to keep track of the math to keep them proportional, Lightroom allows you to adjust the overall intensity of your local adjustments in two different ways, and it'll take care of the math of keeping the component sliders in proportion to one another for you. It'll make your life way easier. Check out the video above to see both possible methods.


I like this guy, very helpful.
Good stuff!
WHOA. Will totally be using this.