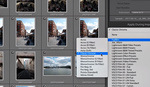
Lightroom is a nuanced application full of controls, sections, subcontrols, subsections, sub-sub- well, you get my point. One of the least often examined tabs is buried at the bottom of the Develop Module: the Camera Calibration tab. This video gives a helpful explanation of exactly what that tab controls.
If you think about what "blue" really is, it's just a word that was arbitrarily agreed upon to represent an approximate wavelength of the visual light spectrum. The problem is that my blue might not be your blue, which might not be Nikon's blue, etc.. This is where the Camera Calibration tab comes into play in Lightroom. As Anthony Morganti explains in this helpful video, the Camera Calibration tab is what sets exactly what the three primary colors (red, blue, and green) are for a specific photo, from which all other colors are formed via combinations thereof. It also allows you to change the saturation of each primary color and also to access your camera's built-in picture profiles to apply them to a raw image within the app. While it's not a tab you'll likely often use, if you find your raw files consistently don't quite have the balance of colors you like or you'd like you use a profile from your camera, it's a good one to know.


It's the first tab I always visit. Either choosing the appropriate camera profile or one made from a shot of my ColorChecker Passport.
Yeah I wish I could move it to the top, to me it feels like the first place to start.
This has been my #1 complaint about lightroom workflow for a long time. It's the first step for me.
I agree but why not let the DNG conversion keep camera profile in tact? Saves a lot of time in post
This is the sole reason I switched to Capture One. Pictures look so much better on import because camera calibration is already applied.
I've been using a preset for import I created 4 years ago that automatically makes all of my photos look the same as the back of the LCD when I took them. I of course do additional adjustments, but it's the best place to start.
I'm surprised to read that other commentors aren't doing this upon import. I was so happy to come across an article on some website about messing with that tab, it really sped up my workflow.
You are absolutely right! People complain about how slow lightroom is when it can do so much more work for you automatically while you wait for previews
I used to have import presets for the various profiles but stopped using them when I began making my own with the ColorChecker Passport. I still use the canned presets occasionally but not nearly as often anymore.
This only works if you use the 'traditional' import method/dialog. I don't. I transfer my images via a card reader into an appropriately named and located folder on the hard drive (allowing me to ingest multiple cards at once very easily). Once all the images are in that folder, I use the "Synchronize Folder" option from the Library Module in LR to import the images into the catalog. Using that option, you don't get to apply presets on import.
Those are indeed important sliders. Many of my presets have the blue almost all the way to the right (about 80%), giving the image more contrast and vibrancy, and the green tab 1/4 way to the left, correcting skin tone.
It give portraits very unique look.
I created a preset that is applied on import that switches to "Camera Standard" (Canon's default setting for in camera Jpegs) and sets a Medium Contrast curve. Thus the Raws almost look like pictures shot in JPG, but without loosing any flexibility.
I am saving a ton of time that way.