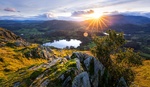
Waterfalls are by far one of the most popular subjects for landscape photographers and for good reason: they show off both the power and beauty of nature all at once. This great video will show you an easy way to create a unique waterfall shot using Photoshop.
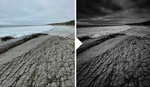
Coming to you from Adam Gibbs, this interesting video shows how he combines long and normal exposures of waterfalls to create the sense of flow, while still retaining texture. The result is a painterly but nuanced image. I know that personally, while I love shooting the standard shot of moving water that turns it into a smooth, nebulous flow, there's a part of me that also wants it to look a bit more realistic and represent the power and turbulence of the water, which is exactly where this simple technique comes into play. Be sure to play with the opacity of your mask to accentuate or attenuate the texture to your taste. And remember, while Gibbs uses the idea of masking the two exposures together to bring back a bit of texture to the water, you can use this for all sorts of purposes. For example, imagine taking a long exposure of a river and waterfall and a short exposure of a couple standing near it, then using this same technique. The only limit is your creativity!


Very helpful reminder. It's easy to forget things like this in the field. :-)
Splendid..really!
i guess i am doing it the hard way...7 stop hdr/ multirow panorama/ i use lenses ranging from 85mm..105mm or 135mm/ focus stacking each row.... this image is over 500 images/ printed on metal...what he dosent say is with multiple exposures it will give you different speeds of water on its own. you dont have to fix what you do and dont want blended