The time slice effect is an original technique to decompose time-lapse of sunset or sunrise. Making this type of video is surprising simple.
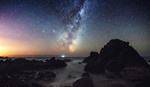
Emeric Le Bars, a time-lapse specialist based in Los Angeles, explains how to edit a time slice video with Adobe Premiere Pro instead of using the usual (and more complex) After Effects software. This type of video has been very popular on social networks lately. Here is how it looks:
The first step is to create a sunset or sunrise time-lapse. It can be done automatically with some cameras (Sony cameras for instance handle auto-exposure ramping during sunrise and sunset very well) or with the help of a dedicated software such as LRTimelapse 5. Once the time-lapse sequence is done, move the video to Adobe Premiere Pro. Overall the editing technique is very simple: duplicate the video over 20 layers and shift each layer by a few frames, then apply a small amount of crop (5%) on the layers. Finally, Le Bars explains how to polish the effect with time remapping and reverse playback. A time slice video is relatively easy to create and can be used as transition for regular film or as a standalone for original content on your Instagram account.
You can follow Le Bars's work on his website, Instagram, and Facebook.


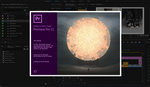
Here's a free After Effects Plugin that makes the same technique easier. https://www.dropbox.com/.../Time%20Slice%200.1.0.ffx...
This is a preset, so you need to install it into your preset folder for AE before you launch AE.
How to use it:
Apply the preset to your video footage (a timelapse already in video format)
Duplicate the layer as many slices as you need, it will automatically slice it up into the right proportions.
After you have as many layers as you want, use the controls on the original layer, the one that you duplicated, to control the whole rig.
A few years back I also published a desktop app that makes it easy to do a still version: http://www.camerastupid.com/time-slice-1-0/