
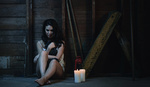
Recently I found myself setting up lighting for a headshot session only to find out my flash was stuck on full power. The "on" switch for the flash worked just fine and it fired as normal but all its buttons simply didn't work, presumably because they were worn out. I had several backup flashes back in my truck but I wasn't looking to make the client wait while I walked back to where I parked, so I figured it was a good time to flex those problem solving muscles and make the shoot work with an un-adjustable flash.
While I don't expect many photographers to often find themselves in the same situation as I, there are often a myriad of reasons why you may not be able to control the power of your key light source and you should be prepared to successfully manage those situations without pause.
The examples throughout this article are based on a series of gloriously unscientific tests. To do the tests I set a camera up on a tripod and pointed at a white wall. I set the camera's shutter speed to 1/250 of a second and f/9 which created a black image when fired without flash. When adding in a bare-bulb flash at full power the wall was almost completely white (just a hair under blown out).
Controlling Flash Power With Distance
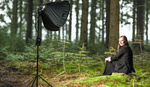
The most obvious method that can be used to control the power of your flash is by adjusting the distance of flash to subject. The farther the flash is away, the less light will fall on your subject. This method unfortunately comes with a pretty tremendous downside. As the distance increases the sharpness of the light increases. Shadows become harsher and light becomes less flattering. The only way to combat this is by increasing the size of the light source which often can be difficult or impractical. Below you can find examples of a flash being moved back 5 feet at a time without adjusting any settings.

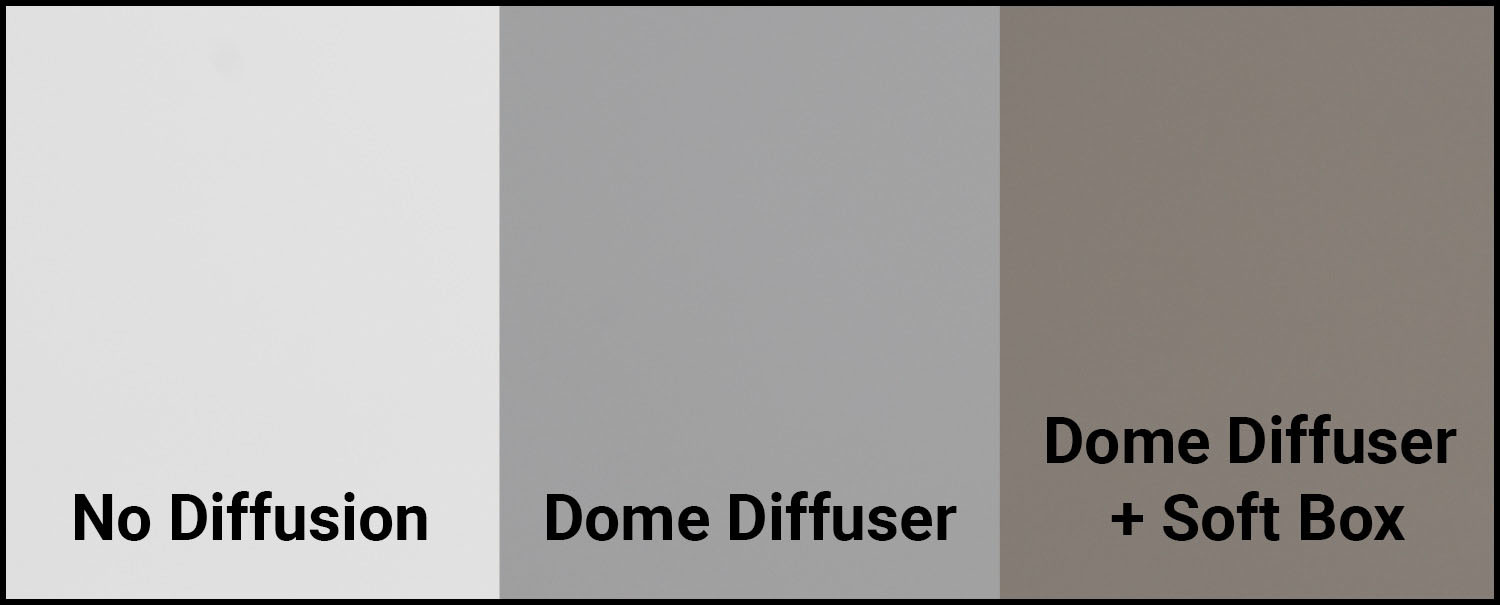
Controlling Flash Power With Diffusion
Most photographers are aware, on a vague level, that diffusion drains intensity from a flash but it isn't often something we consider as a tool for controlling flash output. Rather, we simply use diffusion to soften light and adjust our flash power accordingly. However, diffusion can be an effective tool to adjust the power of a light that you can't dim. This can be a helpful trick when in situations where a powerful studio strobe is still too powerful on its lowest setting. The examples below show light falloff as layers of diffusion are added in front of a light. Note that the size of the softbox also has impact. In this case I used a 20x20 box with no internal diffusion sheet.
Controlling Flash Power With High-Speed Sync
This particular method is slightly more insane than the others in that it is only really useful in a situation when you may find yourself with a flash stuck on full power as I did. Regardless, it is also a fun learning exercise that helps photographers better understand the impact of HSS on their shots. For those that don't know, HSS is a technology that allows a flash to sync to a shutter beyond the normal sync speed of the camera (usually 1/250 of a second). HSS functions by pulsing the flash rather than simply firing in a single burst, which has a diminishing effect on the power of the flash. As your shutter speed increases the amount of power that is lost to HSS also increases. In my particular shoot above I was able to use HSS to harness complete control of my flash output without having to adjust distance, diffusion, or any other factor.
The example below shows the exposure change as shutter speed is increased while all other factors remain the same. Note how quickly the output falls off as the shutter speed increases. The difference between 1/320 and 1/400 is particularly fascinating. I suspect the fall off varies from flash to flash and thus I would suggest testing your flashes in this way to give yourself an idea of how HSS is impacting your exposures. I was using a Nikon SB-700 for this test.

Conclusion
Controlling your light output requires adaptive problem solving as a photographer, especially in situations where there is no opportunity to dim or adjust the raw output of the light being used. This article only skims the surface and is designed to get those wheels churning in your head so that you are prepared for virtually any situation. A few other simple options are leveraging neutral density gels to place on your light or even bouncing your light off a white surface instead of directly at the subject. I'd love to hear about some clever methods you have used to modify the output a light when adjusting its power simply wasn't an option, such as when using non-adjustable hot lights or light sources not designed for photography. Head down to the comments below and tell your story!


Thanks for the useful post -- the need for what you describe goes beyond a stuck strobe, so this is a good skill for any shooter to have. One place I run into it is when I've dialed down as far as I can but still have too much power, like when balancing dim ambient light with strobe. As you, apparently, I don't like backing off as my first solution to light intensity because it changes the light quality. Besides the great techniques you list, here some others that have saved me a bunch of times:
1. ND filters. Rosco and others make speedlight sized gels that have little weight and space but can save your skin. If you don't have ND, or enough ND, stack CTO daylight to tungsten with a CTB tungsten to daylight -- the colors cancel out while eating as much as four stops. Depending on the situation, you can also just go with the color and re white balance the camera.
2. If you're working with a reasonable sized modifier like a softbox, I find that feathering may work if you can frame fairly tightly in the feather zone, or if the shot's at an angle where the feathering works across it, with the subject in the midfeather area.
For sure, feathering is another great option! Though it does have an impact on the shape of the light landing on the subject.
Strictly from a troubleshooting standpoint, It seems odd that your camera could communicate well enough with the Speedlight to get it to function in HSS mode but would not allow you to change the power setting.
If the flash is in manual mode you can't adjust the power remotely, however, it does automatically engage HSS if you go beyond the max sync speed. (At least with the flash/trigger combo I was using)
What combo was that?
What about just narrowing the aperture?
Certainly an option but often a compromise that most photographers would be unwilling to make as depth of field is a creative choice. For example, in the case of the shoot I was doing which was acting headshots. There is an expectation of a narrow depth of field from the client. Shooting at f/11 would have not produced the style of image I was hired to make.
Crushing the aperture also becomes a problem if you are still trying to balance with available light as it will darken your entire scene. You can crush the aperture than slow the shutter down like crazy which would likely give you the exposure you are looking for but the creamy bokeh certainly would be a goner. ;)
Yeah, but all of your options are compromises. Photography is the art of compromise. If you are stuck with a flash where you can't adjust the power, narrowing the aperture or changing the ISO are as valid a compromise as moving the light or adding a modifier: all of these concepts are photography basics. They all have their pros and cons, you compromise based on the creative choices you want to make and the demands of your client.
If shooting at a narrow depth of field was an expectation of your client, then it would have been helpful to not only include that detail in the article, and also not do your tests at f/9. HSS is not a standard go-to option for many photographers: none of my strobes or flashes has it. But the basic principals of photography haven't and won't change, and it may have been more constructive if your article covered the full range of options available to a photographer where "sh$t has hit the fan" than just a few that fit your photographic style. Being able to quickly and systematically trouble-shoot a problem has saved my butt on location more than any piece of technology.
Honestly, I thought it was great that he wrote the piece from personal perspective and experience. You can't spoon-feed every photographer with exactly how to do things. He gives you a basic guideline to start, and if you were any kind of a photographer you should be able to work from there. Especially when it comes to aperture, exposure, etc.
I'm not suggesting he spoon-feed anyone. But he essentially dismissed Shintrao's suggestion on the assumption that "most photographers would be unwilling to" compromise on depth of field, and I don't think that is a reasonable assumption at all.
Ryan asked the readers what other methods were out there so I suggested the most basic one that is attainable for anyone. Like Mark says, I think a lot of us wouldn't have extra diffusion panels or HSS capable trigger/strobe combo on location if we weren't planning on needing them.
The HSS output does NOT reduce with decreased exposure time. The light exposure decreases with decreased exposure time.
IH
In HSS mode, the strobe stimulates continuous light. With continuous light, exposure in affected by exposure time.
This is one of those things which seem to elite people about HSS strobe; it is not magic, it is a workaround, and has not behave as a normal strobe. It is NOT a normal strobe.