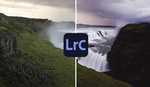
Lightroom recently added the Texture tool to the Develop module, and it brings with it new capabilities to the program. If you have not had much time to play around with the slider yet, this great video will show you everything you need to know about how to use the slider and where it can be helpful on your own images.
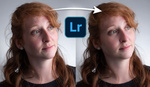
Coming to you from Lucy Martin, this excellent video will show you everything you need to know about using Lightroom's Texture tool. The Texture tool seems similar to the clarity, Dehaze, and sharpening tools, but it works a bit differently and can be used for very subtle work. Namely, the Texture tool works on the medium frequencies in a photo and can be used both to emphasize or smooth over details such as skin or bark, making it a great option for bringing out global features in an image or for quick retouching when you want to avoid more tedious or time-consuming work in Photoshop. When used to emphasize details, it skips over lower-frequency areas like out-of-focus elements, helping to increase the effect by comparison. Check out the video above to see how it works.


I've seen some shallow tutorials in my time, but this 'show' really takes the biscuit. A brief description of how it works; which parts of the image it manipulates, for example, would be a start.
Agree. Not much going on here. I will add that I have started playing around with the texture tool, dialed down, to achieve something very like the Orton effect on busy landscapes.
Thanks for posting this, Alex. Lucy gave me a good sense of what this tool can and can't do.