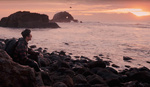
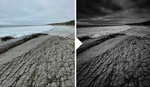
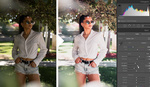
One of the most basic yet effective ways you can improve an image is to shape the light through selective lightening and darkening. This great video tutorial will show you how to use radial filters to shape your subject and capture the viewer's attention using Lightroom.
Coming to you from Anthony Morganti, this great video will show you how to use radial filters in Lightroom to selectively brighten areas of your images. Learning to shape light in post to augment a scene is a crucial skill in crafting professional images, and like Morganti, radial filters are one of my favorite ways to do this, because they're easy, efficient, and effective. Just be sure to use the feathering option to help the effect blend seamlessly and believably into the rest of the image. In addition, remember that you can also use the brush tool to remove any spots you don't want the radial filter to affect, allowing you to fine-tune it even more. You can also use radial filters to create vignettes anywhere in the image; simply leave the "Invert" box unchecked and drag the exposure down instead of up. Check out the video above for the full technique.


Excellent!! Thank You!