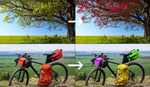
Color correction is one of the most fundamental and important post-processing skills a photographer can have. Photoshop has some helpful automatic tools to help you with this process, but with just a little bit of tweaking, you can get better results. This helpful video will show you just what to do.
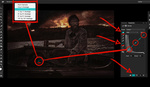
Coming to you from Jesus Ramirez of the Photoshop Training Channel, this great tutorial will introduce you to some of the more advanced automatic color correction options in Photoshop. Photoshop has several algorithms it can use when you press the "Auto" button in a Curves adjustment, and changing which one it uses can make for much better corrections depending on the situation you're in. The best part is that once you change Photoshop's automatic correction settings to your liking, you can set them as the default for future work. I also recommend trying the other algorithms depending on the image you're working with. For example, whereas "enhance monochromatic contrast" adjusts all channels identically to increase contrast, the "enhance per channel contrast" option adjusts the clipping of each channel individually. This results in more extreme contrast, but at the expense of possibly introducing color casts as the channels are not locked together. Check out the above video for more!


great post thanks
This is so incredibly useful O.o