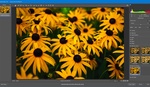
So much of post-processing revolves around editing to bring more attention to your subject, whether that be a person, a waterfall, or whatever you please. One versatile and effective way to do this is through the use of radial gradients. This helpful tutorial will show you just how to use them.
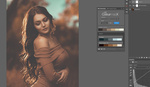
Coming to you from f64 Academy, this video will show you the impressive range of radial gradients in Photoshop. We often think of them as a simple way to create a spotlight effect by creating a vignette, but by adding color and changing the blending mode, the effect can take on a more complex and nuanced look, such as creating a subtle glow that mimics warm sunlight while also giving the luminosity gradient of a vignette. I personally love radial filters; when post-processing events, I typically add one on the order of somewhere around a half-stop with full feathering in Lightroom to draw attention to the subject. It only takes about ten seconds, and it makes a huge difference in creating an imperceptible draw to your subject. When you move over to Photoshop, the color and blending mode options afford you even more capability. Give it a try!


Nice!! I love it
Really neat trick! Hope to practice this!
brilliant