
In the last 10 years, manufacturers have introduced a new level of control to cameras: auto ISO plus the option to set a minimum shutter speed. If you’ve never tried using your camera with this setup, you may want to give it a go, as it could completely change how you shoot.
Here’s a quick summary of how it works. Say you’re shooting informal portraits on location at golden hour. The light is slowly fading, and choosing aperture priority mode, you know you want an aperture of f/1.8, but are happy for the camera to decide shutter speed and ISO. However, you don’t want the camera to set the shutter speed so slow that your subject’s movements become blurred or your shots become soft due to camera shake. By setting your camera to auto ISO and choosing a minimum shutter speed of 1/125th of a second, you can let the camera do the work and focus instead on interacting with your models, safe in the knowledge that the camera won’t let any blur creep into your shots.

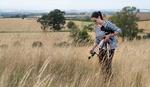
Being back home in the forest typically involves a healthy dose of messing about.
As the light fades, the camera reduces the shutter speed. Once it drops as slow as 1/125th of a second, the camera starts increasing ISO. Strongly backlit subjects and snowy scenes still require careful attention, but with improvements in metering coupled with displays on mirrorless cameras that give ever increasingly accurate indications of exposure, letting the camera do all the heavy lifting is getting easier and easier.
Auto ISO lends itself well to certain shooting scenarios, and it’s one that photographers use frequently when shooting candidly, such as street photography or at weddings. Personally, I’ve recently started to use it a lot when photographing casually with friends, as it allows me to shoot without having to give a lot of thought to how I want my camera set up.

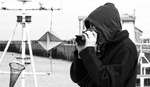
Out on the streets of Glasgow, shooting from the hip and letting the camera make most of the decisions for me. Auto ISO, a small aperture to try and maintain sharpness, with a minimum shutter speed dialled in to prevent motion blur. Thank you to photographer Zeno Watson for the tour.
Better Sensors, Less Grain, Greater Trust
In the past, the amount of noise introduced into an image by increasing the gain (i.e., turning up the ISO) meant that giving your camera free rein over the ISO was a risk, as image integrity could easily be compromised. Recently, however, better sensors and improved processing software have meant that grain is less of a concern, and this gives greater freedom. The camera can make more decisions, allowing you to shoot in a more relaxed mode. If you’re particularly worried about noise, many cameras now allow you to set a maximum ISO where the minimum shutter speed is overridden in the event that light levels drop so low that you hit your ISO ceiling. Personally, I’d always prefer to get a sharp, noisy image rather than a blurred one, but other photographers find this useful.
Who Got There First?
Intrigued, I started digging into camera history, but discovering exactly when this feature was introduced proved a bit of a challenge. The Canon 1D Mark IV and original iteration of Canon 7D seem to have been the first Canons to feature auto ISO, but it wasn’t until more than two years later in 2011 that the Canon 1D X and the 5D Mark III allowed you to also determine the minimum shutter speed. Nikon, by comparison, seems to have been a little ahead of the game, introducing an on/off “ISO Sensitivity auto control” with a minimum shutter speed in the D3 and D300 in 2007, though adjusting the settings still required a bit of menu digging. However, the pioneer might be Sony’s a100, released in the middle of 2006, giving users auto ISO but no minimum shutter speed. If you know differently, please let me know in the comments. (For some reason, this quirk of digital camera history appeals to the giant nerd in me.)
In sifting through old forums, one thing that amused me was how many angry people were complaining that there was a mode called “manual” even though the camera was determining your exposure. If there’s one thing you can be sure of about the photography community, it’s that people are easily outraged.
Liberate Your Fingers and Mind

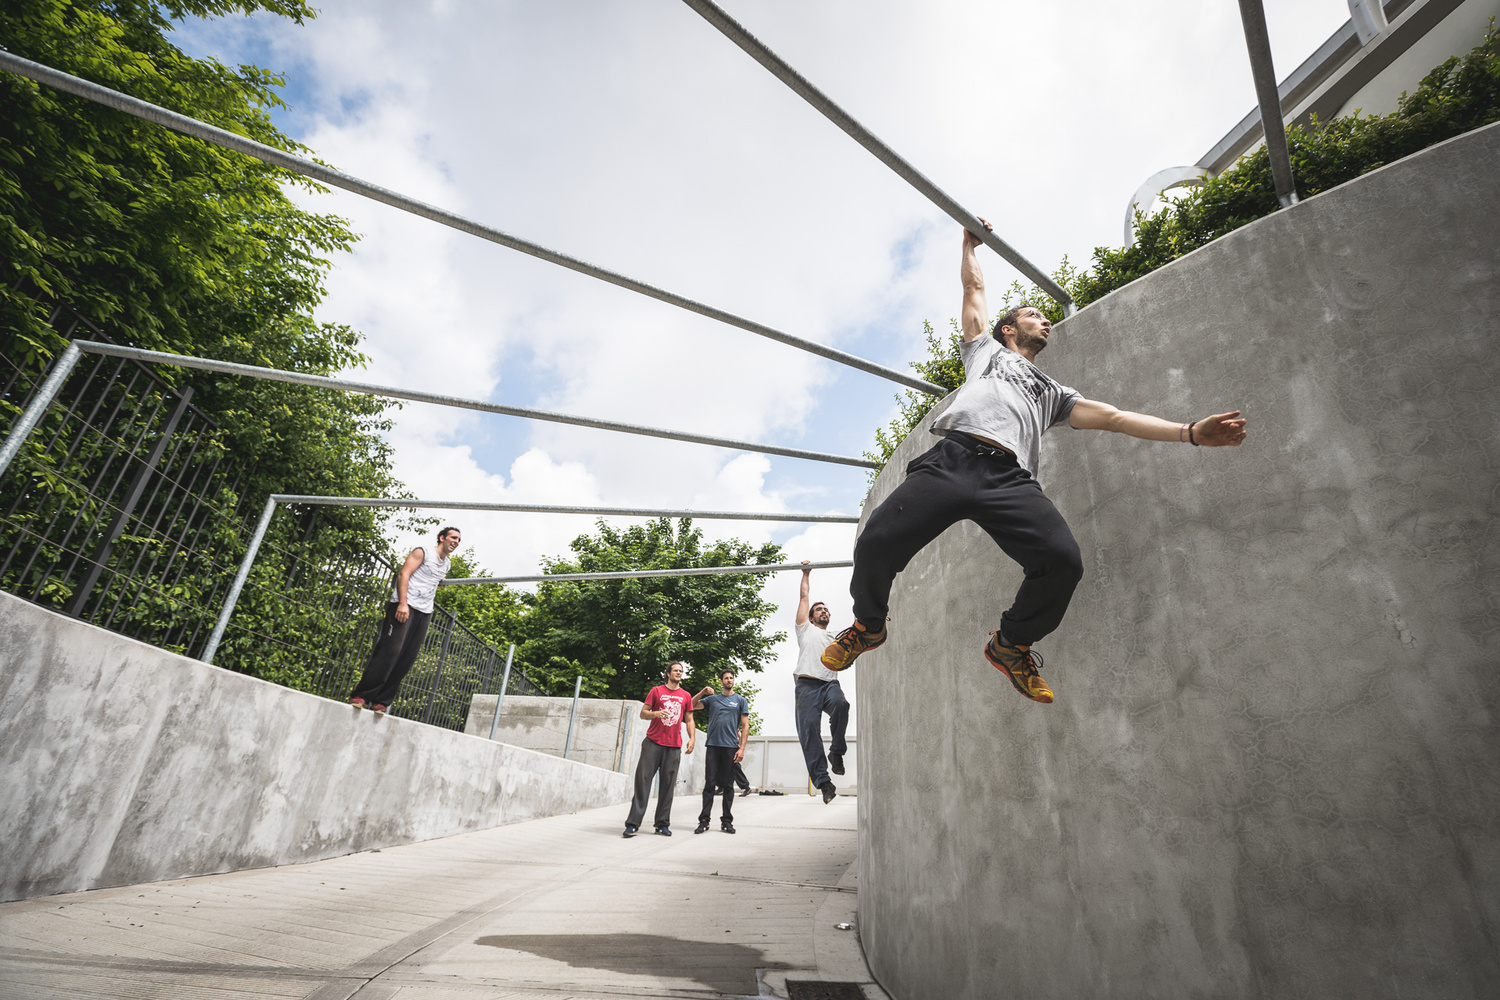

The Spring Wave parkour community training event, hosted by Parkour Wave in Bergamo, Italy.
Having shot in manual for so many (read “too many”) years, stepping into my Sony a7 III’s automated features has been liberating, allowing me to use my camera more casually and shoot friends and family in a more candid manner. My recently discovered “toggle autoexposure lock” is now assigned to a customizable button, giving me even greater flexibility in shifting conditions, and I’m keen to see how this can transfer to other scenarios. No doubt, many readers will find it ridiculous that I’ve only just made this discovery, but I know that many photographers operate on a “if it ain’t broke, don’t fix it” mentality and are resistant to changing how they use their cameras. If that’s you, I can relate.
When shooting parkour events, my default has been to shoot manually somewhere between f/4 and f/5.6 with a shutter speed somewhere above 1/1,000th of a second, tweaking my exposure by changing my ISO. I’ve since switched to shooting in manual but with my ISO on auto, locking the exposure using my toggle button where necessary, and tweaking with the exposure compensation dial — and yes, as you might recall, that’s a dial that I once had absolutely no use for.
Know the Limitations
It’s good to know the limitations of this camera functionality. For example, if you are shooting in manual mode with auto ISO and using slower shutter speeds or wider apertures in sunny conditions, there is a risk of creating overexposed images as the camera would not be able to drop the ISO low enough. Similarly, auto ISO does not lend itself well to shooting with strobes, as the camera will meter for the ambient light and not give you the control that you require.
It’s also worth noting that if you’re shooting in aperture priority and find yourself constantly using the exposure lock and exposure compensation dials, it might be worth shooting fully manual. I’m fortunate not to have to do this, as changing the ISO on my a7 III still feels fiddly, despite being four months in.
The Takeaways
Perhaps the takeaway here is twofold: firstly, if you've not tried auto ISO, give it a go. It passed me by for too many years. Secondly, technology isn't everything, but occasionally, something new comes along that makes shooting easier. Gear won't make you a better photographer, but if you're taking shots that you would otherwise have missed, it probably gives you the chance to become one.
As usual, feel free to leave your thoughts in the comments below.
If you're passionate about taking your photography to the next level but aren't sure where to dive in, check out the Well-Rounded Photographer tutorial where you can learn eight different genres of photography in one place. If you purchase it now, or any of our other tutorials, you can save a 15% by using "ARTICLE" at checkout.


Great explanation. I hope that this article will win over some of the stubborn minded that still are grounded in the world of film ISO without the flexibility to understand what is possible.
Hi Andy,
I think auto ISO was introduced in the canon system with the 5D Mark II.
I never use it myself on my 5D Mark II bodies as I proffer to run my ISO selection manually to have a more consistent image look. My recently acquired 5D IV has it as well as minimum shutter speed options but I doubt I will use it on this camera.
Ultimately what ever get's the results is all good. Some people ( like myself ) would rather retain the control.
My first camera, Nikon D3200, had a simple implementation of this. But now my new D750 has an even better system. It will adjust the minimum shutter speed as well (based on the focal length). It has made casual shooting even more enjoyable. I second the author's message - give it a try.
I have the Nikon D750 as well and when first exploring menu items, wondered how I'd ever want to use that. Now I know and will give it a try. One thing I could not find on my D750, even after much research, is a remote release function on-camera. Unbelievably, it's a menu item buried deep! One shooter offered a workaround, but it's pretty cumbersome. I keep asking others if they know something different, so please forgive my highjacking the thread just a little.
An off-topic suggestion: add the remote control menu item to the MyMenu. If you set the display of MyMenu to say the Fn button on the front of the body, you will gain quick access to frequently used menu items.
I'm really only recently giving my camera leave to change the ISO. Back in the old film days and old digital days, changing the ISO was a fairly drastic change in image quality.
That's not the case anymore. Basically, with today's cameras changing the ISO introduces the least amount of change in the image--certainly less in most cases than changing the aperture and in many cases less than changing shutter speed.
So I'm currently going first to an ISO change--within reason--before changing aperture or shutter speed.
I often shoot in manual for the same reason. But with my camera I can set auto ISO in manual mode. That means I can change either SS or Aperture, depending on the situation, and ISO will adjust accordingly.
Auto ISO = more editing and less consistent tonality due to having to adjust exposure and shadows in post when metering falters. With an EVF, why let the camera decide your exposure? You can see your exposure before you shoot. And metering modes don’t account for creative under or overexposure. I get that ISO-invariant cameras have lots of malleability in post but why do more work than you have to?
Depends on what your subject is. When shooting wildlife, auto ISO is more often a blessing than a curse. When shooting low light or still subjects I'll turn it off so I can control all factors in the composition. Even on the D850, the metering modes suck for astrophotography!
The 5D MkII had auto ISO, but not the option of minimum shutter speed.
Off memory, I believe my D70 had this feature. That would make it 2004. What a superb camera it was.
My Nikon D2xs also has both settings,thanks for clarifying how to correctly use them.
I’ve been shooting like this, minus the minimum shutter speed ability, with my Canon 6D for years. For theatre work where the lighting changes second by second, this is the only way to fly! I shoot a ton of musicals and dance shows, so I change my shutter speed a lot on the fly, in an attempt to keep it as low as is reasonable so the ISO stays down, but I’d rather get noise than blur any day of the week.
While I never used AutoISO in the Canon 5DMkIII, I now use it a lot in the MkIV. Minimum shutter speed can be manually set or can be determined by the camera based on focal length, allowing user adjustments to bias the shutter speed higher or lower than roughly 1/fl. Yes it has its limitations, and I would recommend spending some quality time with an owner manual and a camera in AutoISO before really needing it. Great article!
Pentax introduced the TAv mode with the K10D in 2006. The mode allowed you to set the shutter speed and aperture and then the camera would select the ISO. That was easily my favourite shooting mode with Pentax.
That's interesting to know. For some reason I'm fascinated by how our conventions have emerged - ie, it's now commonplace that Auto ISO is buried in the ISO settings rather than being the 'TAv' option on the mode dial that you described.
Been using Auto-Fake-ISO (hahaha joking...some may get it) since forever. Early this year, I made myself shoot all manual for 3 months. It's fine so long as the lighting was pretty static and shooting in the same general direction. But, when in scenarios where clouds are rolling in and out and/or I'm constantly shooting in different directions, I was spending too much time fiddling with the settings. When I switched back to auto ISO, felt like a burden was lifted. Hallelujah Auto ISO.
With that said, when using flash (while in poor/low light), I use all manual since I'm typically in a static environment.
.
Not feasible when shooting wildlife. Most of the time I need at least 1/500 in order to capture animals because you never know when they're going to twitch, dash, or bolt. Automated slower shutter speeds are only suitable to the stillest of critters, like sloths and snails...
Auto ISO is a godsend, but I can't let my camera play with my shutter speed.
Can you not set your minimum shutter speed to 1/500th?
I use this feature on my Fujifilm body when I'm out with the wife, friends or just cruising around recreational with a camera. I would be a little timid to use it on a paid shoot though
Why would you be timid to use it on a paid shoot?
Fuji (and perhaps others?) adds a nice wrinkle to this. You can set your own lower-bound shutter-speed, but you can also let the camera do it, and it will set it to the reciprocal of the focal length of the lens, which is an old rule-of-thumb for hand-held shutter speeds. Given the effective image stabilization to adjust for camera movement (but not subject movement, obviously), this is a pretty conservative minimum shutter speed
Nice, thanks!
Nice, thanks!
Who got there first? Pentax! …And they did not bury it in a menu. It is done one of two ways, with the mode dial and e-dials.
Way number one, TAv-mode. (Time-Aperture value mode). The photographer sets the time value (Tv, or exposure time) & the aperture value (Av) as they see fit, using the two e-dials, and the camera sets the exposure index (or, what Pentax calls the sensitivity value, Sv), automatically.
Way number two, P-mode (program mode) with hyper-setting. The camera sets everything automatically, then the photographer overrides the time value as they see fit, using an e-dial. The camera automatically adjusts the Av and Sv. (If the photographer manually adjusts the Av, the camera will automatically adjust the Tv and Sv accordingly). Pushing the green button sets the camera back to full program mode.
Within the menu system, one can adjust a usable range for Sv values during P-mode, should one not desire a too high Sv, for noise control.
Ha. Thanks for this. Weirdly interesting. :D
Karim are you a Pentax ambassador or employee or? Asking for a friend.
I first heard of this technique at least 5 years ago, and have used it for certain applications ever since, primarily when I need to control both shutter speed and aperture, but due to changing lighting conditions, prefer to concentrate on composition, while allowing the camera to worry about exposure.
I make sure to limit the high end of the ISO to something below the threshold of acceptable noise, while still getting the benefits of what this technique is all about.
I combine this with Nikon's Exposure Value feature (for example, allowing me to tell the camera to under expose in situations where over exposure is likely). I find this gives me the complete control over virtually all areas.
A far cry from film, where we were stuck with whatever ISO (or, for those of you who remember, ASA) the film was rated at.
Andy, Interesting article, but you can set both Auto ISO AND minimum shutter speed with the Canon 1D Mark lV. With that camera, my minimum shutter speed is set to 1000 (1/1000). I shoot in Av and mainly birds in flight. I also shoot with a 1D X, and unlike with the Mark lV, I use it to shoot in Manual, but with Auto ISO and usually at 1250. Good luck!