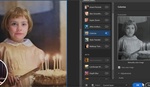
Creating a soft light layer and filling it with 50% gray has been a tried and tested Photoshop technique for as long as anyone can remember. However, why do we do this for dodging and burning, and is there a better way of working? This short video asks some surprising questions.
Unmesh Dinda of PiXimperfect is widely regarded as one of the leading authorities when it comes to teaching Photoshop skills, and even he’s a little bit stumped by this question which, it turns out, was posed in the comments of one of his own videos. Intrigued, he decided to dig deeper to try and figure out the logic behind what many of us do as a standard part of our portrait editing workflow.
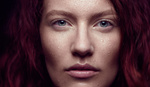
Dinda provides a link to this tutorial, which is incredibly useful if this technique is new to you. If you’re just starting out when it comes to retouching skin, it’s important to remember that brightening an image will also reduce the saturation, while darkening it will increase the saturation. While small changes to a person’s skin using this dodge and burn technique probably won’t have a noticeable effect, it’s worth keeping in mind that more pronounced changes could require you to then make some further adjustments to the color to keep it looking natural.
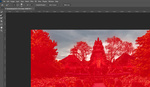
Is Dinda onto something? Can you find any difference when using an empty layer? Be sure to check the comments to the video as YouTube user thinkingpixels has come up with an answer, which also discusses the color implications mentioned above.
Let us know your thoughts in the comments below.


What I gathered from the video and the comments, was that the gray layer was a hold out from when people were still using the dodge and burn tools in photoshop (as it would help avoid the color shifts they created). But that the gray layer becomes unnecessary when using the black/white paint brush method.
His only argument with using the grey layer is moot point. It would actually be easier to see the were you d/b by just adding grey layer between the image and the transparent d/b layer. That way you can just hide and unhide as needed rather than having to change the blend mode.
agreed. someone on the youtube video comments said the same thing.
Excellent video!
You can use the eraser just as easily on a gray layer, so a transparent layer has no advantage in that respect.
Then whats the point of the grey to begin with? That was the point of the article, "why grey?"
Thank you ; will have to try that one ! I'm a big fan of dodge and burn that is actually one the oldest adjustments tools that started way back in the original dark rooms .
You can add a layer mask to the dodge and burn layer to make it easier to reduce effects .
You can also use a coloured brush to add subtle colour --- great for colouring black and white photos
Cheers.