
I recently interviewed Australian film photographer Rob Walwyn on his incredible images documenting the aftermath of the bushfires that devastated Australia’s east coast in late 2019 and early 2020. Walwyn’s project, "Karrikins," led to his first solo exhibition at the 2021 Head On Photo Festival in Sydney.
What makes Walwyn’s images of these dramatic scenes even more striking is his use of Kodak’s discontinued false-color infrared film Aerochrome. Kodak Aerochrome is a false-color infrared film originally designed for aerial photography, with forestry, cartography, industrial, and military applications.
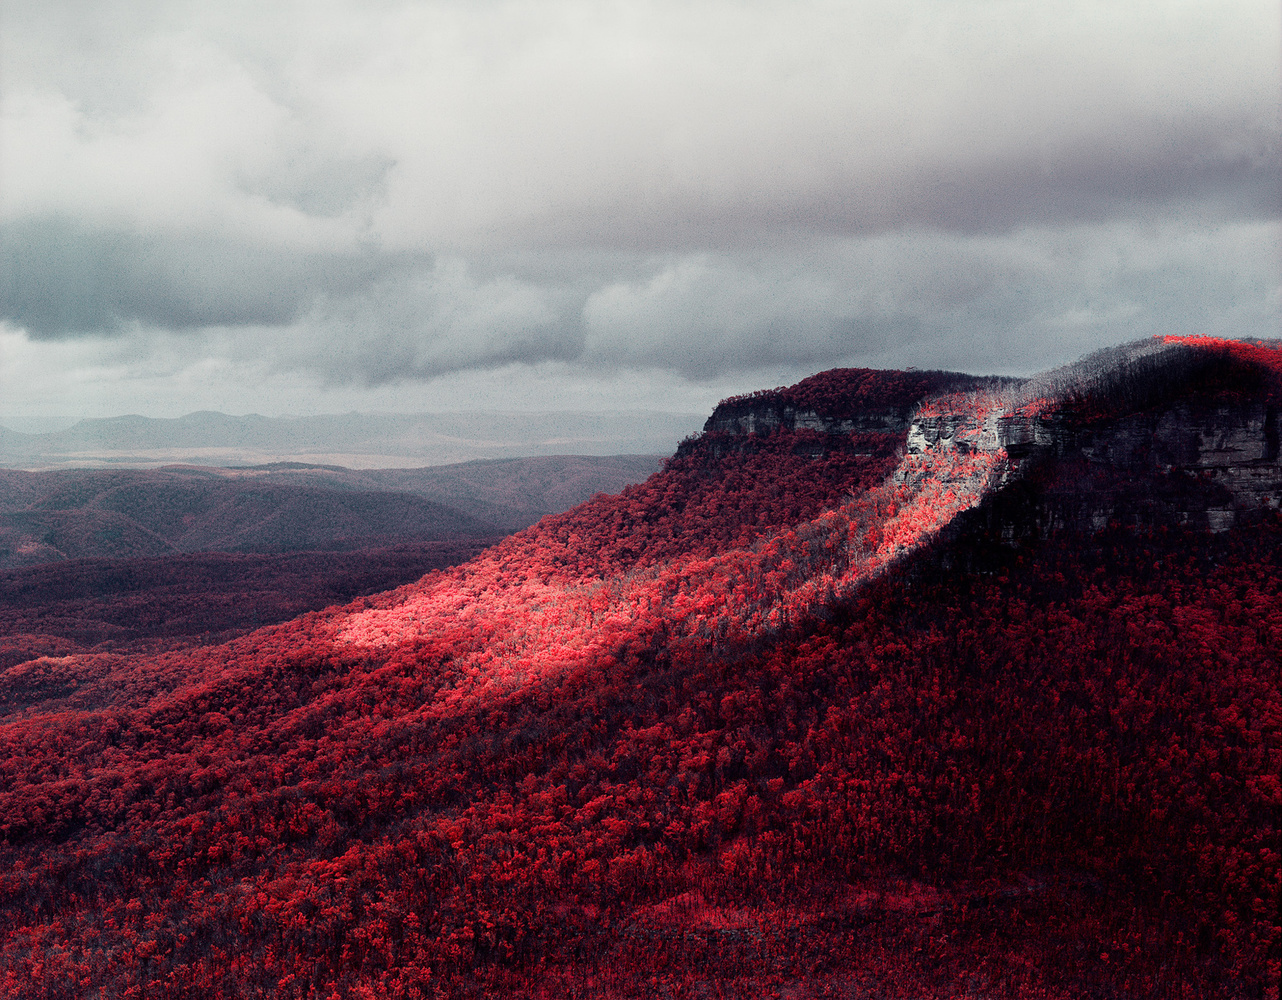
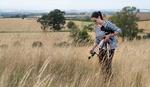
In Walwyn’s images, the green regrowth in bushfire-ravaged New South Wales shows up in hues of bright pink and red, mimicking the flames that leaped up the blackened trees just weeks before.

Karrikins #3 Copyright Rob Walwyn
But how exactly does one shoot Kodak Aerochrome? I have a few rolls in cold storage that I’ve been a little scared to shoot just yet. I asked Walwyn’s for some tips on how to shoot this rare, discontinued film, which is unlikely to ever be manufactured again. Below is the advice he gave me.
Freeze Your Film
Keep the film in your freezer for any length of long-term storage. Color infrared film degrades much more quickly than black and white or regular color films, so keep it frozen to extend its effective life.
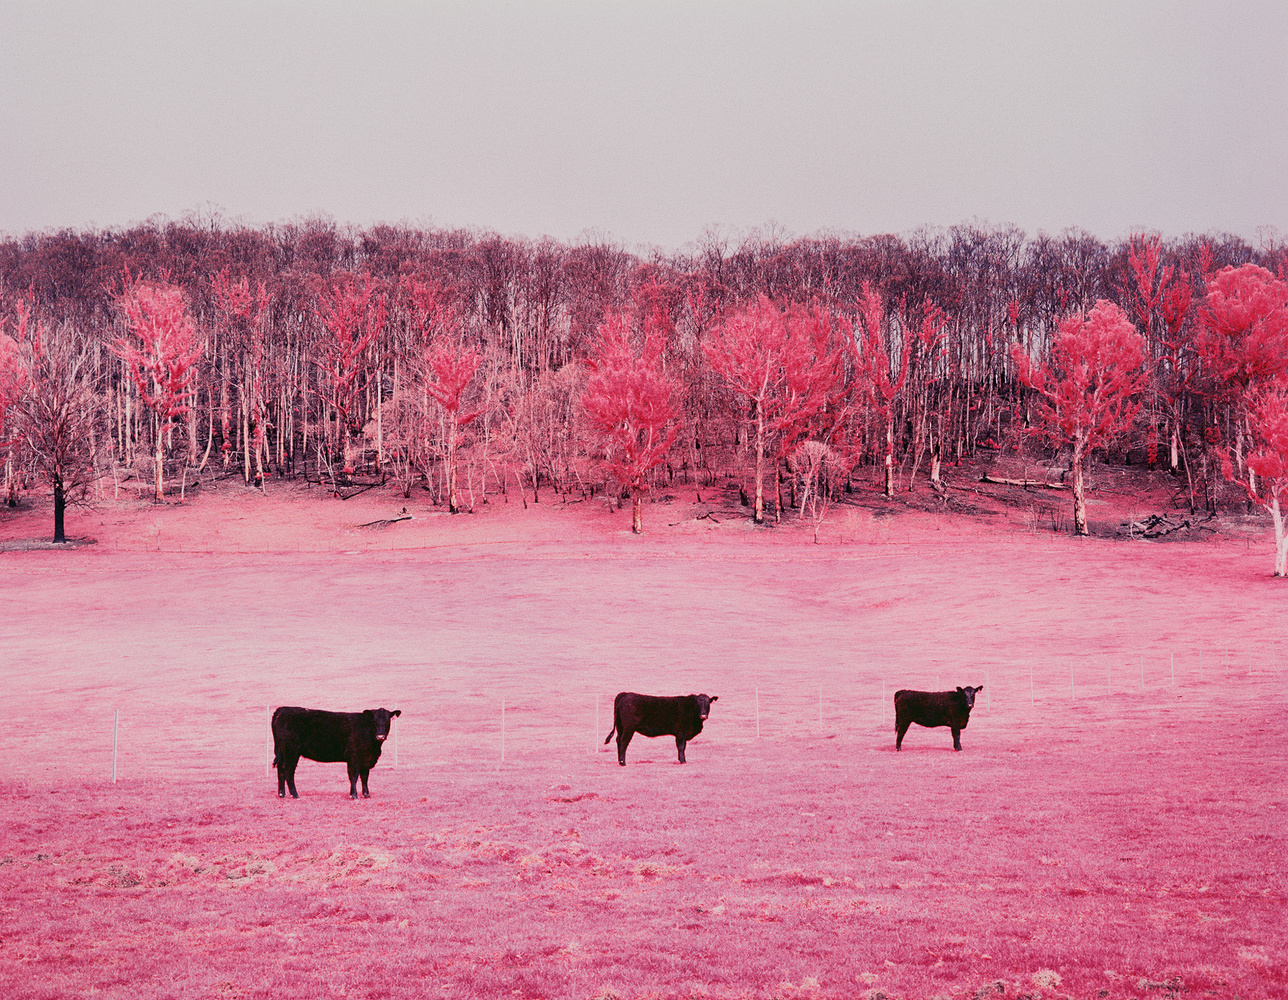
Karrikins #6 Copyright Rob Walwyn
Research Your Camera
Research the camera you plan on using before you use to load it with Aerochrome. This will allow you to confirm if there are any issues with that specific camera while using infrared films. Some cameras use infrared sensors to advance the film, and this can completely fog your precious roll.
If you want to play it safe, use a fully mechanical camera with no electronics for film advancement. This includes cameras such as the Canon AE-1, Olympus OM series, Leica M4, and Nikon FM3a.
I asked Walwyn about his use of Aerochrome in his Fujifilm TX-2 (almost identical to the Hasselblad Xpan). I knew the TX-2 has DX coding, so I asked Walwyn if there were any issues with it fogging the film.
There was no film fogging issues with the TX-2, thankfully. You can see the effect that the IR film advance sensor has on the film; there is a big magenta streak, but it’s confined to the sprocket holes area and doesn’t encroach on the image area.
I read that Fujifilm specifically improved the IR film advance sensor in the second version of the Xpan / TX cameras to be less intense specifically for IR films, but that is likely more of a problem when using Kodak HIE (the most sensitive of all the IR films).
I read on the internet about DX codes being read by LEDs, which might fog IR film, but have not seen any actual credible evidence of this or examples of how this looks. However, I have seen exactly how infrared film advance sensors ruin the film.
Karrikins #14 Copyright Rob Walwyn
Take Your Film Out the Night Before
Take your color infrared film out of the freezer the night before you plan to shoot it and allow it to gradually warm up to room temperature over several hours before opening the sealed canister. Otherwise, you can get spotting or ferrotyping on the film.
Pre-Visualize Your Images
Try to pre-visualize your shots and how they might look on this film before you shoot. Aerochrome doesn’t only turn pink and red from green trees; anything that reflects infrared light shows up in similar colors on this film.
I was most surprised by how certain textiles turned bright red on this film. Black clothes often turn vivid crimson.

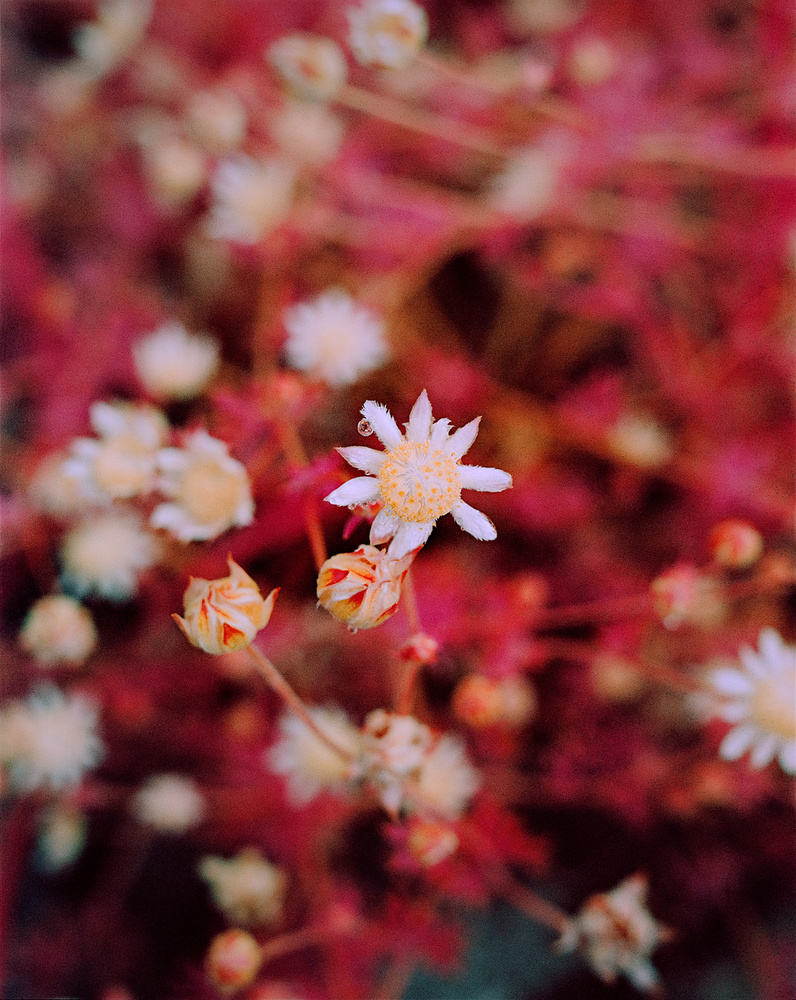
Karrikins #9 Copyright Rob Walwyn
How to Meter
I was curious to know about metering with this film, so I asked Walwyn if he used a light meter or if he relied on the built-in metering of the cameras he used.
The method I have used to success is to set my Pentax 67II’s TTL meter to ISO 400 and meter through the filter while attached to the lens. Using the camera’s spot meter mode on the brightest green leaves in a scene, I set to 0 exposure, that is, neutral gray.
I have also applied a similar approach using a handheld Sekonic L758 spot meter where I either meter through the filter (with ISO set to 400) or increase the exposure by ⅔ of a stop for an Orange B+W 040 filter (e.g. ISO 250) if I am not going to spot-meter through the filter. I have obtained similarly nice results by just setting the Pentax’s TTL meter to ISO 400 and using a weighted average meter reading.
It’s not any more difficult than shooting a slide film such as Fujifilm Velvia. You need to understand how limited the dynamic range is, and what types of contrasty scenes you should avoid.

Karrikins #2 Copyright Rob Walwyn
Don’t Make Any Focusing Adjustments
Many photographers know about the infrared focusing mark on lenses and often think that they need to use this when shooting Aerochrome. However, Walwyn advises not to make any focusing adjustments when shooting color infrared films.
A common misconception is that all infrared films require you to adjust the position of focus due to the difference in wavelength and therefore focus of infrared versus visible light.
This is not the case with Aerochrome, as those infrared focusing marks that some lenses have on them (a little red dot or line on the depth of field scale) are designed only for images made up by a majority of infrared wavelengths — for example, if you are using a black and white infrared film such as Kodak High-Speed Infrared (HIE) film with an R72 (720nm) filter.
Given Aerochrome records both visible and infrared wavelengths, with the majority of the image formed by visible wavelengths, you shouldn’t make any focusing adjustments and should just focus as you would normally for any normal film.
Karrikins #8 Copyright Rob Walwyn
Don’t Rush It
Don’t stress or rush too much with finishing your roll of infrared color film. Ideally, you would shoot and process the film promptly, but keeping it in the camera for a couple of extra days or weeks is not going to destroy the film if you keep your camera out of direct sun or heat.
Talk to Your Lab
Make sure you speak with your lab before handing the film over to them. Confirm they can process color infrared film without issues, as some development machines use infrared sensors within the machine to detect chemistry levels that will ruin your film.
Rob had all his film for this series processed at Rewind Photo Lab in Sydney.

Walwyn also shoots black and white infrared film Copyright Rob Walwyn
Karrikins Project
You can find out more about the Karrikins project on Rob Walwyn's website and by following him on Instagram.
If you're passionate about taking your photography to the next level but aren't sure where to dive in, check out the Well-Rounded Photographer tutorial where you can learn eight different genres of photography in one place. If you purchase it now, or any of our other tutorials, you can save a 15% by using "ARTICLE" at checkout.


Can do this with a Foveon camera that has a removal IR filter
There are ways to simulate the look of colour infrared films, but nothing beats the real deal
You mention TTL metering with filter in place but not what filtration you use. Could you explain please?
Color infrared film must be used with a deep yellow filter that block all blue light. At least a Wratten #12 equivalent (standard filter for color infrared) or a Wratten #15 or #16 equivalent.
Very good point! Apologies for not mentioning this in the article. Rob did advise me that he usually uses an orange #16 (B+W 040 filter) for Aerochrome.
I once bought 3 rolls of these IR aerochrome films and exposed one of them before discovering that all the photolabs near me have closed. It’s now impossible to find a lab that process E6 and even C41, and I am not sure that these films will even survive the long shipping to the nearest big city. Digital photography has killed all these labs, and now it’s even impossible to find a lab where I can walk in that makes prints from digital files!!!
That's sad to hear Marc, I have a few rolls myself but will have to send them to Sydney (1000km / 600 miles away) to get processed, hope they will be okay!