
Multiple exposures are a relatively straightforward and fun way to make interesting and unique photographs. While you can easily blend images during the editing process, creating successful multiple exposures in-camera can be a good challenge and a way to flex those creative skills.
History of Multiple Exposures
As I always like to do, let's start at the very basics. Multiple exposures are simply two or more images superimposed, and double exposures are, as it sounds, just two images superimposed. There are many, many ways to do this, including both in-camera methods and techniques used during the editing or darkroom process. In-camera multiple exposures can be done in a variety of ways, which I will touch on briefly below. In the darkroom, multiple exposures were created by either stacking different negatives within one enlarger and then exposing the paper a single time or by exposing the photo paper multiple times to different negatives.
Multiple exposures have been around since roughly the 1850s. At the time, it was more or less a marketing tactic for photographers. They would make a subject appear twice in a frame, striking a different pose in each, to make it seem as though they had a twin. These were sometimes done by exposing the entire negative (or another light-sensitive surface) twice. However, if they didn't want it to look like a double exposure (with overlapping elements), they would cover part of the lens, exposing the film, then cover the other side of the lens and expose it again.

An example of spirit photography.
The Haunted Lane. , ca. 1889. Retrieved from the Library of Congress, used under public domain.
Multiple exposures were also used for so-called "spirit photographs," or photographs taken during a seance, which was said to document spirits within an image. Often, those were actually one long exposure, with the "spirit" entering into the frame for only a few seconds towards the end, leaving a ghost-like figure, though more true double (or more) exposures were also used. Photographers would charge as much as $10 for a sitting for these or around $210 in today's world! The most famous spirit photographer, William H. Mumler, was called out for faking his images, however, when someone recognized the spirits as living Boston residents. Harry Houdini even got in on the debate over the legitimacy of spirit photographs, and to prove that they weren't real, posed for a photograph with the "ghost" of Abraham Lincoln in 1920.
As technology and the medium itself advanced, the process for creating double or multiple exposures changed. With the popularization of roll film, double exposures were created by not advancing the film before taking two or more images. It is important to note that if you are wanting to try this yourself with film, more modern film cameras prevent multiple exposures by advancing the film automatically. Some will have a way to override that, but not all will. One way to get around it is to shoot the entire roll of the film once, then reload it and shoot again, though some cameras make even this difficult, as they rewind the film fully into the canister automatically. You will have less control over what is getting overlapped with this method unless you are meticulous and take very specific notes of each frame, but I think that is half the fun of multiple exposures anyway.

Double exposure with light leaks, created with a Holga film camera.
Digital Multiple Exposures

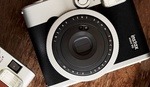
Digital, in-camera double exposure, created with a Nikon D800.
Just like with film, there are multiple ways to create digital multiple exposures. You could simply layer images in Photoshop or other editing software (there are even apps for it) and change the blending modes and/or opacity and end up with excellent multiple exposures. I generally prefer, however, to create them in-camera, as I really appreciate the lower amount of control that I have, as well as the spontaneity that it encourages. Luckily, there are many DSLRs and mirrorless cameras that have the option for in-camera multiple exposures! Nikon, Canon, Fuji, and Panasonic all have in-camera options with varying settings and controls.
My primary camera is the Nikon D800, so all things that I reference from here on out will be that camera. On Nikon cameras, you access the multiple exposure settings towards the bottom of the Shooting Menu. Once there, you can turn multiple exposures on for a single image, on for a series, or off. You can also select how many exposures you want (up to 10), and turn off or on auto gain. Auto gain simply blends the exposures of your different images to create one properly exposed file, as opposed to a potentially very overexposed image. Nikon mirrorless cameras have even more options, and they also allow you to see a preview of what the multiple exposures will look like through the electronic viewfinder after you take the first image!
There are two potentially tricky things to deal with in regards to Nikon DSLRs and multiple exposures that you need to keep in mind. First, you cannot use live view while working on multiple exposures. If you turn on multiple exposures and then turn on live view, it will kick the multiple exposures setting back off. Second, you only have about 30 seconds to take the second (and subsequent) exposure, or it will end up being a single exposure. This doesn't allow for planning of your shot inbetween or time to move to a different location, so if you are the type to plan out your multiple exposures, you will want to do so before starting and will want to choose subjects that are right next to each other.
Once you get your settings figured out, for the most part, it is as simple as point and shoot! While you can absolutely decide ahead of time how your multiple exposures will look and shoot in a way that makes them easier to predict, there is something to be said for embracing the unpredictable and being spontaneous in your photography. So much of photography can be extremely technical and precise, and having an outlet that is more playful and free is a good thing from time to time. That said, figuring out which types of scenes lend themselves well to multiple exposures can save you time. Textured surfaces or scenes generally work well with this process, especially when paired with something more simple and empty.

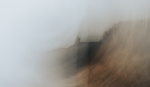
In-camera double exposure.
Visual Impacts
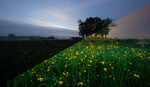
In terms of style, at the risk of oversimplifying, there are two broad visual types of multiple exposures. There are simplistic ones, with lots of white or negative space. I'm sure we've all seen the popular portrait with white space around the subject and their silhouette filled in with trees or buildings. The image example above is also an example of this. There are also very busy, all over multiple exposures (such as below), which give a very different look and feel. Both types can be powerful and creative tools that lend themselves to different scenarios and uses.

Digital in-camera double exposure.
Multiple exposures are great for a variety of things. They can be simply used as a technique to add lots of texture and visual interest to an image, something drastically different from a single exposure. They can also be used to tell more of a story within a photograph, whether that be of a person or place. By allowing extra context to be crammed into one image, as long as defining elements are identifiable from each exposure, you can show more about a person or place than a single exposure could. Taking a portrait of someone with a second exposure that shows something that is unique to them, such as a hobby or career, could be a great way to give viewers more information in a creative and unique way.
Multiple exposures can also be used for conceptual reasons, which is the primary reason I have used them over the course of my work. Much of my conceptual photography pertains to failing memory and the instability that results from that. Multiple exposures lend themselves perfectly to creating instability and confusion and conveying ideas related to memory problems. Many other photographers have used multiple exposures to do similar things, as well as using them to challenge our ideas of perception and reality.
It's worth pointing out that so far all of my image examples so far have been double exposures, but most cameras do have the ability to go beyond two frames. Much of my thesis work from graduate school was between four to eight exposures in one, which you can see a few examples of below. Playing with more than a double exposure can get tricky in terms of making it visually successful, but they are just as fun and intriguing to play with!

In-camera multiple exposure, from "The Cost of Forgetting" series.
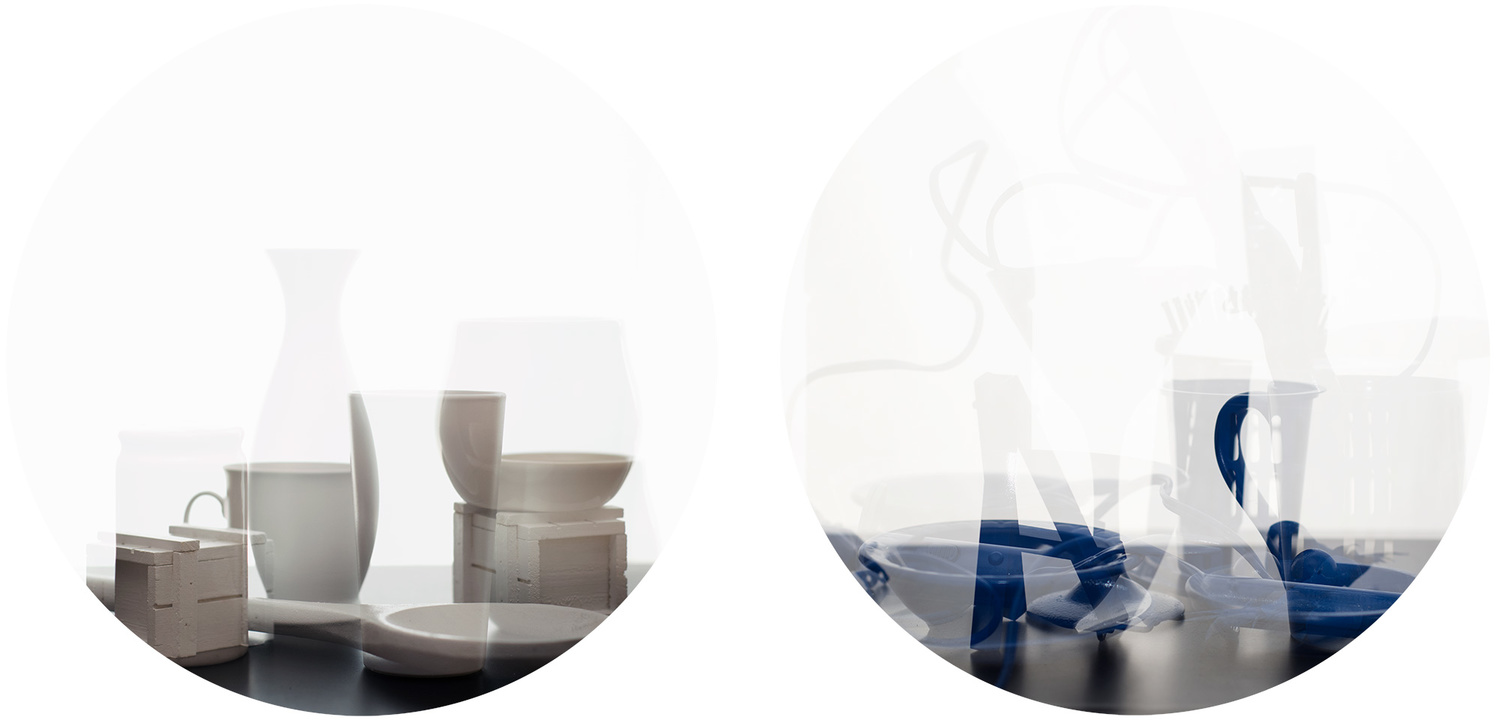
In-camera multiple exposures, from "The Cost of Forgetting" series.
How do you like to use multiple exposures? Share your examples in the comments!


Hey! I shoot a Nikon D90 and having this "how to" for in camera double exposures is going to be fun to figure it out! Thanks for sharing this!!
Gpa Jer
The D90 was what I actually started with for digital double exposures! Have fun!
Thanks for posting this!
Looks like a really cool and fun thing to try!
You can have some real fun with double exposures and strobes. I did it for a fashion shoot a while back. I had the strobes set up and the shutter at 1 second. I would have the strobe fire with the camera and then the model would would run and if flash it again creating two exposures of that model. It looked awesome.
Oh for sure! I've used strobes/double exposures from some self-portraits in the past. It can be really fun and creative!
Honestly a great article Abby, you actually inspired me for my next personal project.
Oh I love to hear that!! I'd love to see the images when you get to creating them!