How many megapixels do we need? What do we have to consider already out on location, that we are able to print big afterward? How do we choose the right printing material, and how can we be sure to get the best possible printing result in the end?
In my latest video on YouTube, I showed you some of my recent special edition prints, that I printed bigger than A0. As photographers, we are used to putting a lot of effort into our photographs and as printing big costs money, we want to make sure that we get the best possible result. So, how did I manage to get my prints on point?
The Right Material
The printing material is an important thing for me. It should fit the scene I have photographed, it should support the story or the message my images tell, and most importantly, it should also fit the interior of the house or the apartment where the image gets hung up. So, how can we achieve that?
There exist so many different materials and generally, there is no right or wrong answer. We should consider the different behaviors. Metal surfaces look fantastic, I really like them. But on the other hand, you are very limited with Dmax. So it is not possible to print each photograph well on metal. Acryl glass looks great, but it doesn’t fit into each room or to each type of interior. I'm not saying that these materials are bad, but it is something that I want to consider. But, there is one material, that fits best to nearly every type of interior in my experience: canvas. And this is why I decided on canvas for my special edition prints this year.


Differences Between the Printing Labs
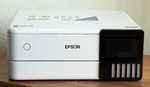
I’m quite happy with my Espon SC-P900 printer, which I use for my open and limited edition prints. But with this printer, I’m not able to print bigger than A2. So, whenever I want to print bigger, I print over at a printing lab.
It's important to consider is that there is a difference in quality between all the labs. This is why the price is never the first criterion for me. I may have put a lot of effort into taking the photo in landscape photography — it is often hard to get to a photo spot — so I’m definitely not interested in saving a few bucks. I’m more interested in getting very good quality for my prints.
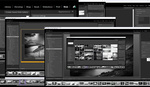
What I do is: I download the ICC profiles from different printing labs and compare the behavior while I’m soft proofing with them in Lightroom or Photoshop. This gives me a quite good idea of the possible dynamic range — the Dmax — of the material. Dmax is even more important for me than the printing resolution, as this has a bigger impact on the result in my experience. And a good tip here is not only to consider the big printing labs, by the way. Have also a look at the small one around the corner in your local area. It could be that they are a bit more expensive, but it could also be that they offer much higher quality.

The Printing Process Starts Already Out on Location
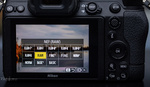
I don’t think that it would be a good idea to take your printer to your photo location though, but what I always do before I press the shutter release button of my camera is to check if everything is in focus. This might not be the most important thing, if you share your photos just on Social Networks, but if you want to print big and with high resolution, you need to nail the focus. If your photo is a tiny bit out of focus, it could be that you will come away having to print smaller or with a low resolution. But when it comes down to XXL printing, you want to fight for each pixel.
How Many Megapixels Do We Need?
I use a Sony a7R IV, which gives me 61 megapixels and as I don’t tend to crop in all too much, I usually don’t come into any megapixel troubles. But for some of the images I have printed for my special editions, I just used my Sony A6500 with a 24-megapixel sensor. And the shocking truth is, that this is also enough in most cases. But we need to be sure. Printing big costs money, we want to get it right.
What I always do is divide the number of the horizontal pixels of my digital image by the desired width of the print in inches. This gives me the dots per inch (DPI). Your printing lab will offer you detailed information about their printing resolution for each material, but in my experience, labs tend to print canvas with around 200 dpi. So, when you get 200 or more for your images, you are fine. If you are a tiny bit below, it is also not the biggest problem, as the viewers are farther away from a bigger print, compared to a smaller one, which compensates for the loss of quality. But you should not go too low, of course.
If you are unsure, you could simply upscale your images with any upscaling software, that uses an AI. Topaz Gigapixel is a fantastic software, but also Adobe Photoshop offers an upscaling tool too.

Don’t Rely on Your Soft Proofing Talent
First of all, it is important that you work with a calibrated monitor. I calibrate mine every few months, using the Spyder X Elite. This is important because your monitor will show the image quite close to the final result on paper or canvas; the print always looks a tiny bit different in the end. This is why I prefer to hard-proof my images as well.
This could mean that you order a smaller version of the final print first, just to be sure that there are enough details in the shadows, that the texture of the material interacts with the image well, and how the haptic experience of the final product feels. For canvas, it is a big difference which stretcher bars you use, for instance. If they are too thin, the whole print looks cheap for me. If they are too thick, it could also look strange, but it could work if it fits the image and to the room. I decided on a depth of 4 centimeters (1.6 inches) for my XXL prints, which are around A0. This is not too thin and not too thick and should fit into most living rooms.
Many more tips about printing big are revealed in the above video. And feel free to tell us your preferred printing material and printing habits in the comments.


Good article. Some detailed (but not too technical) information on this topic can be found in the Printing articles on Luminous Landscape.
Hi John, thank you for your kind words and your suggestion for Luminous Landscape!
Nice greetings,
Christian
I think DPI resolution requirement is quite dependent on content and viewing distance. Portraits require less resolution than landscape, people like to explore landscapes, viewing them up close. I love Hahnemuhle fine art pearl paper, so expensive...
Also dependent on the texture of the media. Something like Hahnemühle William Turner has enough texture that it hides a lot of resolution issues.
Also looks amazing for the right image.
Hi John, that's a good tip. Texture can definitely compensate a bit for too low dpi and also for overexposed areas, when they are not too large. But generally we should get sure to get the exposure right, of course :)
Thank you for your comment and nice greetings,
Christian
Hi Andrew, yes it totally depends on the content. And also interesting: on my experience, when I show an A2 fine art print to people, lots of them go close to see details. But when I show an XXL print, they often even go one step backwards, to have a look at the entire image :)
Thank you for your comment and nice greetings,
Christian
A40 sounds like something that people in other parts of the world would say. What is that in inches?
You mean what is A0 in centimetres. Apparently, only the U.S., Liberia and Myanmar still use the imperial system. Everywhere else uses the metric system.
No, I did mean inches. That is what we use in the United States, which is not only the center of this website, but the economic and social pinnacle of the civilized world.
Im assuming that is a tongue in cheek comment!
No, not at all.
Unless you're in England. They still use pints and miles and metric. I guess they haven't made up their minds completely. ;-)
A0 paper is 33.1 X 46.8 inches. It's a common international size for technical drawings and posters. (And no, it's not a nice neat number of millimetres either, nor does it really correspond to common photograph proportions, though it's pretty close to 4X5).
Thanks!
That is very close to the standard print size of 48 inches by 32 inches, which preserves the original 3:2 aspect ratio of all of the cameras that I use.
I print on metal at this size with some regularity, and get pretty decent fine detail rendering at 16 megapixels and above, provided there was no cropping. This is for viewing from 3 or 4 feet away from the print. If one examines the print at a viewing distance of just 12 or 15 inches, then there may not be as much finely resolved hair detail (wildlife subjects) as one would like to see, depending upon the viewer's expectations.
Hi Tom, A0 is 33.1 x 46.8 inches and you are right, that is close to 2:3 format. Distance is everything here, indeed. Even 5 megapixels could be already enough, when the viewer is even farther away. But yes, absolutely: if anyone had the idea to go closer, the single pixels would be quite big :)
Nice greetings,
Christian
Yes, viewing distance matters a lot, and also subject matter.
If the photo features a bird or mammal, close up, portrait style, then most viewers like to see the fine feather or hair detail sharply and distinctly resolved.
To provide sufficient hair or feather detail on a close up portrait printed at A0, or 48" x 32", one really needs around 12 megapixels, as a bare minimum, and 20 megapixels is much better. But if the animals are smaller in the frame, then the viewer doesn't expect to see every hair and every feather filament, so one can get by with less resolution.
A0 paper has its dimensions so that its surface is exactly one square meter, and the length of all A paper sizes is equal to the width multiplied by 1.41421… (square root of 2) so that the proportion of all paper sizes is always the same where A1 is the half size (surface) of A0, A2 is half of A1, A3 is half of A2, etc.
B paper also has the same proportion but instead of one square meter, it’s based on 1 meter length.
Hi Marc, thank you for the exact definition of A0 here in the comments, what really adds to the article :)
Nice greetings,
Christian
Awesome info. Have worked in Graphic Arts and specifically Print for majority my career. What you mention on keeping monitor calibrated for true color is such a major key -- have seen more issues on color than final print quality. ICC profiles are super smart to use as long as monitor is correct. Your lab or local large format print shop can provide specific profiles for their exact equipment and media. You can chat them up over issues you might see, most are happy to help out. Size of image vs size of print, while is not irrelevant, is less of a concern with modern cameras and pre-press software. The prep software does the heavy lifting, no real need for you to use an enlargement app on your end because whichever app is not same as what the shop uses and may have different profiles built-in leading you down a rabbit hole chasing pixels. When printing large, in addition to ordering small size of image on particular media, ask if they will also print a '100% At-Size' swatch of the final enlargement, say a 5 x 5" swatch, from an area of the image selecting a specific detail or a spot with odd contrast or a concern. Most smaller shops will add this for free if you develop a good relationship and the large labs may have this in their price list. Thanks for the article and Happy printing!
Great article. Printing and monitor calibration go hand in hand. It's one of those pitfalls in photography. Some people treat their monitor screens like a TV and have them far too bright and too saturated so when they print what they get is often far too dark and overcooked colour wise. Calibration is not difficult and should be done regularly if you are into physical printing in any way. Printing can be joy if done correctly and this is where taking advice from experts, Like Keith Cooper, can be a great help. He is the one I often refer to for guidance on all matters relating to printing.
https://www.northlight-images.co.uk/keiths-photography-blog/
Most of us stop printing at home due to the high cost of it. The printer is one thing, but the cost of ink is phenomenal. Epson and Canon kill their market with the ink price.