
Modern cameras offer a wide variety of settings to change the behavior and customize to your own preferences. There are also a lot of basic settings you choose once and forget about it. Did you know there are settings you can ignore completely? I found eight of those.
Menu systems of modern cameras can be very complex. There are many settings possible, and it can be difficult to find your way through it. Even manufacturers can have a difficult time ordering all those logically. Sony is well known for its menu complexity, while Canon has a more logical layout. Nikon and Fujifilm are somewhere in between.
Even if you’re used to these menus, it can be difficult to find that one setting, no matter which camera brand you’re using. Fortunately, you can forget some settings, because these won't make a difference.
For the Raw Photographer Only
There are two kinds of photographers. The first shoots in the JPEG file format, the second in the raw file format. The eight settings I have listed in this article are not important for the latter. But you have to realize, if you’re a JPEG photographer, these settings are very important.
Are you a JPEG photographer or a raw photographer? Some menu options are useless if you use the raw file format.
You may think this article is for the raw photographer only. But I think the JPEG photographer can have benefit from this article as well. Just read it, and find out for yourself.
1. White Balance
The color temperature setting is responsible for the correct white balance. Often, there are six different presets, next to the custom setting and the auto white balance.
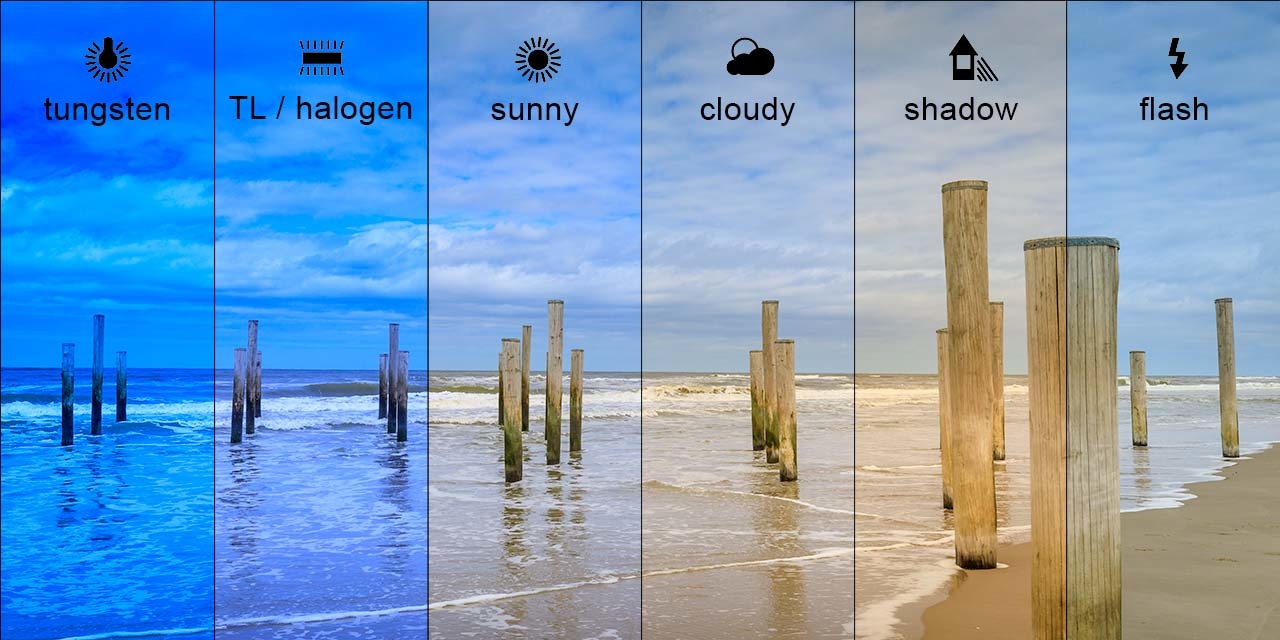
The white balance settings can be altered in the raw workflow without loss of quality.
For the raw photographer, it’s not important which setting you use. The white balance can be adjusted to your liking during post without image quality degradation. Even so, it might be handy to choose the best possible white balance while shooting. It may help you to check the image preview on the LCD screen. If you have the wrong setting, it can be corrected.
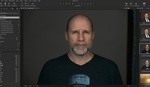
2. Picture Style
Almost every camera offers a selection of picture styles or film simulations. These presets will give a certain look to the final image, which is basically an in-camera post-processing step. The result will always be a JPEG image. If you’re using raw, the picture profile or film simulation is not added to the image, though you will see it in the preview.

Picture styles offer a selection of image presets, which won't have any effect on raw files.
In some occasions, you can add a similar picture profile to the raw file during your own post-processing. It might not be exactly the same as the profile offered by the camera manufacturer, but it can be a good starting point for your own personal final touch.
3. Lens Correction
A perfect lens doesn’t exist. Every lens has imperfections. This can be vignetting, aberration errors, or image distortions. Cameras offer settings to correct these errors using built-in lens profiles. If the lens is recognized, certain lens corrections are applied to the final image.

On most occasions, lens corrections won't affect the raw file, but there are exceptions.
If you’re shooting in the raw file format, these corrections are often not applied at all. You will need to activate the lens correction in post yourself. Despite that, some camera manufacturers will add lens corrections into the raw file itself, which can’t be disabled at all. In other words, sometimes, you don’t have a choice.
4. Noise Reduction
There are two kinds of noise reduction. First, there is long exposure noise reduction, which makes use of a dark frame to remove hot pixels and other unwanted pixel errors. The second is high-ISO noise reduction.
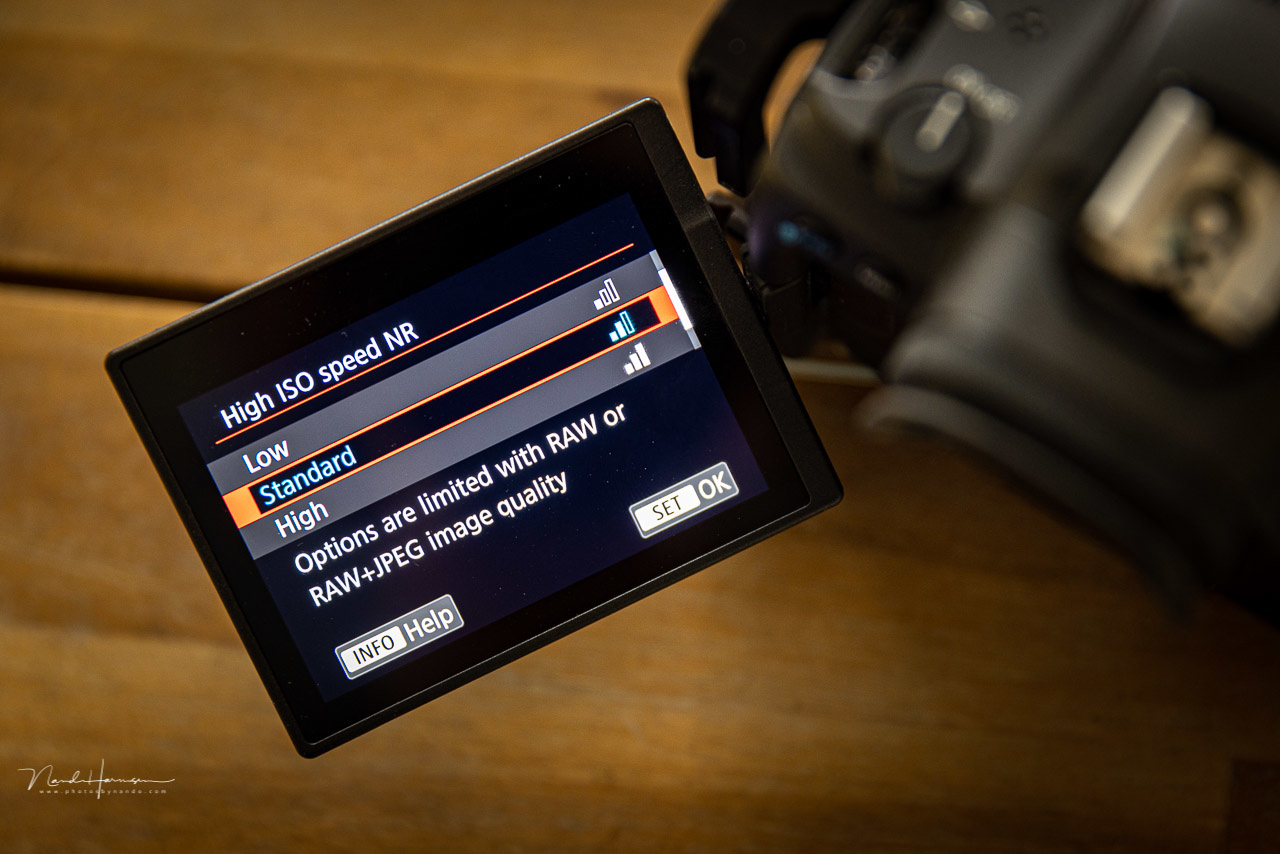
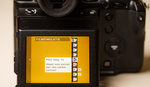
High-ISO noise reduction on the Canon R5. It won't affect the raw file, which is also noted in the menu itself.
The latter is not added to the raw file. You have to use the noise reduction of your photo-editing software. No matter what high-ISO noise reduction you have set, it won’t affect the raw file.
5. Highlight Tone Priority
Active D-lighting, highlight tone priority, Dynamic Range Optimization. These are all names for the same thing, the expansion of the dynamic range that is visible in the image.

An expansion of the dynamic range for Fujifilm. Other brands have something similar. But with raw, you already have access to the complete dynamic range of the camera sensor.
By using the highlight tone priority setting, the camera will underexpose the image to protect the highlights. Before the JPEG image is produced, it will light the darkest tones, expanding the dynamic range a bit.
This setting is for the JPEG image only, not for the raw image. As a matter of fact, if you’re a Nikon photographer, and you use the Active D-lighting, the raw image will be underexposed. So, turn this option off because the raw photographer already has the ability to use the maximum amount of dynamic range.
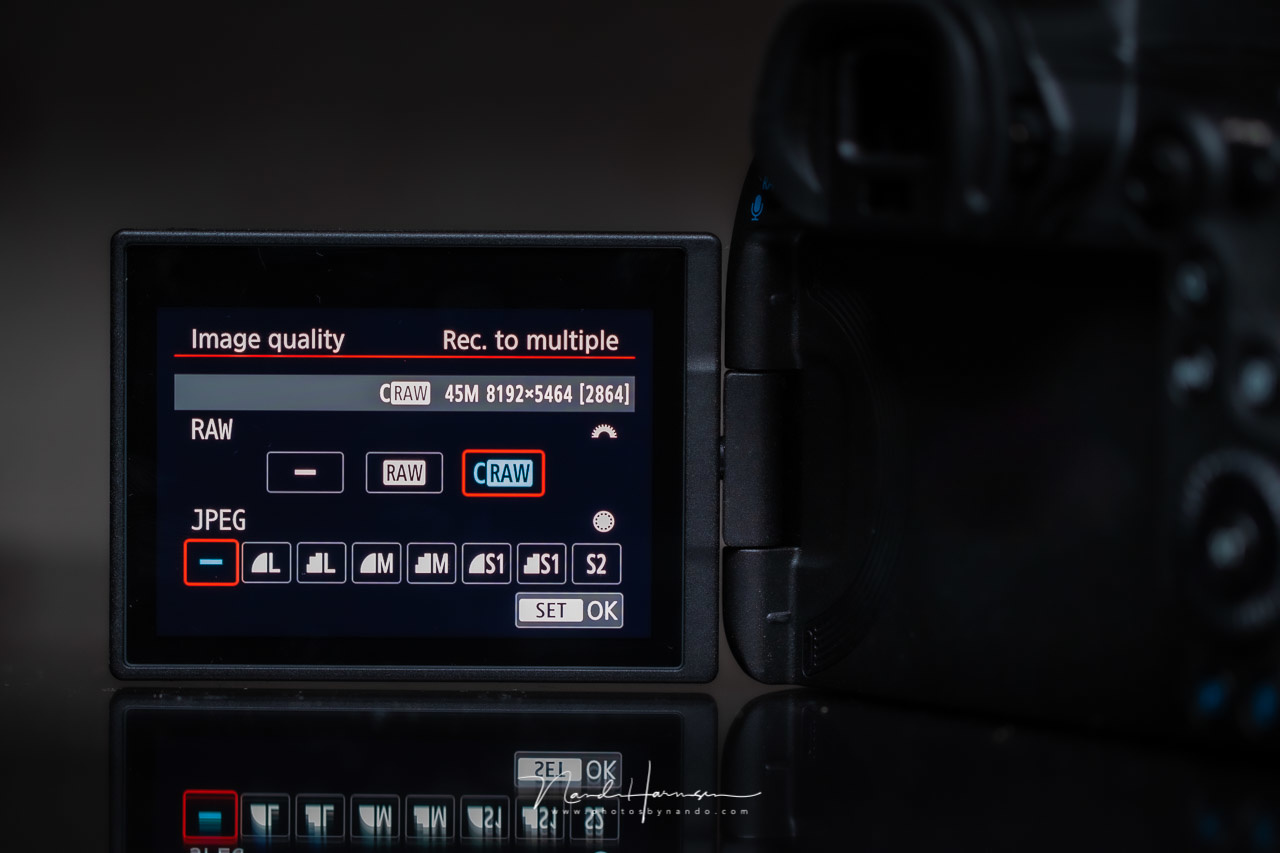
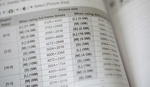
6. Image Aspect Ratio
I love to shoot images in the 4:5 format, especially when shooting in portrait mode. Most cameras offer the ability to change the image aspect ratio. Canon, for instance, allows 2:3, 4:5, 1:1, and 16:9. If you use one of these aspect ratios, the resulting JPEG image will have those dimensions.
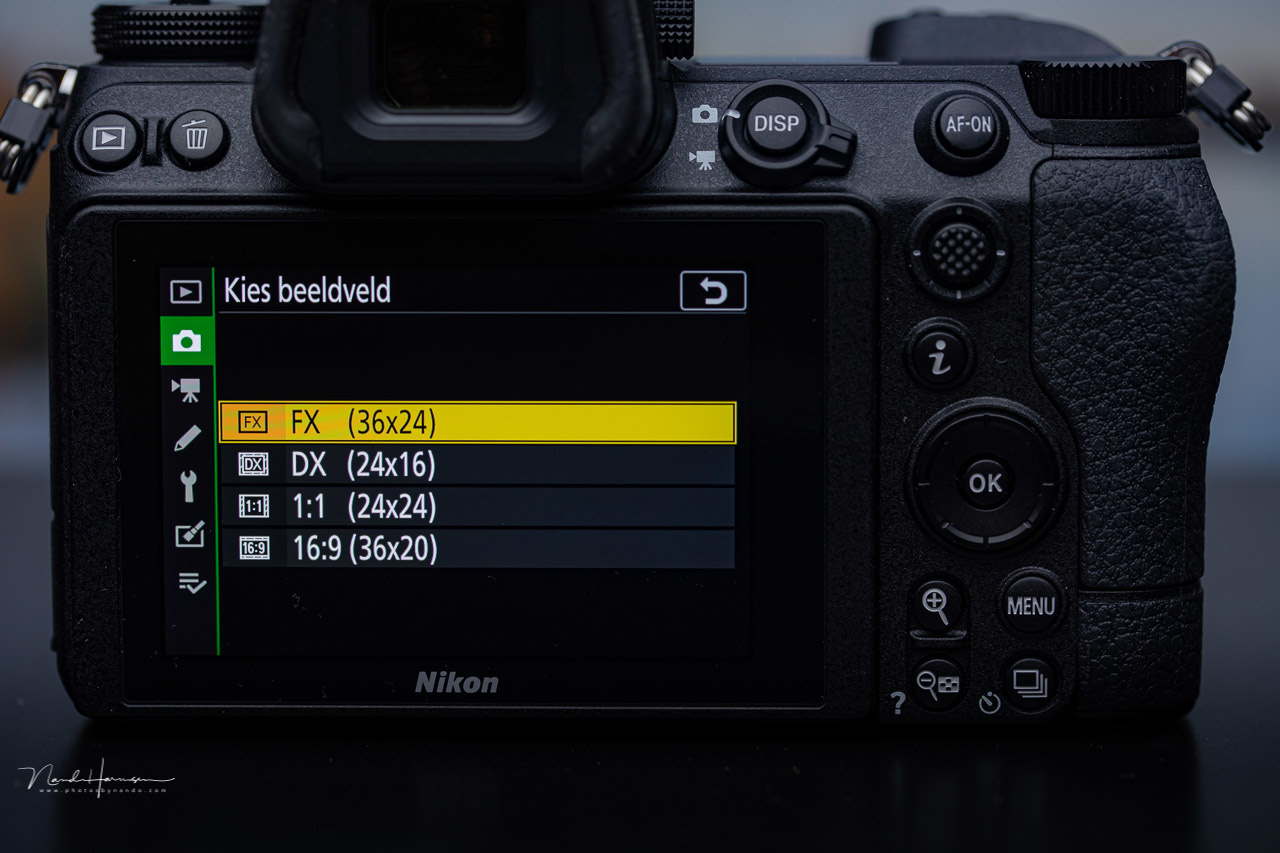
Different aspect ratios on the Nikon Z 6II, together with the DX setting. The latter will have an effect on the resolution. The aspect ratios don't change the raw file.
If you’re shooting in raw, you will end up with the normal sensor aspect ratio, no matter what you’ve chosen. After all, raw means the almost untouched sensor data, and that is what you will get.
Be careful, though. If you activate a crop mode, it will affect the raw image also. With that setting, sometimes, only a part of the sensor is used, and the resulting image will have a lower resolution. Although it’s often found in the same aspect ratio menu setting, it’s completely different from the aspect ratio.
7. Color Space
A camera has the ability to choose between the Adobe RGB or sRGB color space. This color space is assigned to the JPEG file, not to the raw file. If you open a raw file in software like Lightroom Classic, it will assign a different color space regardless of your camera setting. For Lightroom Classic, this is ProPhoto RGB.

sRGB or Adobe RGB. Although the color space is different, it won't make a difference for the raw file. For JPEG photographers, the sRGB is probably the better choice.
Color space is only important for the JPEG photographer. Although Adobe RGB has a larger color space compared to the sRGB, it might be wise to choose the latter. This will ensure the colors will be displayed correctly on any device.
8. HDR
Some cameras have an HDR function built in. This setting is not intended for the raw photographer, and often, the setting is disabled if the camera is set to raw. It will only be active if JPEG is chosen.

The HDR modes of the Canon EOS 5D Mark IV. It is possible to use it with raw files, but the result will be a JPEG file. On most occasions, the option is not available with raw and only accessible when the camera is set to JPEG.
If you want to use HDR, you will be better off using exposure bracketing and combining the images in post. This way, you can manipulate the HDR image to your own preferences. The in-camera HDR setting is doing the same thing, but it will produce a JPEG image as a result. There is no way to change that appearance, although you may be offered a choice between a couple of effects in the HDR menu.
For the JPEG Photographer
If you are a JPEG photographer, for whatever reason, the eight settings mentioned in this article are important for you. Use these to your own benefit, and choose wisely.
Do you know of other camera settings that are not important for the raw photographer? Please share in the comments below.

In case you use Nikon Capture for the RAW conversion, all these settings Will have effect....
I'm using Capture NxII, later other versions, to develop my images, and all of these settings are implied. Makes it a lot easier.
One of the reasons I don't use Lightroom.
What I forgot: in Capture I can switch these setting on and off.
Many other software will also read these settings, Lightroom also. And you are correct, it will make it a lot easier in a way.
Capture One doesn't mimic the jpg output. They do their own raw methodology processing. Sometimes, I do wish they would, though.
Capture NX and Capture One are two different programs.
I am aware of that. I brought it up because Paulus brought up in Capture One he can switch the setting on and off. So, I'm just saying that's not the same as jpg capture.
Ah, I understand. Thanks
No, I was refering to NikonCapure, in it's various forms.
I am not familiar with Capture 1, only know it nu name.
I have my aspect ratio under a custom buttom myself, for the same reason you mention.
As I understand it, picture style affects the in-camera histogram, so it worth setting this correctly.
Correctly to what? How do you set a Picture Style correctly?
Set it a style similar to how you intend to process.
I'm a Canon shooter and I set my picture style to have practically zero effect on my histogram or what I see in my VF or rear screen.
You have a point, Greg Edwards. Setting a picture style can fool you when checking exposure on the back of the camera. I wrote an article about it a while ago.
https://fstoppers.com/education/consider-using-flat-picture-profile-when...
I found that article first and just posted a comment there - as a RAW shooter exposing to the right, would choosing Faithful on a Canon EOS R7 and turning on Highlight Tone Priority give me the best of both worlds: a pleasing JPEG with a histogram that matches the RAW dynamic range? (I shoot RAW+JPEG.)
Just read a Canon article on HTP - it actually records a 1-stop underexposure and then boosts the darker areas in the JPEG - shades of consumer Dolby B audio noise reduction in the 1970s (turned upside down). No thanks!
Yes WB and Picture Style is for jpeg BUT BUT setting them will get you nearest and shooting both jpeg and raw it will be hard to tell the difference. Post Programs where you can select a picture style is a best guess of the camera maker style. NR (either one), if not used you end up with hot (red) or dead (white) pixels that are most impossible to get rid of. You used to have to change the date by a month and return to reset pixels today it is done every time you turn off your camera. Even todays noise programs can not get rid of either and only a trick in PS will but degrades image. As far as long exposure, with a wide lens (12mm) you may shoot at 25s or even 30s say for astro MW but using a longer mm like 20mm or 24mm you will be limited to 10s and less, if you can not wait 10s or 25s for a next shot then you are not out enjoying. It takes extra work/time to run a stacking program. It only takes a minute and a half to do a 200 degree pano doing a 10 shot each using a stepper and moving during dark frame. I used to in the beginning turn it off but the red and white pixels took to long to clone out. It is the worst advice to turn off!!!
For a single astro photo it isn't a big deal to wait another 10 to 30 seconds for the darkframe.
But if you want to shoot a series of asto photos for stacking, it adds up. Eight images of 30 seconds will become 8 minutes instead of 4 minutes, twenty images of 30 seconds becomes 20 minutes.
Startrails will also become impossible with dark frames.
With normal long exposure the same applies. A 5 minutes long exposure will take 10 minutes, and so on.
If you have a problem with hot pixels on your sensor with long exposures, you might also decide to take one manual darkframe and substract that one from your series of images. The result is the same, but it will save you a lot of time in the field.
But I wasn't talking about long exposure noise reduction, but high ISO noise reduction. That setting has nothing to do with darkframes.
And what's even worse than doubling your shooting time, if your aim is to shoot star trails then the long-exposure NR will cause gaps between the stars as long as the trail of each individual exposure instead of nice continuous trails!
😂
Star trails with long exposure NR does offer a nice dotted line. You should try sometime, Tim :)
Dynamic Range Optimization and Dynamic Range Priority in Fuji cameras do affect RAW files because it will be used differents speed/aperture/ISO than would be used if Dynamic Range would turned off. See this article:
https://www.jmpeltier.com/fujifilm-dynamic-range-settings/
I have read the article. As I expected, it only changes the base ISO level. DR200 will set the lowest ISO to ISO400, and DR400 to ISO800. It doesn't change the aperture or shutterspeed.
Although the differences are shown in the example, I rather believe it's the effect of the raw editor reading the setting of the camera and applying it to the output. As far as I have seen with my own testing, it won't change the raw data at all.
Why not just get it right in camera and save yourself extra work in post?
You are aware the image you view in the back of the screen is jpg? Yes?
With raw files, there's always going to be post work.
If you don't know the difference between raw and jpg, it'd behoove you to catch up.