
The weather isn’t always pleasant for landscape photographers. Have you ever tried to take advantage of extreme weather conditions?
It’s safe to say that almost any landscape image with lightning is always striking. However, capturing such images is often harder than it seems. While unpleasant weather is pretty common for landscape photographers, depending on where you are and quite frankly, how unlucky you are, it’s quite uncommon to find yourself in a situation when you can photograph extreme lightning storms and be able to properly execute it amidst the many factors that can hinder you.
Challenges To Photographing Lightning
Photographing lightning storms can be hindered by so many factors. In the same way that heavy cloud cover can prevent you from photographing a nice sunset or the night sky, clouds are the most common hindrances to shooting lightning. Lightning happens due to electrical charge imbalances between a storm cloud and the ground (or commonly also other clouds.) Given that these marvelous natural occurrences happen because of clouds, it is far too common for other clouds to be around and get in the way of your shot either partially softening the lightning flash or covering it entirely.

The most common hindrance to shooting lightning is having a thick cloud between you and the lightning strike
Another obvious challenge to this task is of course the rain that often comes with the storm. Rain can be pouring around the area where the lightning strikes are happening and can therefore introduce haze if being photographed from a distance. On the other hand, if you are shooting from a vantage point relatively close to the storm then there is higher likelihood that the rain will prevent you from shooting either because of the optical effect it makes or the fact that your camera and you might be at risk of getting wet, or worse getting struck by lightning.
Technicalities of Photographing Lightning
1. Camera
Any camera with manual functions can photograph lightning. However there are certain features that can make the workflow much easier. For instance, it is a plus if the camera has a built-in interval shooting mode. If not, then an external intervalometer remote can suffice. Higher resolution cameras are obviously more advantageous to yield more flexible images. Cameras with faster and more accurate low-light focusing would be beneficial as well if you intend to shoot with focus considering that the process will involve capturing hundreds of images in a matter of a few minutes.

Composite image of a single lightning strike captured out of over 400 shots. Demo post processing on the video above
2. Lenses
In the same way, any lens can be used to photograph lightning. However if choices are available, it is your distance from the storm and the overall scatter of lightning strikes that would dictate how zoomed-in you should be. A standard zoom is often enough to capture storms that are relatively close by or relatively scattered around from a distance, while a telephoto zoom can help you get more detailed shots of distant lightning strikes. During a lightning storm there are generally spots where most lightning strikes hit repetitively and this shifts along with the wind. It is best to observe for these spots as you compose your shot.
3. Tripod
A sturdy tripod is obviously a requirement. The process involves long exposures and hundreds of consecutive images. The tripod has to securely hold your camera and withstand a bit of wind that may come with the storm.

4. Intervalometer Remote or Lightning Trigger
As discussed above, an intervalometer would be needed if your camera doesn’t have a built-in interval shooting mode. Since lightning strikes don’t come in predictable patterns, the goal is to make sure that your camera is exposing right when the lighting strike hits. This is why interval shooting settings should be set to the shortest interval, and set to the maximum number of exposures in sequence. It’s almost certain that the storm would end before the maximum number runs out since most intervalometers can do at least 999 shots without having to reset.
A lightning trigger can give you a more precise shooting workflow. Lightning triggers use a light sensor. I use the MIOPS Smart+ trigger but most brands have sensors commonly found on the front most part that detects drastic changes in the lighting condition. The flash of light from the lightning would trigger the camera to start the exposure. Using lightning triggers would drastically decrease the number of shots taken overall and more or less give you mostly only frames with lightning in them. Other light sources such as a bright city in the same direction make the sky relatively bright might confuse the sensor since the overall change in luminosity would be reduced and for such a situation, it might be more beneficial to shoot in time-lapse/interval mode instead.
3 Approaches To Creating Lightning Images
The seemingly simplest way is to capture a single exposure image. This can be done if there is a significant foreground element that can give the image context. Given the challenges mentioned above, it may be more challenging to be able to shoot from a vantage point with a good foreground against all the environmental factors in play. Otherwise, if you aim to only capture the lightning bolts or illuminated clouds then that would be fairly simple. The post processing involved would be to simply tame down clipping highlights and recover foreground details if any.
Single exposure image captured with a lightning trigger
Two-image composites are made up of a foreground shot which may or may not be from the same location, and the image of the lightning strike itself. This process can be done with very little post-processing experience since most editing software now lets you do sky replacements in a few, uncomplicated steps. Especially if the foreground image has a relatively clear or simple horizon, Adobe Photoshop or Skylum Luminar can automate this process for you. Of course knowing how to do it manually might allow you to execute this more precisely.
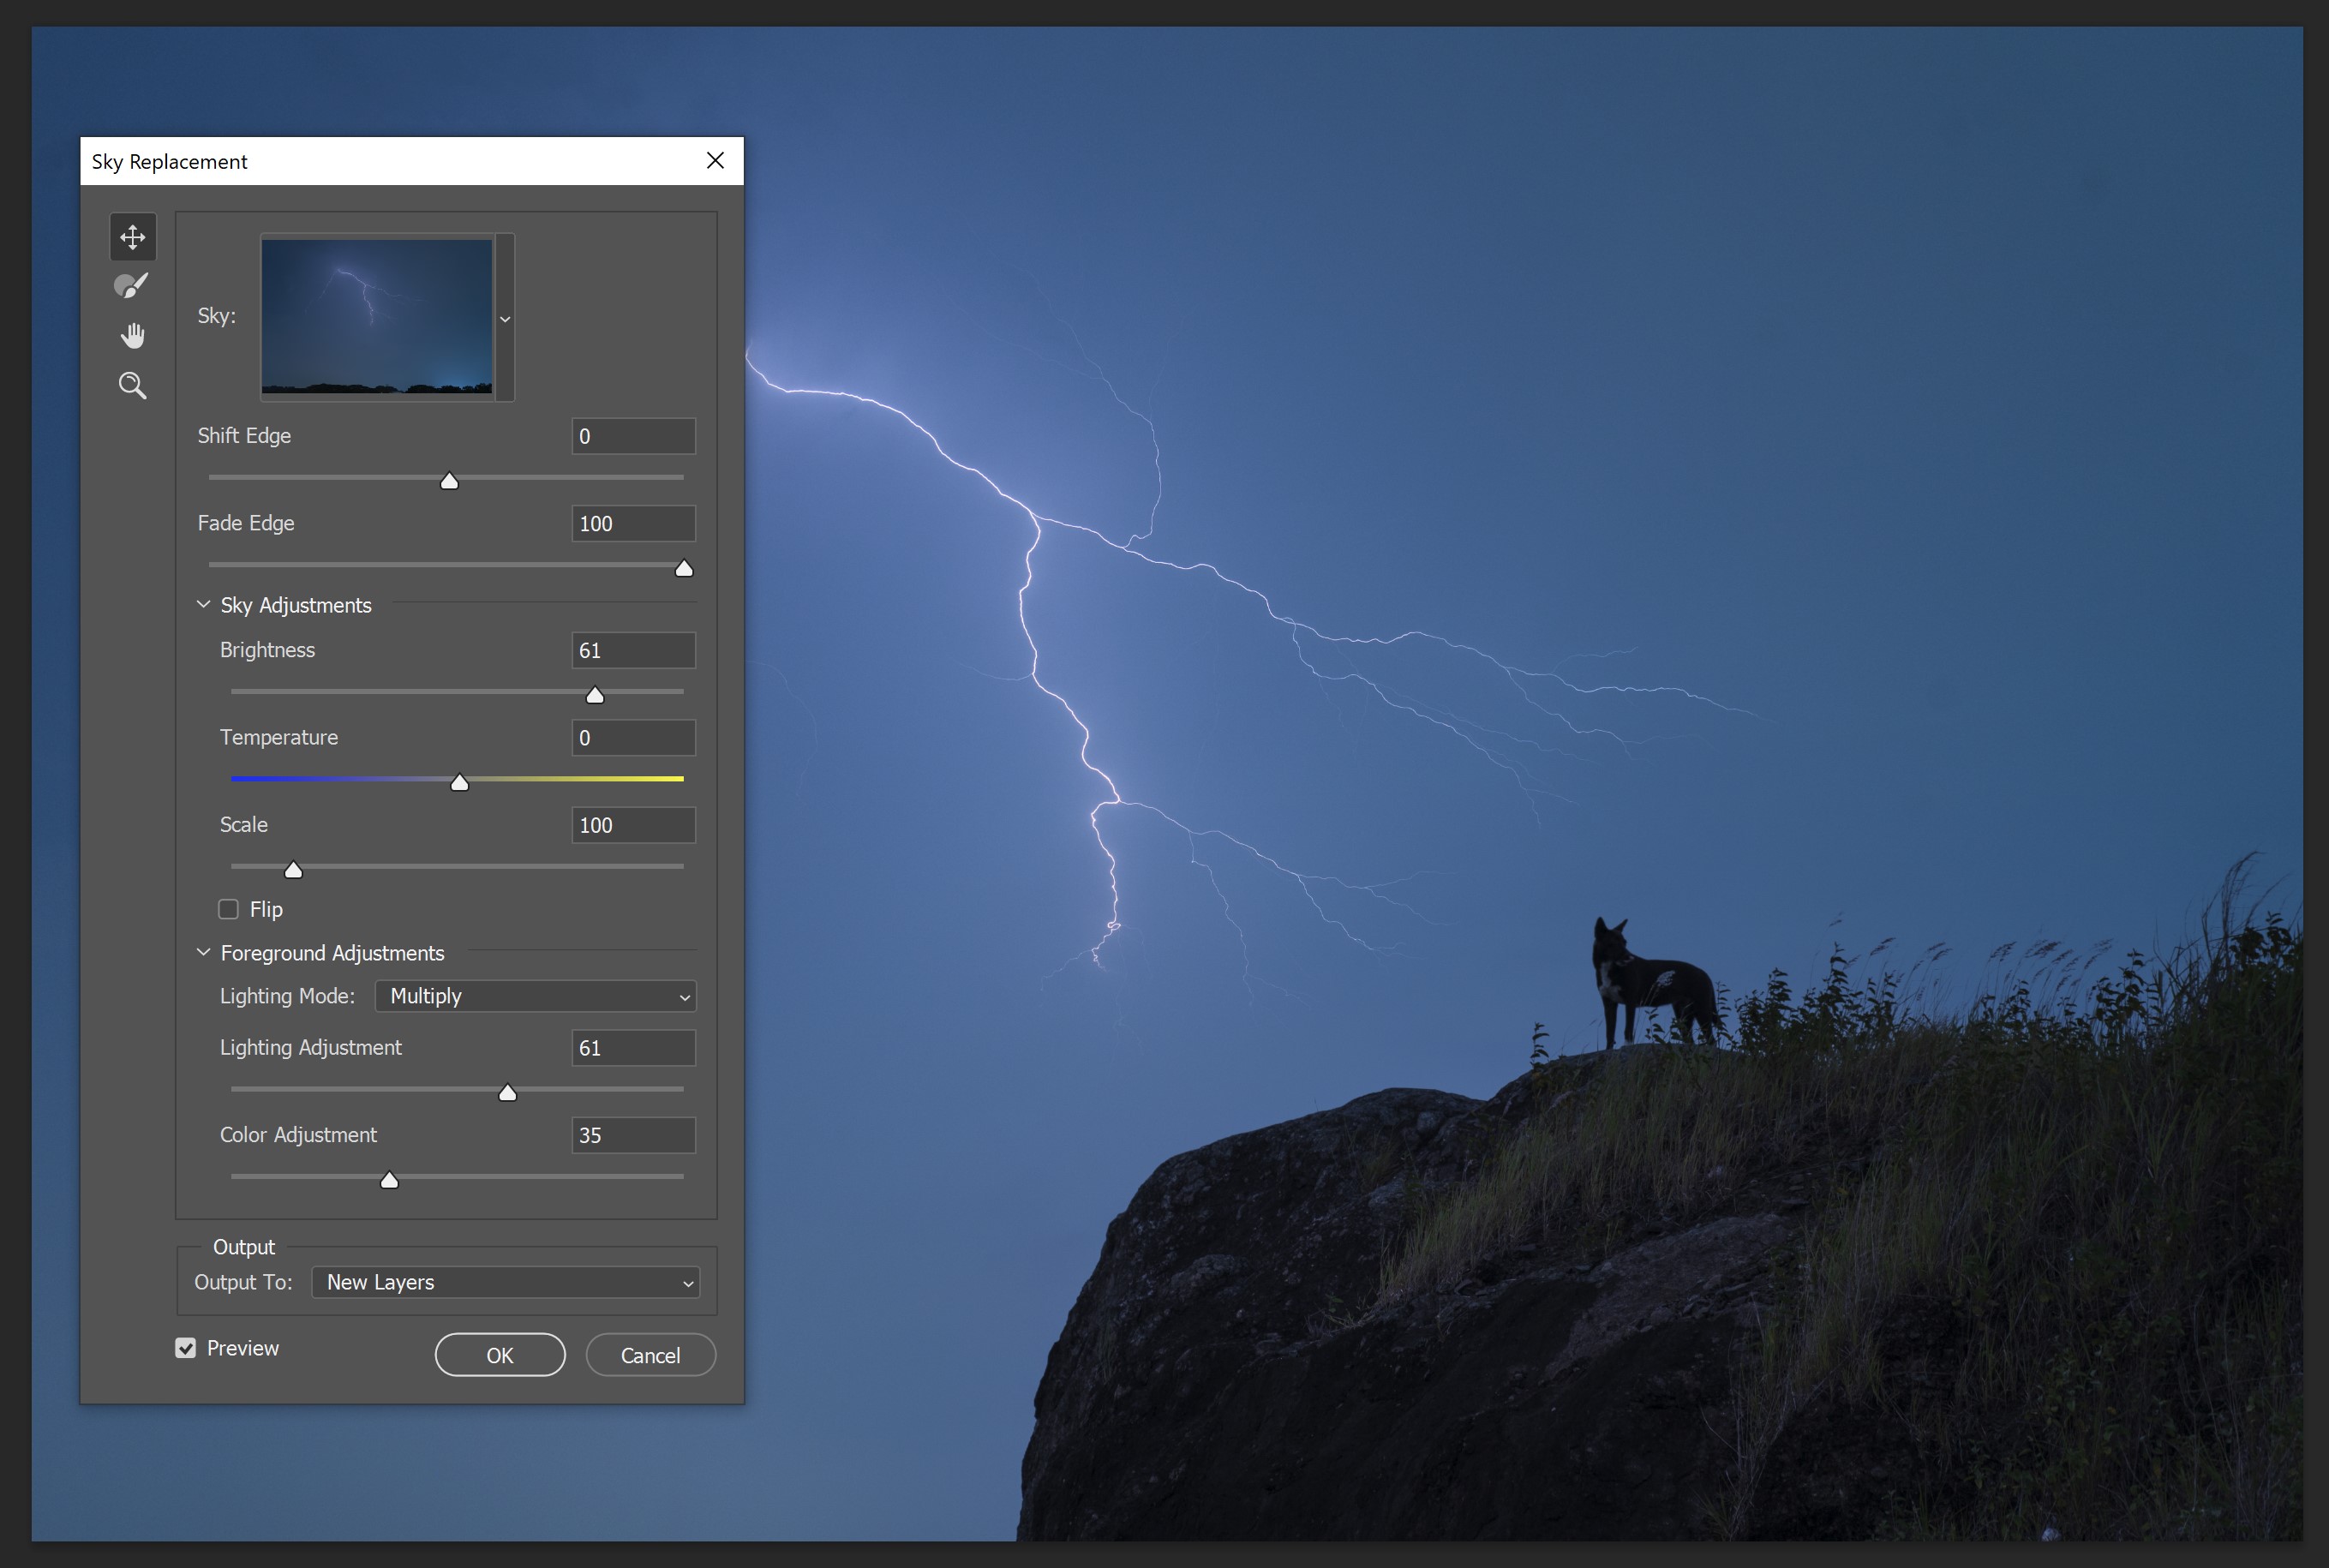
Simple sky replacement on Adobe Photoshop with no manual adjustments. Note the halo around the silhouette in the foreground
Time-lapse composites require significant experience with post-processing, clear artistic intent, and, to put it bluntly, a non-purist approach. The goal of this process is to put together numerous patches of different images to create a dramatic scene. It can be done with a foreground image from the same location or an entirely different shot. The process of shooting a lightning storm often yields at least a handful of different looking lightning strikes and charged clouds. By seamlessly putting them together on Photoshop through various possible methods, it can give you a highly impactful and dynamic result.
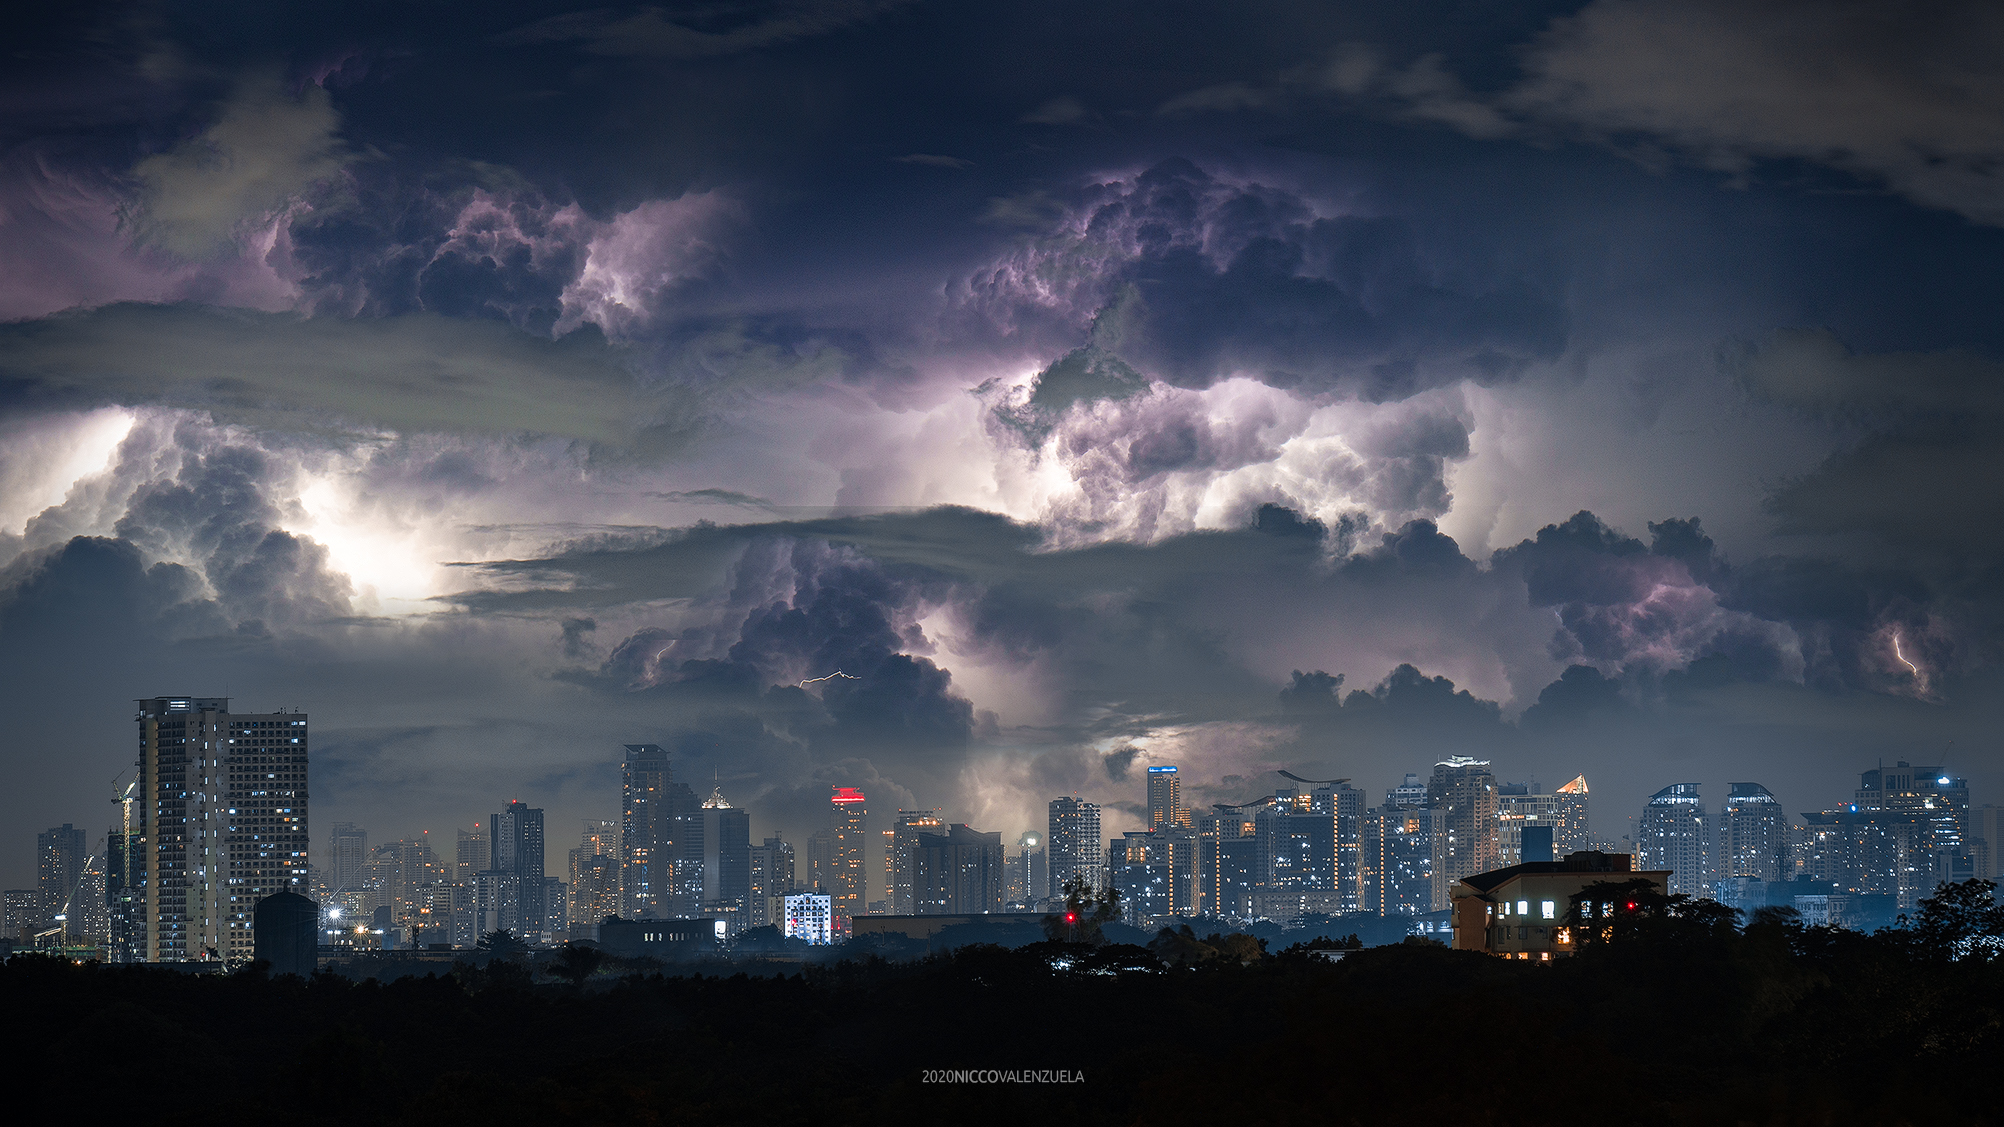
A composite of 7 images. 1 foreground cityscape shot and 6 different shots for the lightning strikes
The process of photographing lightning is fairly similar for all three methods. It totally depends on the photographer if they aim to create a realistic documentation of the storm or put together a fictional but striking interpretation of the scene altogether.


Nice! Thanks!
Thank you! Appreciate it :)
Very surprised you mention nothing about the most impressive tool on any camera for lightning photography. And that is Olympus’ Pro Capture and Live Composite. I’ve shot lightning for years but but these new tools on Olympus have given me consistent results I only hoped for in years past. Disappointing Micro Four Thirds gets short changed AGAIN. You should give it a try.
Hi Daniel. I do apologize if I did not mention that. I do have just one reason. I have never used an olympus camera. I am merely sharing my personal methods on this article and in no way am I saying that they are the only options out there. Not to short change the format, but instead, Im just sharing options that are generally available to everyone regardless of the kind of camera they use. Im sure micro four thirds cameras are great but Im not going to pretend as if I have lots of experience using them.
Hi Daniel, they are little known and excellent feature outside the realms of us Olympus shooters - the rest of the world don't know what they are missing! ;) Nonetheless, it's a super article though for those who miss the advanced features like Live Composite and ProCapture.
For those who don't know, ProCapture stores images in a buffer while the shutter button is half pressed, and records up to a maximum of 14 of them when the shutter is fully depressed, and then up to 99 frames in total.
Live Composite continuously takes frames and compiles them into one image, and only adds to the image if there is new light recorded, e.g. a lightning strike.
I enjoyed the article Nicco.
Thanks Ivor! I'm actually curious about that now. What format is the final image output with ProCapture?
The output is a raw file for both Pro Capture and Live Composite. There is also a feature called Live Time which allows you to watch long exposures gradually develop as they are shot, and you can monitor the histogram moving from left to right. That produced raw files too. It's snazzy tech!
That's actually pretty awesome! I must try it out :)
Great article ! Any "cheaper" lighting trigger recommandation to experiment with before buying the real deal ?
Myrdwin - I have uploaded some of my lightning photographs collected over around 15years. They were all taken using a Lightning Trigger by name. I am not sure what I paid for a later version some years back but $300 springs to mind. Not sure if that is "cheaper' or if that is still the price you'd pay but it has served me incredibly well over the different Nikon Cameras (D2X, D3, D3s, Z7) and one Sony A7RI. Each camera has a different lead between the trigger and the remote firing socket on whichever camera you have. Of course having a trigger also requires a camera setting regime which varies for night and day lightning photography. It is essential to use manual for all camera settings especially focus by setting focus to something the horizon with sufficient depth of field (for Nikon I use f7 aperture setting with 1.3 to 1.6 secs shutter). That's for nighttime but for daytime you'll need all kind of help to retain the 1.3 to1.6 second exposure - ND filter, exp comp, low ISO etc. And don't use the 'mirror-up' feature on older Nikon DSLRs. Each frame taken stands on its own with no combining for me. Finally you'll need to live or go to an area with volatile weather. Essential. Hope it helps.
I only have experience using the MIOPS trigger. Before that, I just did interval shooting. Thank you, Michael Sharp for giving more info for Myrdwin Emrys . Cheers guys!
I got some cheap remote trigger, around $20-$30. It plugs into the socket of the D8x0 and Dx. There are other versions available. It is programmable too.
The Lightning Trigger is just a switch that changes state in response to radio or infra red sources. From https://store.lightningtrigger.com/lightningtrigger-2-1-1-2.aspx it says:
'responds to IR remotes, flash strobes, canon flash, laser light, and just about any flash source'.
They are now $369 including cable which is unique to ones camera.
My remote is no longer available and the price went up quite a bit, wouldn't buy it now. I just searched and found:
(video deleted, of no use, see comment below)
It is in German, but you still get it by watching. It i about $40. I have no idea about it, do not know it. It looks better than mine.The reviewer likes it and the fact it takes standard batteries.
edit: removed video.
This is just an intervalometer remote right? Not a lightning trigger? If so then there are tons around that price with the same functions. Ive used the ones by Phottix and Viltrox.
I misunderstood it completely, sorry! I found one for $139.- https://strikefinder.photo/strike-finder-store/
And for the technical skilled a simple project:
https://www.the-diy-life.com/arduino-lightning-camera-trigger/
The costs of the hardware are low. An Arduino costs a few $.
Lightning and storm light make some of the most amazing images, I love chasing.
Indeed. Like candy sprinkles to your nightscapes.
Would love to try this soon 🤩🤩🤩
Go go go!
Do you have any advise on safety when shooting lightning?
Let's say I want to shoot cityscape with storm covering and lightning, and the city is about a kilometre far, and me standing next to a well spread tree.
I know lightning goes after talk things, including tall trees.
Any safety advise?
I cant say I know much but if the storm is in the city and you are far away, you're relatively safe unless the storm is moving towards your direction.
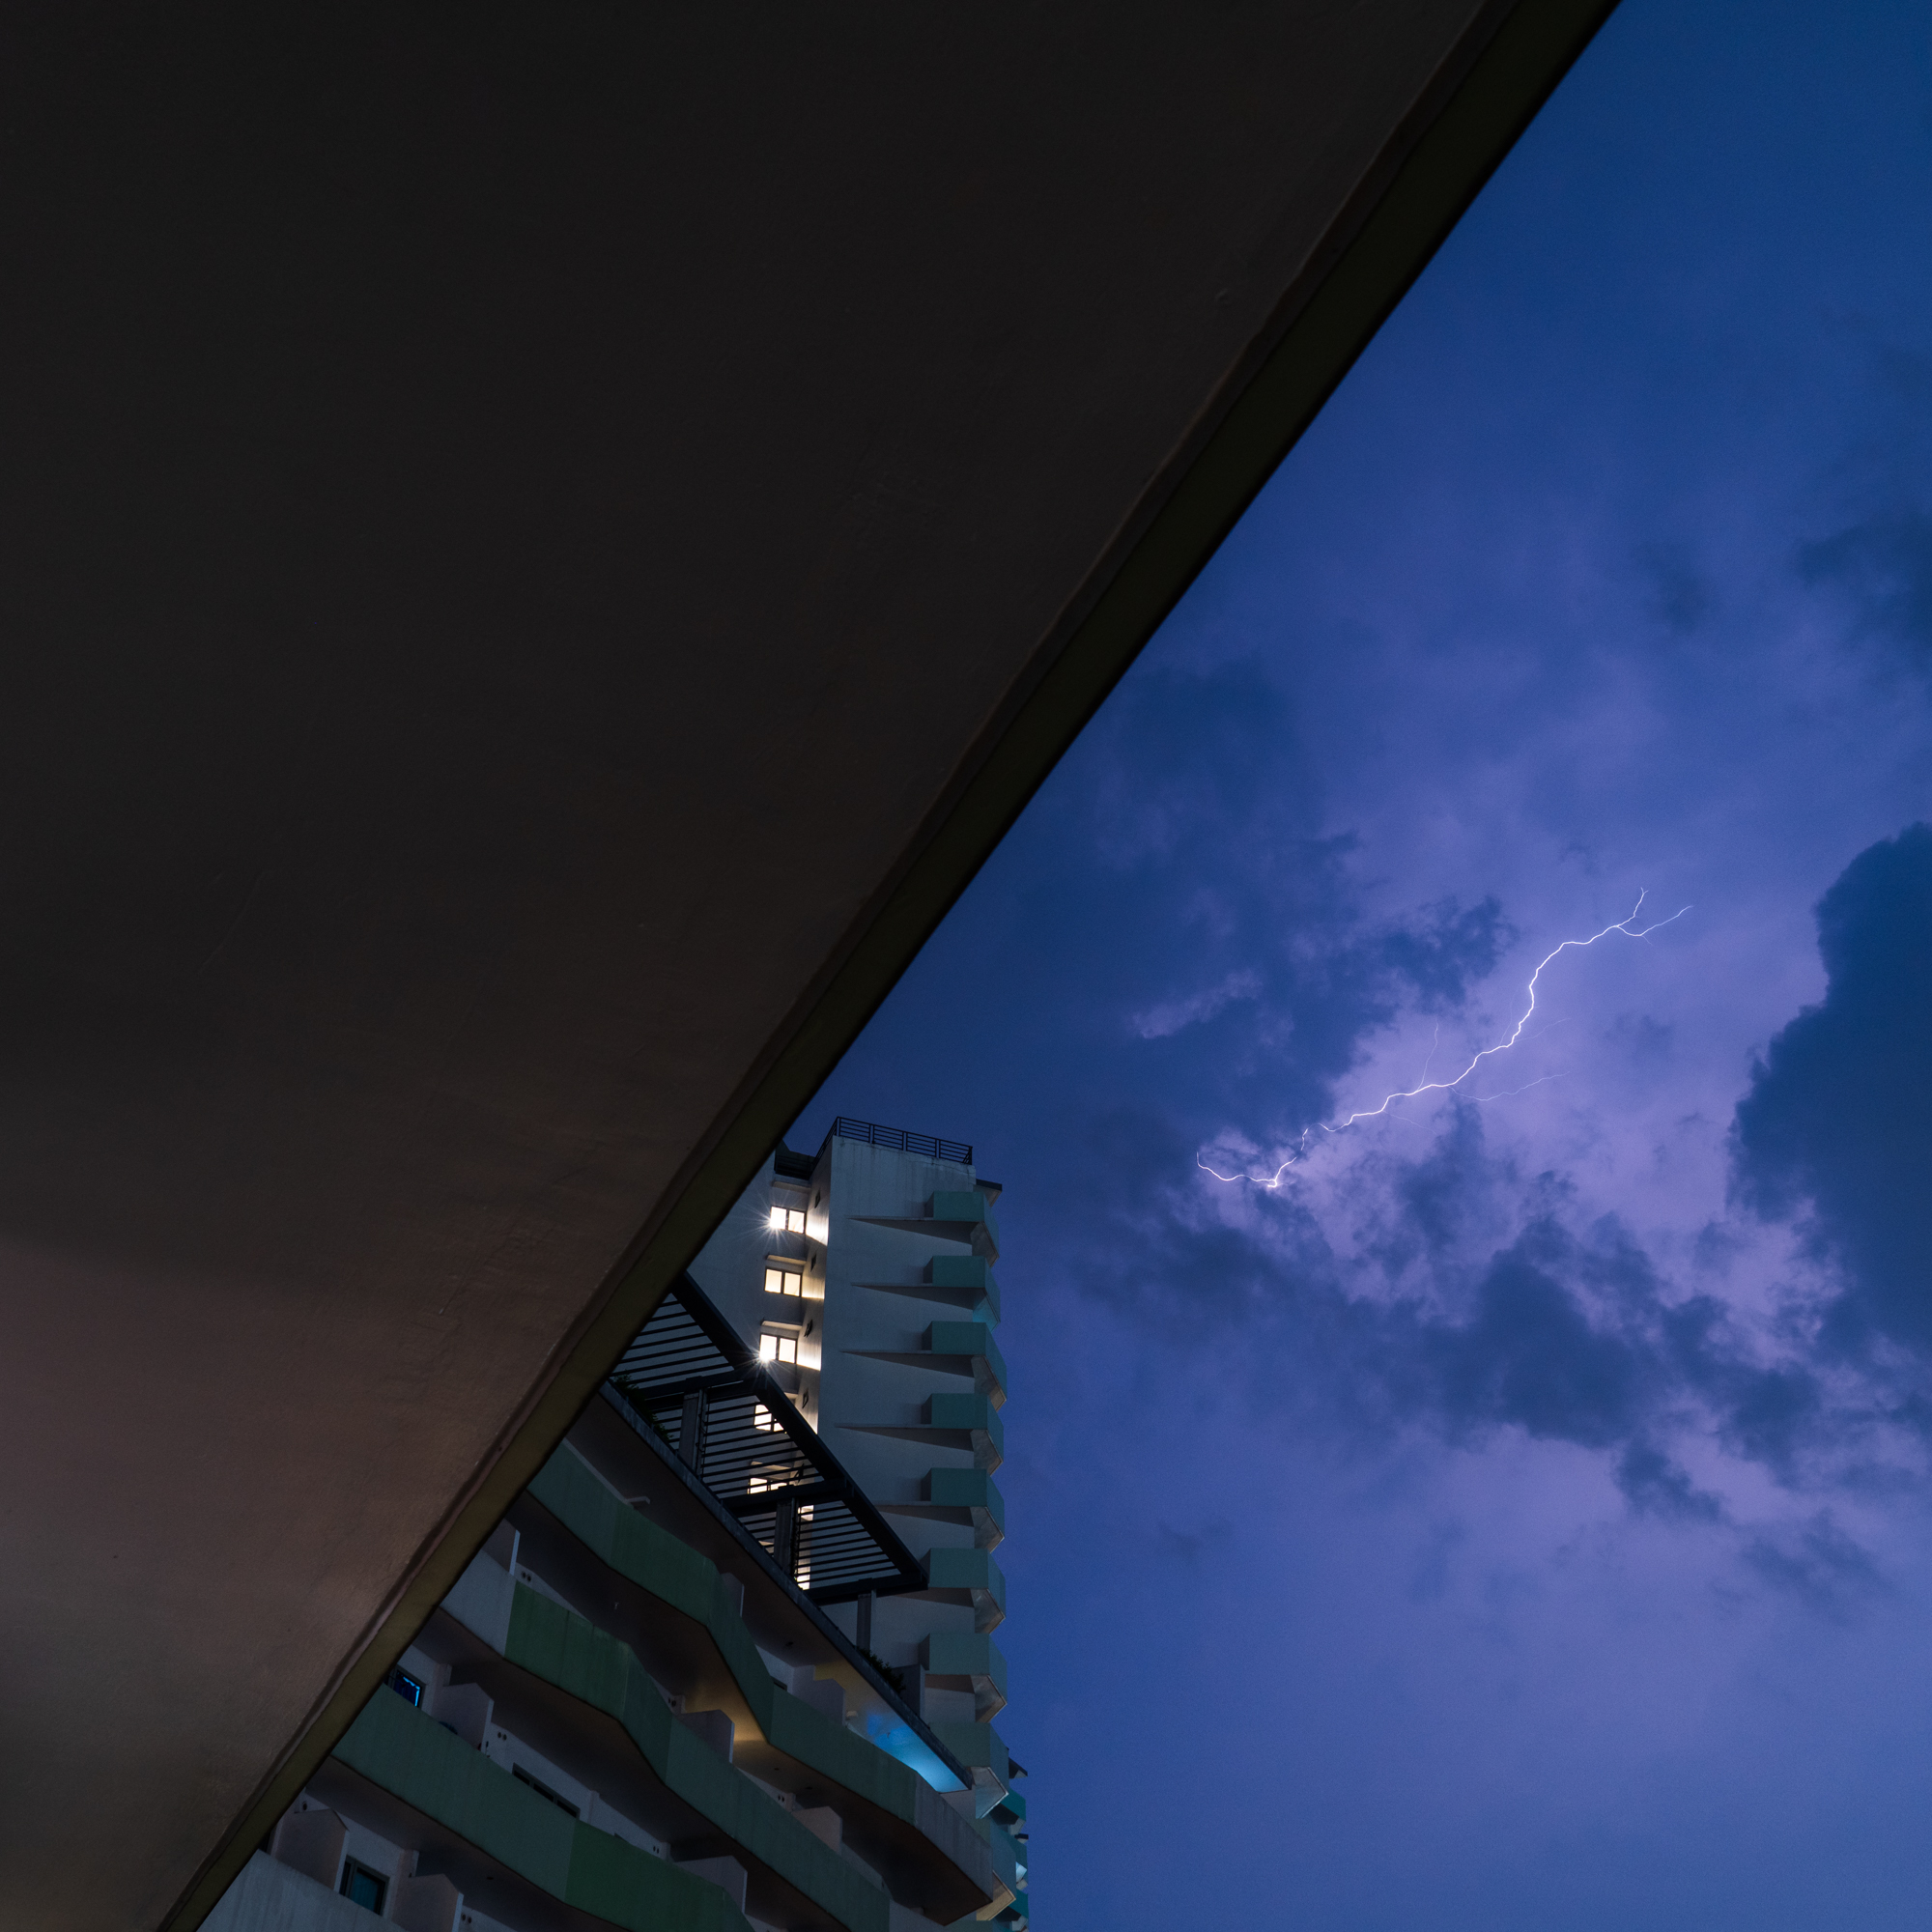
I have experienced shooting from a tall building with a taller building nearby and the lightning rod of the taller building got struck by lightning. We felt a bit of heat but that was it. I think the lightning rods on skyscrapers really do spare other structures from getting hit.