
Photographing landscapes is easy. After all, landscapes are everywhere. Choosing a good composition is often much more difficult. It can be helpful to take small steps, slowly building up the most attractive composition. Let me show you how I often work for my landscapes.
There are a lot of composition rules and helpful insights for making an attractive photo. But learning this from examples, books, or YouTube videos doesn’t mean it will be easy in real life. The location you’re at will look much different compared to what you’ve seen.
For the best landscapes photos, you need to enjoy the place you’re at and let the landscape grow on you. Don’t start shooting the minute you’ve arrived. Keep the camera in the bag, or place it on a tripod and leave it alone for a moment. Just look at the surroundings and see every detail, no matter how small.

Just a landscape with some nice elements. What would you do to take a great photo? Where to stand, which focal length? Which elements should you show, and which not?
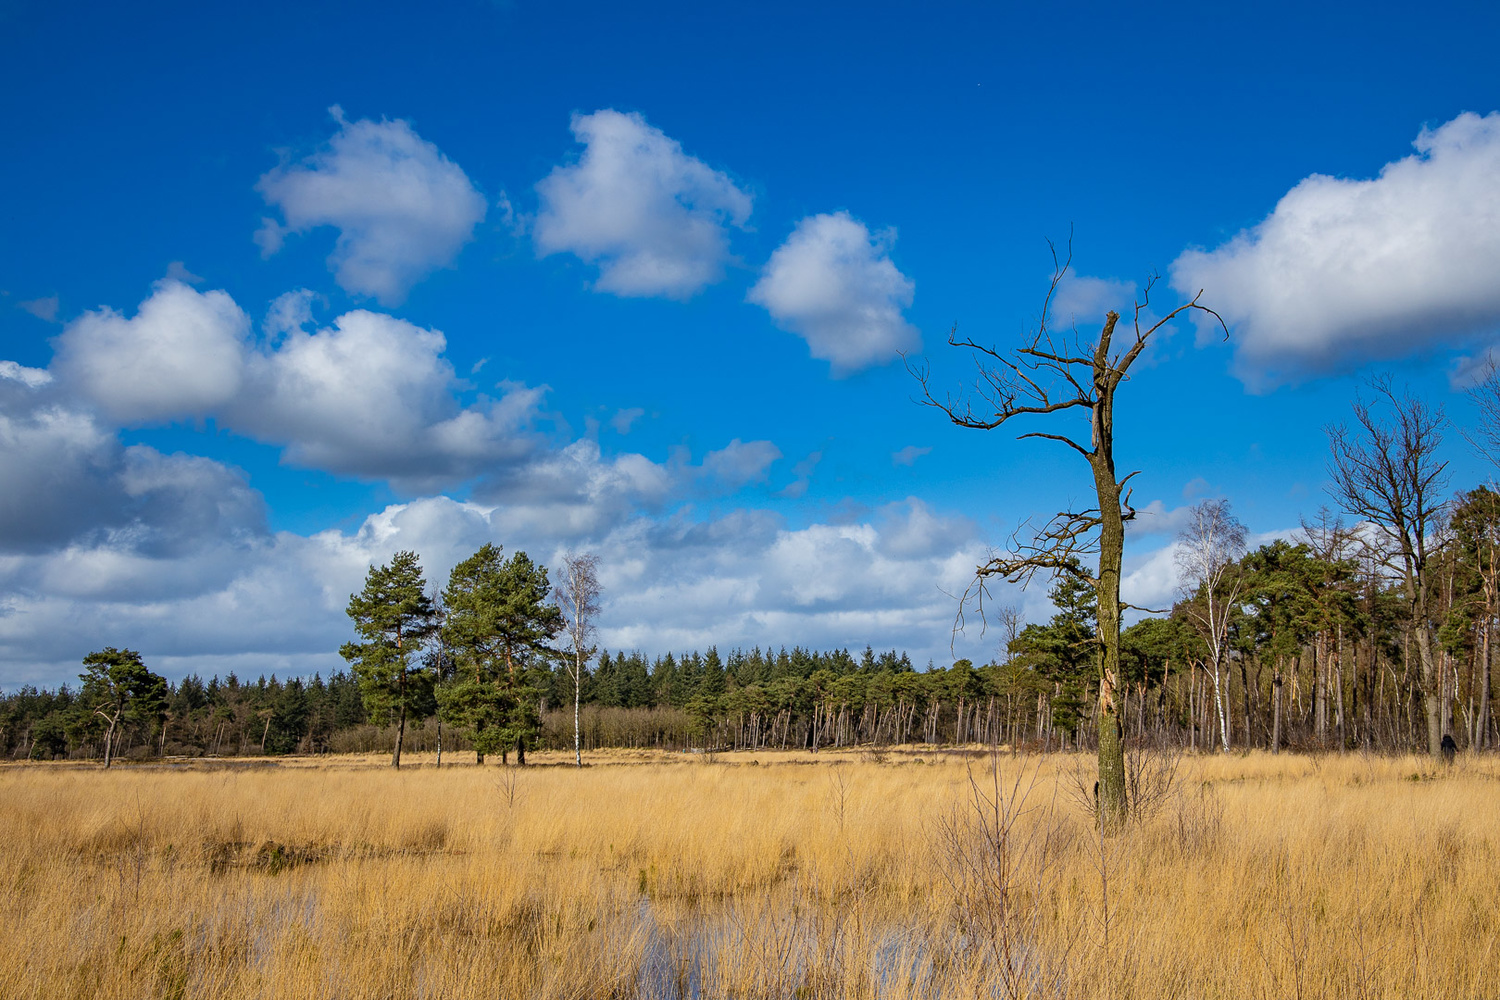
A longer focal length allows you to lose the elements that will distract. But there is still room for improvement.
After seeing every detail in the landscape, the next step can be a sort of quest. Discover all the possible viewing angles. This can be done by sight, or you can take your camera and walk around, looking through the viewfinder. Try different focal lengths, vary the height and distance, and see if one or more of those details you’ve discovered fit in the composition.

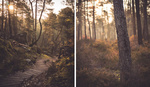
I could add some water as a foreground element. But wait, do you see the sunlight moving to the back of the frame? Perhaps it will open possibilities. I just have to wait for the light.

Suddenly, the light is at the forest edge. Everything else is in shadow. A telephoto lens allows me to take a great intimate photo.
Also, look at the relative position of the foreground elements compared to the background. How do these relate to each other and play with the possibilities your available focal lengths offer? I’ve written an article about the four methods of using the focal length of your lens. You might find it interesting to look at.
The before-after example below is an example of how a combination of focal length, depth of field, and distance to the subject can give a significant change in appearance.


You Can’t Always Go Back
Visiting a location multiple times is a good way of learning the possibilities it offers. This way, you can learn from previous mistakes just by looking at the results on your computer. It may also be a way to get ideas for another composition. If you come up with another composition idea, just go back and try it out.
Unfortunately, not every landscape can be visited time after time. If you go on a holiday to a faraway location, it might be the only occasion you have. In that case, take your time and try things out. It not only allows you to enjoy the place even more, but it will also improve the photos you take.

A nice scenery at Lofoten, Norway. It shows nice leading lines. But there is a problem: the background mountains obscure the view of the tree.

Getting closer will change the relative size of the tree, and a slightly lower vantage point raises it above the mountains. It's better, but I lost some leading lines.

Changing position and keeping an eye on the relative size and position of foreground and background elements allows me to get the leading lines back in the frame. On top of that, the new position has moved the background mountain next to the tree instead of behind it.
Take a Lot of Test Shots
It might be helpful to take test shots of every angle you’ve looked at. I often do this for examples for the photography lessons I teach. But I’ve discovered also how it can give insight into how I look at the landscape myself. In a way, it is a step-by-step process that will lead to the best possible way to register the landscape. Sometimes, the steps will improve the composition and leading lines or even bring a completely different viewing angle I’ve never thought of in the first place. Trying things out can also lead to less interesting compositions. Then, you know you've got it right the first time.
I have gathered a couple of examples of my step-by-step approach that may give some insight into finding a good composition or finding guiding lines in a landscape. These examples are made while scouting. The funny thing is when a daylight situation didn’t look too attractive at first, a good composition transformed the ordinary situation into a great-looking photo.
Example 1

When scouting for a location to shoot a sunset I found this tree. Let's look at the possibilities this location offers.

Looking for some foreground, I tried to capture the green and brown grass pollen. Imagine how this could be with low light and long shadows.

Looking around, I tried to find interesting elements to incorporate in the frame, with the tree as the main element. I found a small patch of white flowers.
Lowering the perspective changed the patch of flowers into a more important foreground element. It looks nice, but perhaps it can be better.

I tried an even lower vantage point, right between the flowers. This could make a great sunset image. Even this daylight scenery looks great, I think. Unfortunately, I haven't been able to shoot a sunset yet.
Example 2

A nice path between the birch trees. But there is too much foreground. This can be solved quite easy.
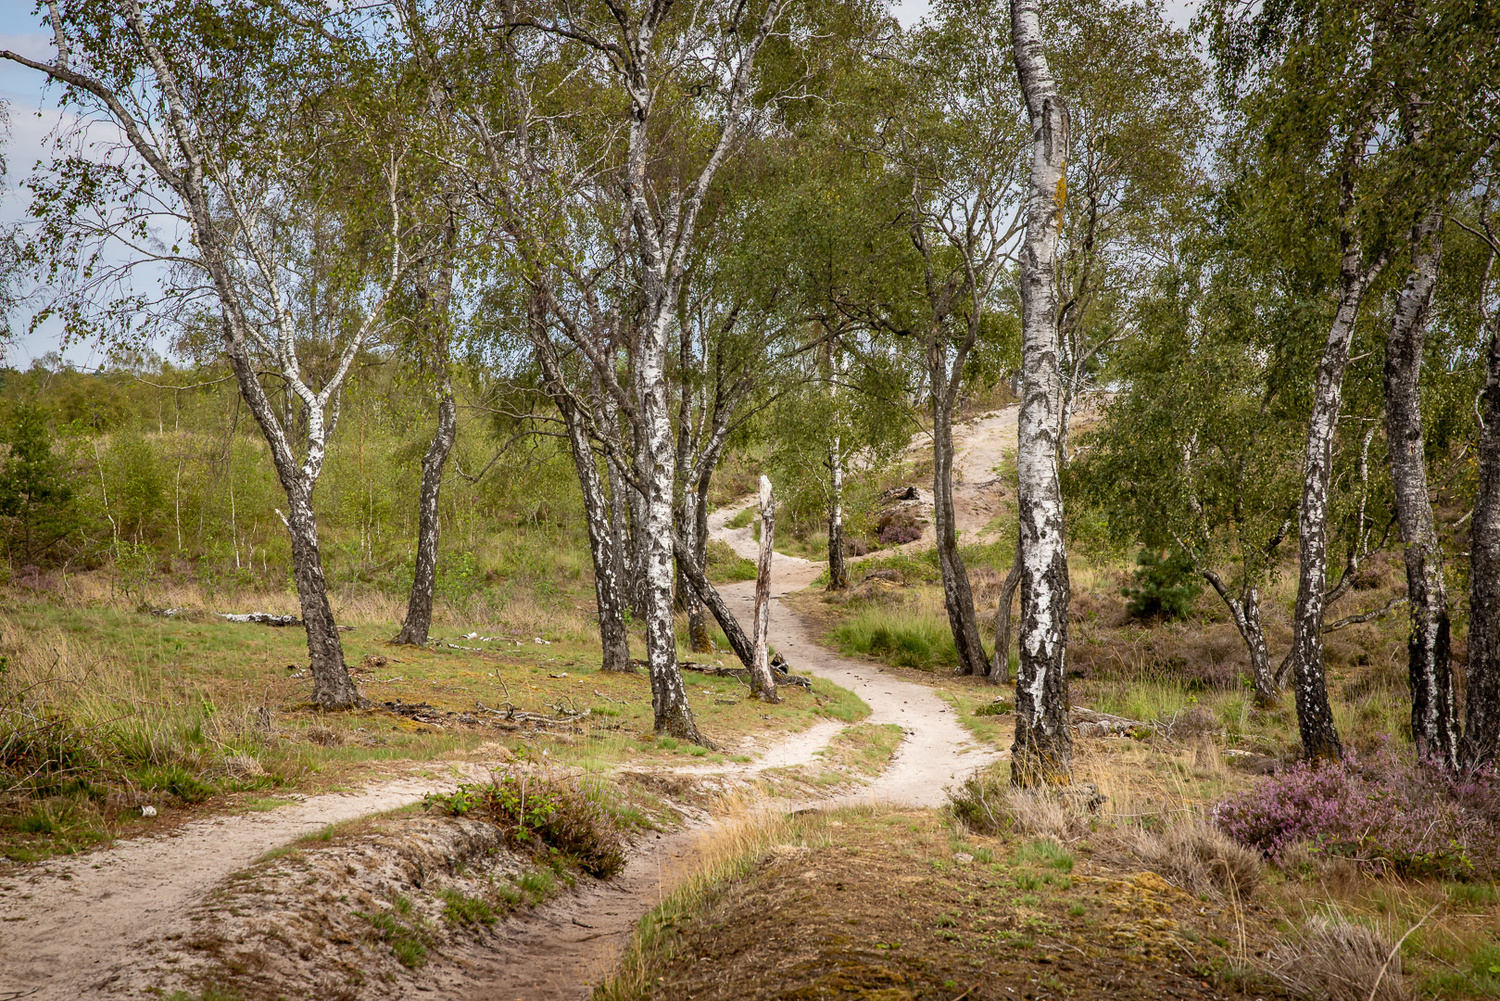
Getting closer and using a longer focal length makes the image much more attractive with great leading lines. But wait, perhaps there is an even better image possible.

I tried all kinds of positions, but none of those works as well compared to the previous image. Well, I've tried and learned how a path can be a leading line in the best possible way.
Example 3

A nice location with a small canal and some trees. I do like the composition, but let's try some other vantage points to find a possible better composition.

Getting closer makes the small canal a bigger, but I lose the tree on the right side of the image. I don't like it this way; the amount of water and the way it runs into the frame isn't that nice.

Moving closer to the water solves the issue with the leading line of the water. Not completely, but it's a bit better. What if I stood on the other side of the canal?

Standing on the other side opens up the landscape. It looks interesting, but it's a mess in the water. Perhaps I have to go in front of that mess. Just a few meters.

The small canal changes into a big pond from the new vantage point. It has become a completely different image all together, something I wouldn't have noticed if I left it the way it was with the first image. It's almost unbelievable we're looking at the same canal in every photo.
If You Don’t Have the Time
There are occasions when there is no time to extensively explore the possibilities of the landscape you’re in. The light can change very fast during sunrise or sunset. Or the light is changing constantly due to moving clouds. In those cases, you need to be fast and act almost in an instant. It requires a good understanding of camera settings and exposure settings, but you also have to find the best possible position fast.
Just remember practice makes perfect. This is why I also find the step-by-step process instructive for myself. The more I try this, the more it becomes second nature. The idea of practicing this method is making it automatic, so you can eventually find the most attractive possible composition just by looking at the landscape that surrounds you.
This is not the only method for finding a good composition, of course. If you’re a landscape photographer, how do you work? Do you use a similar method, or do you have another way of capturing the best possible photo at that location? Please share it in the comments below.


Nice article with quality examples. Funny how the difference between an average snapshot and a great photograph is often just a few feet or even leaning a few inches one way or another. And I think understanding some fundamental principles is key to knowing when you haven’t quite got THE shot and that you need to adjust your perspective.
Interesting. I think it demonstrates why landscape photography is so dam difficult to get right. Making aesthetic sense out of the randomness of nature and doing it in such a way that all the visual elements work together is no easy task. The almost infinite choices one has coupled with one’s own tendency to self delusion, thinking, oh that’s a great shot, only to discover its mundane nature when it’s up on the screen. What you see is not what you get when it comes to landscape. I’ve tried landscape many times over the years only to achieve no better than the mediocre results apart from the times when I’ve used a minimalistic approach reducing the elements to what I can handle, even then is only just passable. That’s why I really admire those shooters who head out and can make beautiful sense of the world.
Well, it's nice to see that probably most of us do the same. We guess a good composition, take the shot for light might change, and try an even better composition, or one we judge worse later. As an amateur I mostly visit locations for one time only in my life, so there's no real coming back. On the other hand this intensifies my experience and urges me to judge my composition trials quickly. After all our shots have to be good enough for the moment, as tastes differ even in the same person over a lifetime.
Enjoying the location is very important indeed. I like the way you describe this, intensifying the experience. Never become the person who jumps from the bus, takes the snapshot with the smartphone or tablet, and is on its way again ;)
Thank you for this article, the examples with steps of looking for a great composition were incredibly helpful for me who's still at a beginner level. I love landscape photography and I'm looking forward to learning to find better composition for my photos. :) Cheers!
Glad to be of help. Enjoy learning the skills of landscape photography
Thank you, this is a very well thought out article with excellent examples to show just how effective a change in position can be in the composition.
And enjoying where you are for a while before taking the camera out is how it should be to appreciate the experience
I hope you dont mind my sharing this with my camera club?
Please feel free to share it.
Thank you for your comment