Are you starting to print your photography? Are you looking to sell prints for the fans of your work? This new video gives a great rundown of colorimetry, papers, and the value of the print.
For those that are looking to print their work but are unsure of where to start, Thomas Heaton’s new video is worth a view. Like many of Heaton’s videos, the value isn’t just in his entertaining and forthcoming dialog, but also in his honest and easy breakdown of what his process is. It’s a great way to begin looking at printing your own work and understanding that, at each step of creating a final print, even the type of paper used can help create a sharp and clear image or a more ethereal and subtle print.
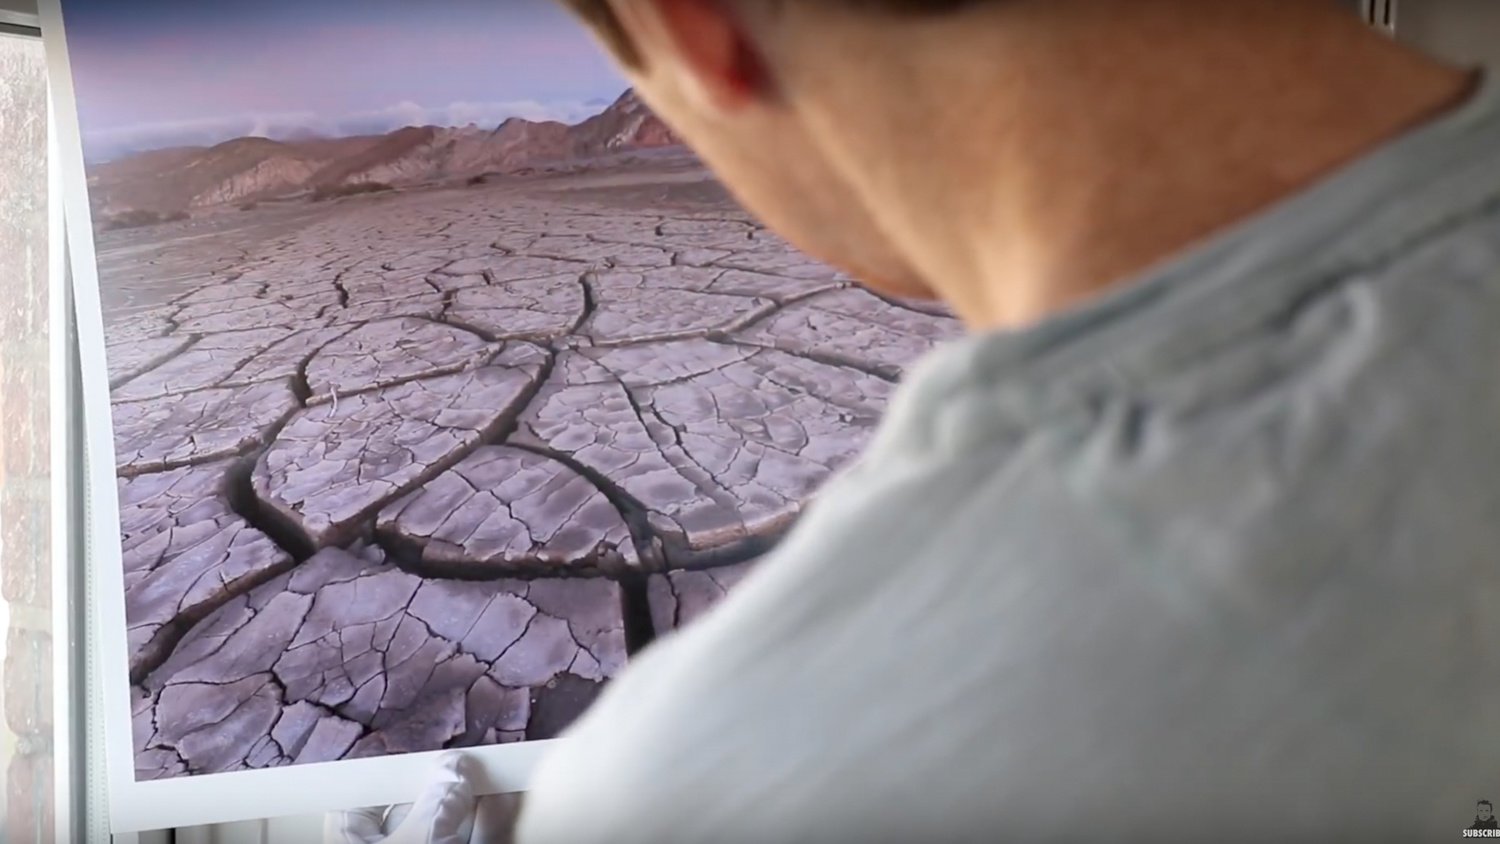
A great take-away from the video is that printing is a beginning-to-end process starting at the photography you’ve captured. If you are looking at or starting to print your imagery, the first place to start is not at the print paper but at your monitor. Colorimeters are an essential part of any post-processing workflow that has printing in mind. I personally use an X-Rite i1Display Pro to calibrate my monitors. Heaton uses a Spyder5Pro Colorimeter to do his calibrations as he shows. The biggest kernel of learning here is that the only way for your prints to look the way you intended is to calibrate the monitor you intend to edit on.
Heaton doesn't stop there and goes into explanations on print profiles, types of paper used, and how he delivers his work to clients that purchase his imagery. Most of us may not have professional printers in our homes and will need to calibrate our screens to a professional printer’s profile, which does add an additional step to creating imagery on a medium. Let us know if Heaton’s video made you look closer at printing your work or if you already create prints for your imagery.


So pleased to see an article on printing; it's nearly a lost art form in some photography circles today.
I saw this video the day after I purchased a new Canon Pixma Pro-100. It was super inspiring and reaffirmed my decision to focus more on printing.
Have you gotten a chance to use it yet? Interested in that model.
I've made a couple test prints and have been very impressed. Still working to perfect my process. There's a great rebate deal through the end of March. Check out B&H.
Thanks Tre!
In the past Canon has had some pretty amazing deals on this printer. If you haven’t checked already, I’d look for any rebates.
Great printer that punched way above its class. I think you’ll enjoy it.
Yes! I purchased through B&H and there is a good rebate deal going on right now. $150 after rebate which includes 50 sheets of 13x19 Canon Pro Luster.
Yep that's the same one I had! Glad you found it.
Excellent video. I'm inspired to start printing more.
This is great, I actually needed something like this. My prints were looking weird haha
I am so impressed about this video but I have one problem... I really want to buy my own printer but there is still a huge question for me! If you have some wonderful prints like Thomas how are you presenting them? I mean putting such a peace of art behind a regular frame is just aweful... If someone is printing like Thomas how are you presenting your prints?
Afternoon Roger, you want to look into matting the print. Either a pre-constructed mat/ drop in mat or using mat board and a cutter to create a mat for the image you want to present. When cutting your own mats, you will need a good trimmer and cutter (Link to choices in BH Photo store is here: https://www.bhphotovideo.com/c/buy/Trimmers-Cutters/ci/860/N/4029975304). Adhering the print is simply using an acid free double sided tape to the mat and backing board and then choosing a frame. Mount the matted image in the frame with framing nails. You can seal a frame with backing paper and set up a mount for hanging and you're done.
The only part I had trouble believing was when he said he "wasn't a businessman." My guess is if he should tire of photography he should become a photographer's business consultant. Very impressive marketing strategy and excellent prints as well.
I enjoy watching Thomas Heaton's videos. I am impressed with he does to print and send out prints; all those personal touches are great!