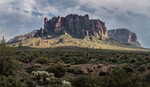
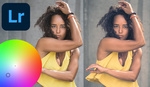
Learn how to make cleaner, more powerful shots by following the dos and don'ts of this simple, six step formula for retouching success.When we first start retouching shots in Lightroom Classic it's tempting to pile in with all the editing techniques you can learn from online tutorials, but often the beginner can't tell how far to go. In fact, there's plenty of tips that budding retouchers overlook because they'd rather opt for the flashier editing techniques because "the video made it look cool". But in reality, it's the "less is more" approach that wins out for most professionals, so learn the six basic techniques below for better retouching in no-time.
Adjustment Brush Highlights
Use the Adjustment Brush in Lightroom to alter selective areas of the photo, rather than the whole image
Occasionally, we get those shots that are almost perfect but a spot of highlights distract from the main subject in a scene. It's tempting to knock back the Highlights slider in an attempt to quell the overly bright areas, but doing so reduces all highlights uniformly across the entire photo. The better option would be to use the Adjustment Brush.
By painting over the area with a reduced Highlights slider using the Adjustment Brush you can carefully rebalance those brighter areas without affecting the overall tone of the photo.
Auto Mask for Cleaner Retouching
Instead of painstakingly painting in every minute detail that you want to edit with the Adjustment Brush, turn on Auto Mask to have Lightroom cleverly select specific areas based on like-light and tone
The Adjustment Brush is brilliant for finely-tuned, selective editing on a photo, as we've seen in the previous step, but sometimes it's difficult to get into those nooks and crannies. Let's take the example of this bright spot on the building. We want the bright stonework to be darker but no matter how much we adjust the Brush characteristics like Size, Feathering, and Flow, it's extremely difficult to mask out the sections we don't want effected, like in the shadows on the left.
Turn on Auto Mask and Lightroom will automatically mask the brush application for you. Now, when you click on a certain color or tone, (as I did on the lighter stonework in the sun,) Lightroom will attach itself to that bandwidth of data and apply the Adjustment Brush settings over similar areas that you stroke the brush. That means you can get lossless, adjustable, accurate masks on adjustments in selected portions of your shots.
Spot Removal: Clone or Heal?
So you're editing your shot when you notice a spot that needs admonishing. You reach for the Spot Healing and run it over the area but it leaves a weird, blurry line between your spot and the scene behind it. Or perhaps you'll notice this worst of all when editing at the edge of the frame. What do you do? Time for Photoshop? Not quite.
Head to the top of the Spot Removal tool settings panel and you'll see the option to switch between Clone and Heal. Switched over to Clone and you'll see that it's a very literal clone from one spot to another and in some cases can reduce that blurring problem and keep things looking orderly and natural. Heal is great for the most part, but Lightroom does try to guess what you'd want replacing the texture of the original image and in confusing areas it often gets it wrong.
Take Out Distracting Elements From Edge of Frame
The rule is: take out anything bright or distracting at the edge of the frame, so as to keep viewer attention towards the center of the frame
We're taught that the eye goes to the brightest part of an image, and if you have those bright areas at the edge of the frame you'll find viewers' attention drifting to the edge, too. The hypothesis goes that if the eyes travel to the edge of the photo, they will soon move out of the frame and onto something else.
In an attempt to keep attention on the photo it's a wise idea to remove any distracting elements at the edges of the frame (unless they're vitally important to your photo) in order to keep the eye nearer the center of the frame and as such, focused on your shot for longer.
Stop Overdoing Eye Contrast
Overly white eyes and iris' that have unreal detail and color are two tell-tale signs that an amateur retoucher has done a bad job at editing the eyes in a portrait
How many portrait editing tutorials have you read that instruct you to brighten the eyes? This is usually done by increasing contrast and boosting highlights or darkening shadows in order to make them "pop." This is fine to enhance the light and tone that's already there (and easy to overdo if you're not careful) but you shouldn't use this technique to correct an issue with the portrait.
If the eyes aren't bright enough compared to the rest of the face, then you haven't lit your subject in the right way to get those bright eyes you want. Head back to the shoot and try again, or if it can't be repeated then learn this lesson for next time. Place light in areas that will create catch lights in the eyes (those bright, specular highlights that shine in the eyes) to give them some sparkle. If you can get some side light in to the iris this will also help to make them glow, as well. A good technique to use for this is butterfly lighting where two light sources (or one light source and a reflector) flanks the subject.
Edit Spots, Leave Moles
Remove anything temporary like spots or scratches, but leave permanent areas such as scars and moles, unless expressly asked to remove it by the subject (or demanded to by your editing boss)
If you need to get rid of marks on the face then use my simple rule: take out anything that seems temporary and leave anything that's permanent — unless the subject expressly asks you to remove it. So a spot that might not be there in a few days and just so happens to be there for your shoot day can be removed without worry, but if they have a birth mark, a mole, or a skin tag then leave it in.
Those are just a few simple tips to better image retouching, whether it's for landscape, wildlife, portraiture, or anything else. These steps can be applied to almost any genre of photo and should serve you well to making more informed, cleaner photo edits in the future using Lightroom Classic.
Jason is an internationally award-winning photographer with more than 10 years of experience. A qualified teacher and Master’s graduate, he has been widely published in both print and online. He won Gold in the Nikon Photo Contest 2018/19 and was named Digital Photographer of the Year in 2014.
Using Lightroom is NOT RETOUCHING!
Please stop associating wrong words with processes. Retouching is a craft that requires lots of practice. Lightroom is per definition a raw-converter. It is exactly the same as camera raw, just a different interface with library function. Hence, it's not retouching.
Stop being so precious.
Of course you can do retouching in Lightroom. Maybe not to the degree it can be done in Photoshop, but by definition it can be done.
From the Oxford dictionary.
retouch
verb
gerund or present participle: retouching
improve or repair (a painting, photograph, or other image) by making slight additions or alterations.
"full-colour images can be retouched, enhanced, or colour-corrected"
What if I tell you there are plenty of programs like said Lightroom or Photoworks that can process raws and allow you to do all the retouching as well? Are these not photo editors at all? Good, gotta throw my subscription out of the window.
Sometimes the look of the face marks may be confusing. I've had a model once who had acne, she asked me to remove ir all and so I did using photodiva healing brush. Turned out I removed several tiny moles along with all the acne traces as they went unnoticed by me but she saw their absence from the very first glance.


Using Lightroom is NOT RETOUCHING!
Please stop associating wrong words with processes. Retouching is a craft that requires lots of practice. Lightroom is per definition a raw-converter. It is exactly the same as camera raw, just a different interface with library function. Hence, it's not retouching.
Stop being so precious.
Of course you can do retouching in Lightroom. Maybe not to the degree it can be done in Photoshop, but by definition it can be done.
From the Oxford dictionary.
retouch
verb
gerund or present participle: retouching
improve or repair (a painting, photograph, or other image) by making slight additions or alterations.
"full-colour images can be retouched, enhanced, or colour-corrected"
If I clone or heal out something in Lightroom it's called raw conversion, but if I clone or heal the same thing in Photoshop it's called retouching?
What if I tell you there are plenty of programs like said Lightroom or Photoworks that can process raws and allow you to do all the retouching as well? Are these not photo editors at all? Good, gotta throw my subscription out of the window.
Thanks for the tips , I learned something new!!
Could do an article on "Pre-Touching". Spot it and fix it before you take the photo.
Sometimes the look of the face marks may be confusing. I've had a model once who had acne, she asked me to remove ir all and so I did using photodiva healing brush. Turned out I removed several tiny moles along with all the acne traces as they went unnoticed by me but she saw their absence from the very first glance.