
I am a big advocate of calibrating equipment. For this reason, I regularly make sure my monitors, cameras and, lenses are calibrated and working correctly. Printers, on the other hand, are a device that I've never done anything beyond using the factory settings. I figured it might be a good idea to reconsider that.
One of the main reasons I've never calibrated a printer before is because I don't personally print. Many of my clients print the images I provide them but I don't personally print them for myself and for that reason I never really had any need for such calibrators. Recently, however, I'm starting to reconsider that position and I'm currently looking at potentially buying the Canon PIXMA PRO 10S. I agree that printing images is something that all photographers should do. The perspective you have of your images is entirely different when you see your work in a huge print vs looking at it on a relatively small screen. As mentioned above calibrating is something I'm a big fan of and something I recommend; so, I wanted to test and see how Datacolor's solutions work. For this particular test, I thought it would be far too easy to use a high-end printer and calibrate that. A good printer will more than likely produce relatively decent prints even without calibration. What I wanted to see was how much of an improvement the Datacolor package could offer for a cheap and entry-level printer. Is it even remotely possible to produce "high-quality" prints from a cheap printer if it's calibrated correctly?
SpyderX Elite
As part of the SpyderX studio package, a display calibrator is also included. Previously I used and reviewed the SpyderX Pro which I thought was a brilliant, simple, and, intuitive device. The Elite version takes things further and gives even more control when it comes to calibrating your monitor. I've found the results from the Elite to be far more pleasing because I can control all aspects the major aspects of the calibration including the white point and color profile. The stated speed benefits of the SpyderX however, are completely useless especially if you want a more accurate calibration. I'm guessing almost no one who buys these types of devices are concerned about saving 30 seconds if it means you end up with a slightly less accurate calibration. There's an option within the software that allows you to select a more accurate option which is somehow not the recommended option. This does increase the time it takes for it to complete but I don't see how that matters. If you're using the Elite versions it's important to make sure you select the more accurate options to get better results.

If you're printing at home then it's important your screens are calibrated properly and as accurately as possible. This is precisely why the Studio package includes the Elite calibrator. If your screen isn't displaying colors and tones correctly then it makes the whole editing and printing process very difficult. It's far too difficult to know the kind of results you're going to get if your screen can't display them correctly.
The Printer
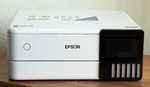
For this test, the printer I selected was one of the cheapest "photo printers" I could buy from Amazon. The HP Envy 5010 is probably the cheapest printer I've ever bought. The other option was an Epson printer but I'm not stupid enough to buy one of their products ever again; the last Epson I bought accidentally met my woodcutting axe. The HP printer can only print up to A4 and the first few prints that I produced with this cheap hunk of lovable junk were absolutely terrible. The colors were way off and the print had this very prominent teal cast to it. The print also had far more contrast and was much more saturated than how I had edited the image. Considering this initial print, I wasn't very positive about the kind of results this printer could produce after I had calibrated it.

The Image
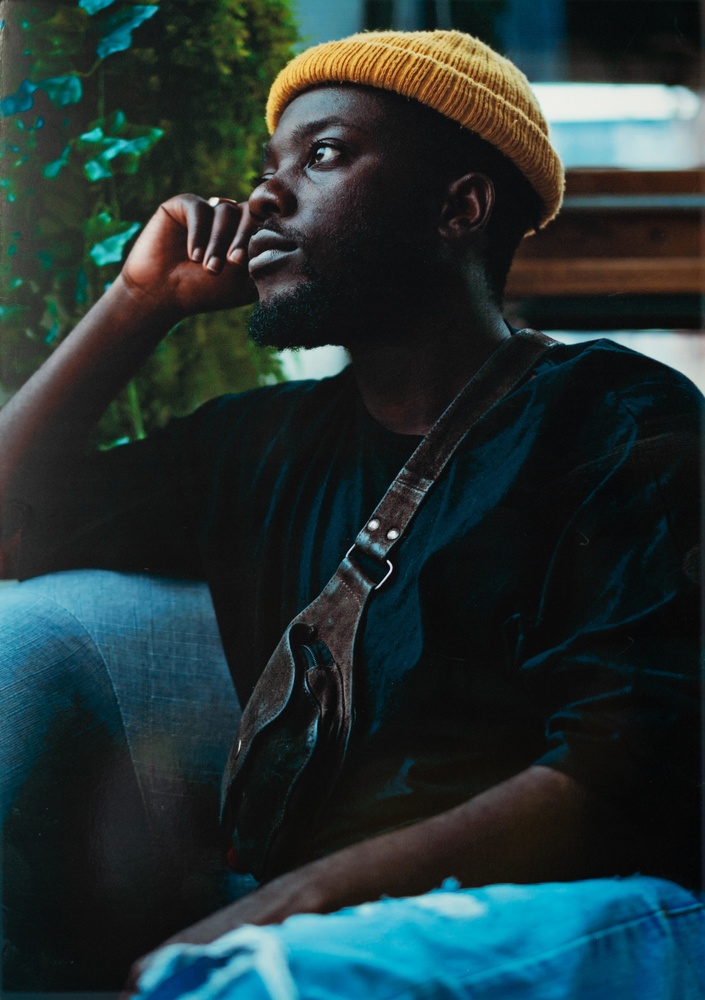
For this test, I decided on using a relatively simple portrait of a friend and fellow photographer Keith. The reason I picked this one was because of his darker skin and the fact that there are enough colors in this image for me to see any noticeable differences. Looking at the initial uncalibrated print versus the actual image you can see there are some pretty notable differences. For one the print has far too much contrast and some may prefer the contrasty look but I'm not a fan. The colors also look a little abrupt in ho they transition between one another. The teal/blue color cast is also pretty harsh and looks quite bad in my view. I have a feeling that there might be some that prefer the way the print looks, however, I'm not one of those individuals. The printed image is also lacking a lot of the detail and tones in the plants and leaves behind the subject. I prefer to have prints that look like how I edited my files. In short, printing images on a cheap entry-level printer will almost always look pretty bad and this is no different.

The Calibration Process
Once I had printed the uncalibrated image I started working on calibrating the printer. I do recommend reading the manual properly or watching a video on YouTube before attempting this because the process isn't incredibly intuitive. It's not that the process is difficult, it's just not very intuitive. Fortunately, I did watch a couple of videos before I made my attempt so I didn't have any issues calibrating the printer. You will need to download specific software for the printer calibration, unfortunately, Datacolor does not have one piece of software that manages everything. This is somewhat annoying but not a major pain. Once you have calibrated your printer it's important to make sure you select this profile before printing any files. The default settings in say Lightroom may be to let the printer manage the colors, therefore, it's important to ensure you change this option and select the new profile you create.

The Result
So, what do you think? Honestly, I wasn't expecting much but I'm surprised at how much of an improvement there has been since calibrating the printer. It's not a perfect print by any means but it is a significantly better print in almost every regard. The horrible and harsh blue/teal tones have been removed and colors look far better than they initially did. The harsh contrast has also been removed and this makes the image more pleasing to look at in comparison. I really prefer this version over the first print. There are still problems like details in the plants and leaves behind the subject not coming through properly however the colors do look significantly better. The results look better in person as in this article you're seeing a picture I took of the print. Scanning produced worse results and that's why I resorted to photographing the prints.

What I Liked
- The package as a whole is cheaper than buying all items individually.
- Results are noticeably better and you can clearly see how calibrating your devices makes a big difference.
- Overall it's not too difficult to calibrate your devices using these devices from Datacolor
What I Didn't Like
- Not the most intuitive software and process (minor point)
- Each device requires you to download and use different software, they're not all integrated into one suite.
Final Thoughts
I obviously don't recommend you buy the cheapest printer you can in the hopes that calibrating it will allow you to produce professional-grade prints. That's obviously not what I was trying to achieve because ultimately a better printer will be able to produce significantly better results especially after calibrating. What I want to see and hopefully demonstrate was how much of an impact calibrating your printer can have on your prints. In my testing and experience, I have to say there is a very noticeable and significant difference between printing from an uncalibrated printer versus one that has been calibrated.
The Datacolor Studio package is definitely something I recommend. Calibrating your screen is obviously important but if you're planning on printing your images (which you should) then I think having a calibrator like the one from Datacolor is simply a must.


I have the Datacolors print calibrator and also Xrite i1 Studio. But I found that it's hard to make good profile. I use a Epson P800, it's been with me 4 years now and does not seem to clog like some do. Anyway using Epson paper and the provided profile in Lightroom gives good results and pretty close to my screen. So a good monitor profiled and factory provided profiles seem to me like all needed.
Starting to print and making a flow was hard and troublesome. I wish someone told me to use factory paper as reference, when I started. The other thing is that when making prints in a dim room, having a good light on the print makes everything so much easier. I bought a lamp with pretty strong white light, it made it all fall in place. There a light boxes for this purpose to if money is not a issue:)
I have a P800 as well and use mostly Red River paper and a bit of Ilford. I've found that the ICC profiles provided by both paper companies give terrific results, so I've never messed with the high end screen calibration units.
Colour Management for printing can be a pissing nightmare. Media handling can be as important as ICC paper profiling as we as media linearization. Hahnemuhle paper is great because you can download ICC profiles for most good printer with media handling setup. Comparing Un managed print to profiled print is not very helpful..
In the article you never say whether you got the ICC profile from the paper manufacturer and compared it to your calibrations. I have been calibrating printers for about 4 years. I purchased the Datacolor Spyderprint similar to yours years ago. I have an Epson P800 and previously an Epson 3880 which died after 10 years. When I did my calibrations, I found that they were virtually identical to the ICC profiles supplied by Canson or Epson, the only papers I use. I have advised others not to waste their money on print calibration equipment because it doesn't buy you a lot unless you are using papers for which there is no profile. The thing about using a cheap printer is that they typically don't have enough inks to help accurately match the colors on your calibrated monitor. I have a Spectraview monitor that is 98% of Adobe 1998. A cheap printer probably won't emulate the colors when I retouch on a monitor with this wide of a color gamut.
I didn't get an ICC profile from HP or anyone for this comparison because the point wasn't to compare that ICC with what the calibrator produces but the difference from stock to calibrated. I might give that a go though and see how much of a difference there is.
Thank you for the comment man much appreciated.